Over the last few years, news that police, military, and intelligence organizations use portable cellular phone surveillance devices – colloquially known as the ‘Stingray’ – has gotten out, despite their best efforts to keep a lid on the practice. There are legitimate privacy and legal concerns, but there’s also some fun tech in mobile cell-phone stations.
Off-the-shelf Stingray devices cost somewhere between $16,000 and $125,000, far too rich for a poor hacker’s pocketbook. Of course, what the government can do for $100,000, anyone else can do for five hundred. Here’s how you build your own Stingray using off the shelf hardware.
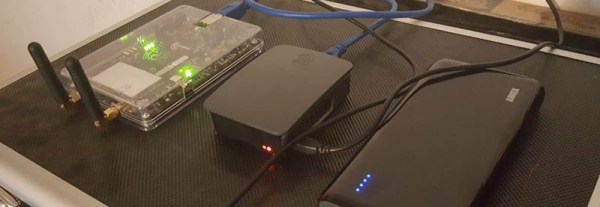
[Simone] has been playing around with a brand new BladeRF x40, a USB 3.0 software defined radio that operates in full duplex. It costs $420. This, combined with two rubber duck antennas, a Raspberry Pi 3, and a USB power bank is all the hardware you need. Software is a little trickier, but [Simone] has all the instructions.
Of course, if you want to look at the less legitimate applications of this hardware, [Simone]’s build is only good at receiving/tapping/intercepting unencrypted GSM signals. It’s great if you want to set up a few base stations at Burning Man and hand out SIM cards like ecstasy, but GSM has encryption. You won’t be able to decrypt every GSM signal this system can see without a little bit of work.
Luckily, GSM is horribly, horribly broken. At CCCamp in 2007, [Steve Schear] and [David Hulton] started building a rainbow table of the A5 cyphers that is used on a GSM network between the handset and tower. GSM cracking is open source, and there are flaws in GPRS, the method GSM networks use to relay data transmissions to handsets. In case you haven’t noticed, GSM is completely broken.
Thanks [Justin] for the tip.