While searching for signs of Dalek activity in the vast depths of outer space, the Arecibo Observatory in Puerto Rico stumbled across a most interesting find. They were receiving modulated radio signals emanating from an invisible object about 25 light years away. The signals were all in the VHF band between 41 and 68 MHz. After a applying a little amplification and some wibbly wobbly timey wimey enhancements, it became clear what the signals were – 50 year old terrestrial television broadcasts. The site takes a minute or so to load due to the traffic its getting.
[Dr. Venn], the radio astronomer who discovered the signals, was able to talk NASA into pointing the Hubble Space Telescope in the direction of the now officially named “Bounce Anomaly”, but was unable to see anything. Meanwhile, a BBC team has been working with [Dr. Venn] to recover the 50 year old signals and is attempting to reconstruct entire broadcasts – some of which are the very first Dr. Who episodes.
[TK] is a retro computer enthusiast who’s had some difficulty locating a joystick for his trusty Amiga 500. New ‘sticks are expensive, and battered survivors from the 80s go for more than they should.
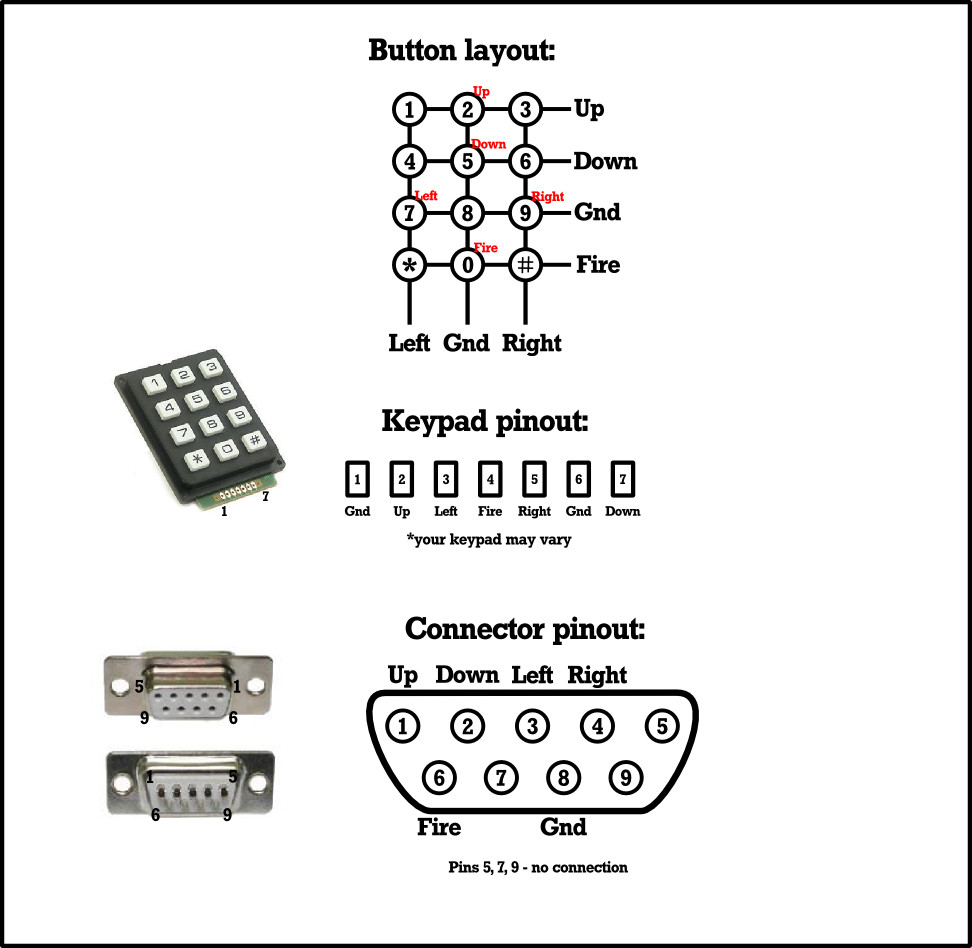
Happily these old controllers were simple devices, having only five control lines for the four directions and a fire button which were active low. [TK] therefore cast around the available components and decided to craft his own controller from a numerical keypad.
Numerical joypad schematic
Numerical keypads may be ubiquitous, but they’re not the perfect choice for a joypad. Instead of individual switches, they are wired as a matrix. [TK]’s controller works within that constraint without butchering the keypad PCB, though his layout has the left and right buttons below the up and down buttons. Looking at the schematic we wonder whether the 4-5-6 and 7-8-9 rows could be transposed , though joypad layout is probably a matter of personal choice.
Making the controller was a simple case of wiring the pad to a 9-pin D socket in the correct order, and plugging it into the Commodore. He reports that it’s comfortable to use and better than some of the lower-quality joysticks that were on the market back in the day. Veterans of Amiga gaming will understand that sentiment, there were some truly shocking offerings to be had at the time.
Some of you might be too young to remember, but the 90s were weird. If you need an example of this, you need only look at pogs. This was a schoolyard game using small cardboard discs and metal or plastic ‘slammers’. To play, stack the cardboard pogs, throw a slammer at the stack, and collect all the pogs that land face up. Of course, each cardboard pog was printed with full-color glossy pop culture images and were as collectible as comic books and baseball cards. The Bart Simpson ‘Public Enemy #1’ pog is highly prized. You could trade a pack of dunkaroos for three holofoils. I’m still looking for Animaniacs #27; my set is otherwise complete.
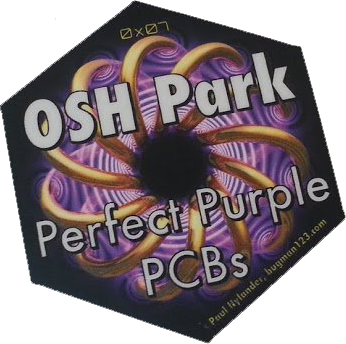
For the past few years, OSH Park, purveyors of perfect purple PCBs, put purple stickers into purple padded envelopes in each order. These stickers weren’t really anything special – just a rectangle with one rounded off corner, a gear, and the OSH Park URL. A few months ago, [Laen] at OSH Park ditched these plain purple stickers for something that taps into the same sentiment as the Apollo 13 pogs distributed through Hardee’s kids meals that included a modular Saturn V-shaped pog case and an aluminum slammer embossed on the obverse side with the Apollo 13 mission patch.
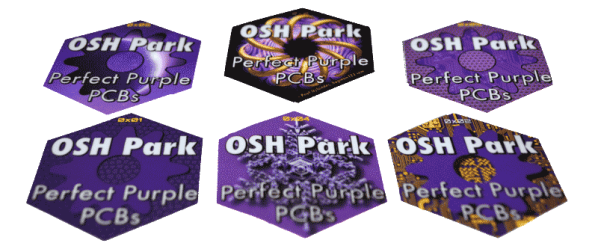
OSH Park’s newest stickers are numbered, limited edition, and feature unique artwork for each sticker in the series. They’re also hexagons, allowing anyone to tessellate their love for OSH Park all across their laptop. These are the OSHexagons, OSH Park’s newest stickers. Right now, [Laen] is drawing up and releasing about one design per month, with seven stickers out so far. Holding fast to OSH Park’s ideal of open standards, the OSHexagons utilize the Open Sticker Standard (yes, there is a standard for everything), making these stickers a regular hexagon that can be inscribed in a circle two inches in diameter.
While most of these stickers have runs in the thousands, OSH Park pulled a page from the history of pog and introduced a very special, limited edition OSHexagon. Only 500 of the beautiful purple and gold 0x03 stickers were produced, making these collectors items equal in stature to the famous zinc alloy Austin 3:16 pog slammer.
As far as marketing goes, giving away a sticker with every order is pretty standard. The Hackaday Store includes a die-cut Jolly Wrencher with every order, but we order thousands of these every few months for events and shows. OSHexagon 0x03’s limited production turns it into an object to be cherished – coveted, even – that is easily digested by the gaping maw of fringe electronics trade journals and blogs. It’s a tour de force of marketing not seen since the 90s.
What’s next for OSH Park? If we’re following 90s trends and fads, you would think Beanie Babies would be next. Luckily, they already have that covered.
What if we could reduce the cost of a photopolymer resin-based 3D printer by taking out the most expensive components — and replacing it with something we already have? A smartphone. That’s exactly what OLO hopes to do.
A resin-based 3D printer, at least on the mechanical side of things, is quite simple. It’s just a z-axis really. Which means if you can use the processing power and the high-resolution screen of your smart phone then you’ve just eliminated 90% of the costs involved with the manufacturing of a resin-based 3D printer. There are a ton of designs out there that use DLP projectors to do just this. (And there have been open-source designs since at least 2012.)
The question is, does it work with a cellphone’s relatively weak light source?
After months of cross-disciplinary meetings, some of the largest professional associations just announced their plans to submit an entire standard set for engineers with egos too fragile to accept design criticism. The Special Snowflake Standard or S2 (in compliance with Godwin’s law) ensures compromised mechanical and electrical integrity by ignoring proper design methodologies for more fluid definitions of success. The Special Snowflake Standard allows the modern engineer greater flexibility in avoiding self-improvement in their field while maintaining an advanced level of apparent competency.
The Standard follows an ingenious randomly generated naming scheme to hinder cross-checking and look-up. The honesty being the only change from the current system. It took us a while to navigate the websites built to serve the standards, as they themselves were built to the W3C.S2.01.d.f4r.7 Special Snowflake Standard For Geriatric Exclusion From The Study of Modern Web Development and therefore were only accessible through the Gopher protocol running specifically on SPARC workstations.
Nonetheless, after working through multiple W3C.S2.u.r.f4.u17 Probably PEBKAC Self Exclusion Of Responsibility Standard errors, we found a few standards we’re really excited about. Let’s take a look at a the highlights:
When working on a new project, it’s common to let feature creep set in and bloat the project. Or to over-design a project well beyond what it would need to accomplish its task. Over at Black Mesa Labs, their problem wasn’t with one of their projects, it was with one of their tools: their hot plate. For smaller projects, an 800W hot plate was wasteful in many ways: energy, space, and safety. Since a lot of their reflow solder jobs are on boards that are one square inch, they set out to solve this problem with a tiny hot plate.
The new hot plate is perfectly sized for the job. Including control circuitry, it’s around the size of a credit card. The hot plate is powered from a small surplus 20V 5A laptop power supply and does a nice 4 minute reflow profile and cools off completely in under a minute. Compared to their full-sized hot plate, this is approximately 29 minutes faster, not to mention the smaller workspace footprint that this provides. The entire setup cost about $20 from the heating element to the transistors and small circuit board, and assuming that you have an Arduino Pro sitting in your junk bin.
It’s a good idea to have a reflow oven or a hot plate at your disposal, especially if you plan to do any surface mount work. There are lots of options available, from re-purposed toaster ovens to other custom hot plates of a more standard size. Overkill isn’t always a bad thing!
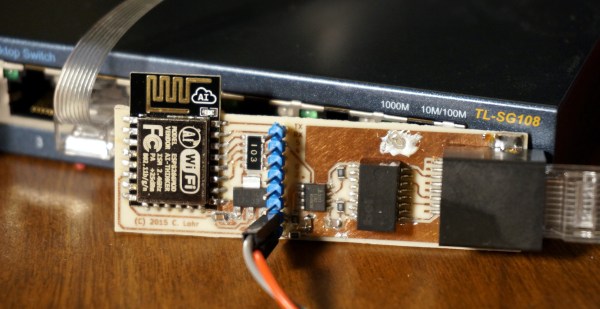
The venerable ESP8266 has rocked the Internet of Things world. Originally little more than a curious $3 WiFi-to-serial bridge, bit by bit, the true power of the ESP has become known, fully programmable, with a treasure trove of peripherals it seemed that the list of things the ESP couldn’t do was short. On that list, at least until today was Ethernet.
No, despite the misleading title, the ESP does not have a MAC and/or PHY, but what it does have is an incredible 80 MHz DMA-able shift register which can be used to communicate 10BASE-T Ethernet using a new project, espthernet. Join me after the break for video proof, and a deep dive into how this is possible.


 For the past few years, OSH Park, purveyors of perfect purple PCBs, put purple stickers into purple padded envelopes in each order. These stickers weren’t really anything special – just a rectangle with one rounded off corner, a gear, and the OSH Park URL. A few months ago, [Laen] at OSH Park ditched these plain purple stickers for something that taps into the same sentiment as the Apollo 13 pogs distributed through Hardee’s kids meals that included a modular Saturn V-shaped pog case and an aluminum slammer embossed on the obverse side with the Apollo 13 mission patch.