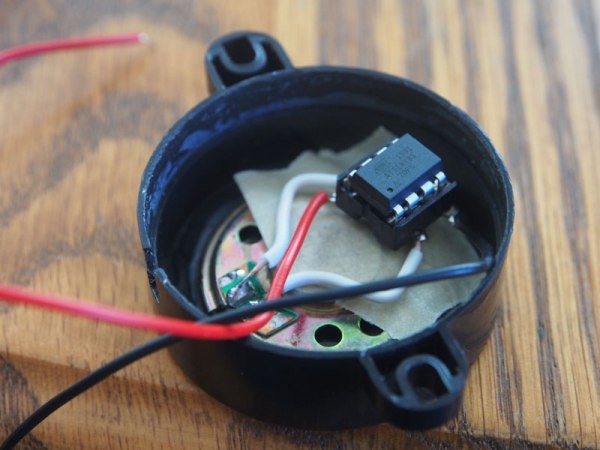
Let’s be honest here: one of the first things we all did when we came across speech synthesizers like the Speak-n-spell was to try swear words. [Alec Smecher] has taken this to heart, building a simple buzzer mechanism driven by an ATTiny 85 that swears repeatedly when you connect it. It is a rather simple project (or, as [Alec] himself says, it is “a satisfyingly minimalist build”), but it is quite nicely done.
The 8kHz speech sample (taken from Google Translate) is stored in the code, and written out to one of the PWM outputs of the ATTiny85 from a timing loop to directly drive the small speaker. So, all that is needed is the buzzer case, a small speaker, the ATTiny85, a power source and a few bits of wire. It’s a great example of a minimalist design: the ATTiny85 can just about drive the speaker directly, and can be run directly from batteries without requiring a power controller. Sometimes it pays to keep things simple, especially when it comes to swearing.
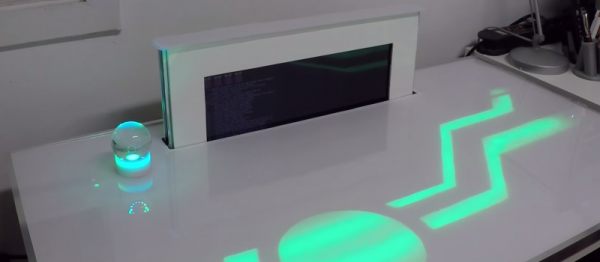
Recent science fiction movies always show people sitting at stylish semi-transparent desks that have all kinds of strange and wonderful gadgets in them. Our desks look like something your grandfather might have sat at. [Frederick Vandenbosch] must have seen those same movies so as part of contest he decided to build the desk of the future.
The desk is as much a furniture project as an electronics project, but it does have a Raspberry Pi, a scavenged laptop LCD, embedded touch sensors and LEDs, a wireless charger, and a built-in sound system. In addition, it uses a Gertbot and some stepper motors that it uses to raise and lower the screen in and out of the desk (watch the video below to see how that looks).
[Fredrick] used Python to get the major functions of the desk programmed. We couldn’t help but think of all the things you could do with an easily programmable desk surface: show stock quotes (or sports scores), notify about e-mail, or other things. Although it doesn’t look like it would be simple for a simple user to add those things, if you were a handy programmer, they look like they’d be in reach.
We’ve seen some desks before, but nothing quite like this. We couldn’t help but wonder if you could add some Minority Report-style goodness to [Frederick’s] already impressive desk.
Back in the day, true hackers – the kind that would build VCRs out of 555 chips only to end up in the Hackaday comments section in their twilight years – would steal satellite TV feeds with the help of tiny little microcontrollers embedded in a credit card. This was the wild west, when a parallel port was the equivalent of a six-shooter and Jnco jeans were a ten gallon hat.
The backdoors that enabled these satellite pirates have long been closed, but these devices for stealing HBO have now evolved into stealing €600,000 worth of goods using a most unlikely source: chip and pin card terminals. A gang of criminals in Belgium have successfully broken chip and pin, and although the exploit has now been closed, the researchers behind the investigation have published their war story for one of the most interesting hacks in recent memory.
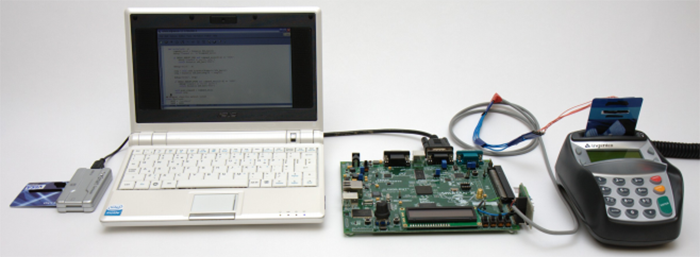
Chip and pin verification for Point of Sale (PoS) transactions are a relatively simple process; during a transaction, the PoS system asks for the user’s PIN and transmits it to the card. The card then simply answers ‘yes’ or ‘no’. In 2010, a vulnerability to this system was discovered, making it a simple matter for anyone to break chip and pin systems. This system used an FPGA with a backpack worth of modified hardware – executing it in a store would raise more than a few eyebrows.
The 2010 exploit hardware
The problem of implementing this system into something that was easily concealable was simply a matter of miniaturization. Thanks to the proliferation of smart cards over the last 20 years, very tiny microcontrollers are available that could manage this man-in-the-middle attack on a chip and pin system. What is a gang of criminals to do? Simply program a smart card with all the smarts required to pull of the hack, of course.
To pull off this exploit, an engineer in the gang of criminals used a FUNcard, a development platform for smart cards loaded up with an Atmel AVR AT90S8515 microcontroller and an EEPROM packaged in a small golden square. By removing the chip from this chipped card and replacing the chip in a stolen credit card, the criminals were able to reproduce the 2010 exploit in the wild, netting them €600,000 in stolen merchandise before they were caught.
How were they caught? The ‘buyer’ of the gang kept shopping at the same place. Rookie mistake, but once security researchers got their hands on this illegal hardware, they were amazed at what they found. Not only did the engineer responsible for this manage to put the code required for the exploit in an off-the-shelf smart card, the gold contact pads from the original credit card were rewired to the new microcontroller in an amazing feat of rework soldering.
Before this exploit was made public, the researchers developed a countermeasure for this attack that was swiftly installed in PoS terminals. They also came up with a few additional countermeasures that can be deployed in the future, just in case. In any event, it’s an amazing bit of reverse engineering, soldering, and craftsmanship that went into this crime spree, and as usual, it only took a massive loss for retailers to do anything about it.
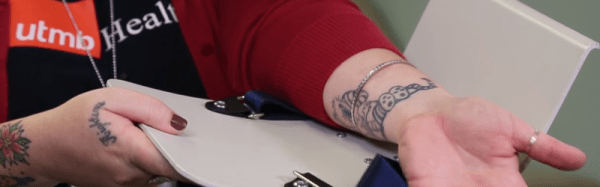
Although there are many skilled and dedicated types of health care professionals, nurses are often the main point of contact between the medical establishment and a patient. You will probably spend more time with your nurse–especially in a hospital setting–than any other health care provider. Every patient’s needs are different, so it isn’t surprising that nurses sometimes improvise unique solutions to help their patients be more comfortable or recover faster.
That’s the idea guiding an innovative program called MakerNurse–an initiative backed by MIT and the Robert W. Johnson Foundation. The idea is to encourage nurses to be makers. One of the project’s cofounders, Anna Young, had found nurses in Central America making do with what they had on hand and naturally acting as makers. “We saw a nurse repair a stethoscope diaphragm with an overhead transparency,” she said. Young noted that often nurses didn’t realize the significance of their making–it was just how they got through the day.
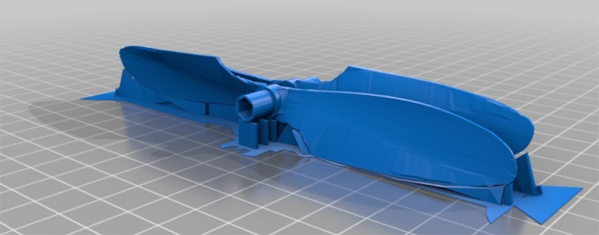
Here’s something that isn’t quite a hack; he’s just using a 3D printer as a 3D printer. It is extremely interesting, though. Over on Hackaday.io [Anton] is creating 3D printable propellers for quadcopters and RC planes. Conventional wisdom says that propellers require exceedingly exacting tolerances, but [Anton] is making it work with the right 3D file and some creative post-processing treatment of his prints.
These 3D printed props are a remix of an earlier project on Thingiverse. In [Anton]’s testing, he didn’t get the expected lift from these original props, so a few small modifications were required. The props fit on his 3D printer bed along their long edge allowing for ease of slicing and removal of support material. For post-processing, [Anton] is using acetone vapor smoothing on his ABS printed design. They come out with a nice glossy sheen, and should be reasonably more aerodynamic than a prop with visible layer lines.
Although [Anton]’s prop is basically a replica of a normal, off-the-shelf quadcopter prop, 3D printing unique, custom props does open up a lot of room for innovation. The most efficient propeller you’ll ever find is actually a single-bladed propeller, and with a lot of experimentation, it’s possible anyone with a well-designed 3D printer could make turn out their own single-blade prop.
In the late 1800s, a railway engineer named Philbert Maurice d’Ocagne was part of a group of men faced with the task of expanding the French rail system. Before a single rail could be laid, the intended path had to be laid out and the terrain made level. This type of engineering involves a lot of cut and fill calculations, which determine where dirt must be added or removed. The goal of earthwork is to create a gentle grade and to minimize the work needed to create embankments.
In the course of the project, d’Ocagne came up with an elegant, reusable solution to quickly solve these critical calculations. Most impressively, he did it with little more than a pen, some paper, and a straightedge. By developing and using a method which he called nomography, d’Ocagne was able to perform all the necessary calculations that made the gentle curves and slopes of the French railway possible.
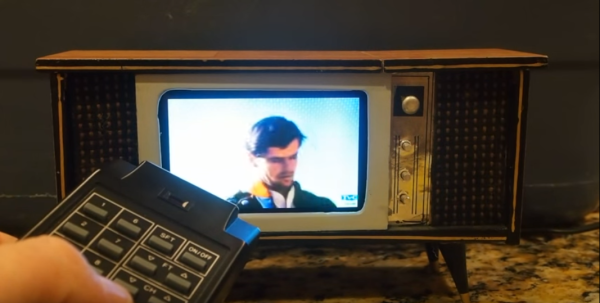
A couple of years ago, [Alec]’s boss brought him a souvenir from Mexico City—a small mid-century console television made of scrap wood and cardboard. It’s probably meant to be a picture frame, but [Alec] was determined to give it a better life.
As it turns out, the screen of [Alec]’s old Samsung I9000 was a perfect fit for the cabinet with room to spare. It was on its way to becoming a real (YouTube) TV once [Alec] could find a way to control it remotely. A giant new-old stock remote that’s almost bigger than the TV was just the thing. There’s enough room inside the remote for a non-LE Bluefruit module, which is what the I9000 will accept as input without complaint.
Trouble is, Bluefruit doesn’t support matrix keypads, so [Alec] used a bare ATMega328 running on the internal clock. Since the Bluefruit board provides voltage regulation, the remote was able to keep its native 9V power. [Alec] is happy with the results, though he plans to refine his button choices and maybe make a new overlay for the remote. Stay tuned for a tiny TV tour.