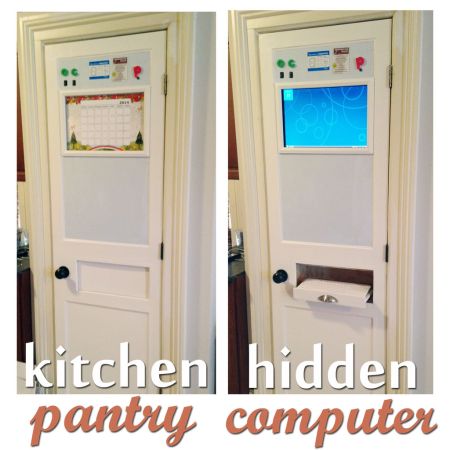
You might look at the images above and think “oh neat” and then go about your business. But you’d be missing a great motorized hidden computer build. We simply must insist that you click on that link and look at all that went into it. Do it. DO. IT.
Still here? Okay, we’ll give you the gist and then you won’t be able to help yourself. First off, [Designforhire] built that door completely from scratch using skills that your average hacker wields. At first glance you’d think it was a retrofit or done with serious woodworking tools (quality table saw, router table, etc.). This actually started with a simple frame out of 2″x3″ pine studs. This is faced with Masonite which was affixed with glue and brads. From there the upper half was outfitted with a dry-erase panel, and trim pieces were added.
Now the hack really starts to get interesting. The opening for the monitor and the keyboard are both motorized. An old cordless drill (borked handle and dead battery) was cannibalized for its motor which is run using the two black switches just above the left corner of the monitor. When closed, a dry-erase calendar covers the monitor and a blank panel keeps the keyboard secret. The computer itself is actually in the basement, with cables running down the hinged side of the door and through a hole in the jamb.
We didn’t see a video showing off the build, but you can satisfy that craving by looking back at the Kitchen HAL installation from a few years back.
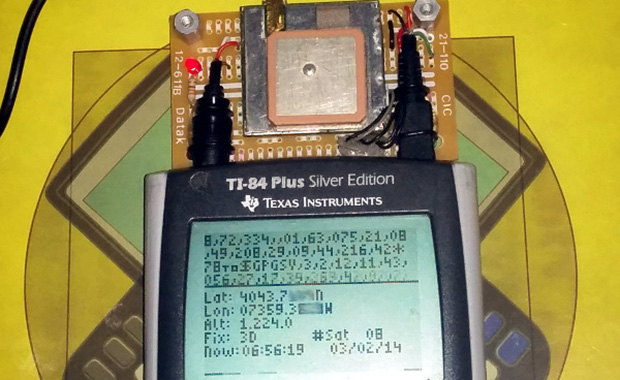 [Chris], graphing calculator hacker extrordinaire, has seen a few of his projects show up on the front page of Hackaday, mostly involving builds that turn graphing calculators like the TI-84 Plus shown above into something that copies a few features from a smartphone. His latest build,