neopixals

Seven Segment Clock Made From Scratch

[David Hopkins] built a seven segment clock, but not in a way you would think.  Typically, if one wants to make something like this, one would start off with some seven segment LEDs. [David] wanted to kick it up a notch and use RGB LEDs to get access to the wide array of different colors, but found off the shelf assemblies cost prohibitive. So, he did what any good hacker would do. He made his own.

clock
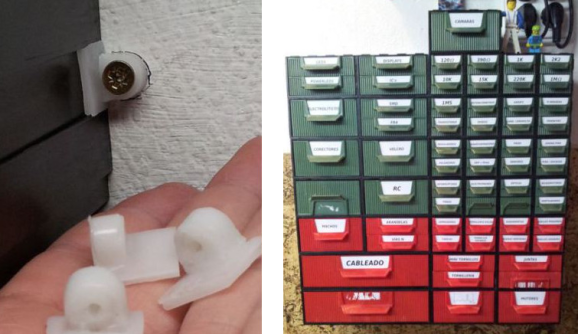
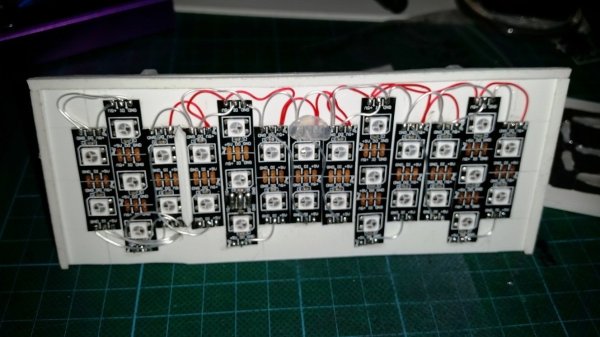
The easy part consists of Neopixels, an Arduino Nano and a DS3231 Real Time Clock. The hard part consists of Plasticard and a polymorph diffuser. Plasticard also goes by the name of Polystyrene and comes in sheets. [David] describes Polymorph as a type of moldable nylon that softens with heat, with a working temperature low enough that boiling water will suffice.

He was able to cut out the individual segments to make an impressive looking desk clock.

Hypno-Jellyfish Is Great For Kids (and Kids At Heart)

hjf3_blue

LED’s are fun. They are easily seen, not to hard to hook up, and produce a nice glow that can be gazed at for hours. Kids love them, so when [Jens] daughter was born, he knew that he wanted to create a device that would alternate colors depending on the object’s movement.

He utilized a mpu6050 accelerometer to detect changes in position, and wired together an Arduino Nano, a 9V battery, and a 12 LED neopixel ring from adafruit. Design requirements were jotted down beforehand ensuring that any child playing with the Hypno-Jellyfish would not be injured in any way. For example, anything that fits in a child’s mouth, will go in that child’s mouth; meaning that any materials used must be non-toxic, big enough not to be swallowed, and drool proof/water proof. The kids will pull, and throw, and drop the toy as well, so everything has to be of sturdy quality too. Epilepsy is also a concern when dealing with LED’s. But, [Jens] project hit the mark, making something that is kid-friendly while at the same time enjoyable for anyone else who likes color-changing lights.

Continue reading “Hypno-Jellyfish Is Great For Kids (and Kids At Heart)”

Hackaday Links: March 16, 2014

hackaday-links-chain

Tape decks are fertile hacking ground. In this offering from [Erich] the speed of the motor has been turned into a MIDI instrument. Drive it faster and the pitch rises, slower and it falls. There are all kinds of other magnetic tape hacks around here, this tape delay is a classic.

[Dbever] needed a reason to use a big 7-segment display module. He opened up the drill press at his Hackerspace, Pumping Station One, and added a sensor which shows the RPM of the drill on the display. Hackaday was lucky enough to be invited for a tour of the space last fall.

There’s a lot of hype about 3D printing… and rightly so since it’s the radest; which is even better than being “the most rad”. But if you don’t have access to one that shouldn’t stop you. Here’s an example of making robot parts using polymorph instead of 3D printing (or laser cutting) them.

If you’re living in the east-coast metroplex and are unable to travel to Maker Faire Bay Area this Spring you can still get in on some live hacking. Check out MassHack which takes place the same May weekend but in Boston instead of San Fran.

Blimps; not as cool as quadcopters but orders of magnitude less likely to go down in flames (as it were). Draw some inspiration for your own build from silent_runner. The graceful travel of these lighter-than-air-craft make for an interesting camera platform. Here’s a POV video inside of a church, and some shots from the ground while in the woods. [Thanks Oliver]

We try not to pimp crowd-funding campaigns just for the sake of getting them to the goal. But we hope you’ll agree that the Gamebuino we saw a few months back makes a strong argument for backers. Their Indiegogo for the Arduino-compatible handheld gaming rig is over half-way there after just a couple of days.

Direct, Wall-Mounted Storage With Lasers And Polymorph

parts-storage-brackets

We’re sure everyone could use some more storage and organization in their workshop. [Nixie] is no exception, though he also hates sacrificing tabletop space for boxes. His solution was to attach them to the wall directly by hacking together some brackets. This hack allowed him to hang everything without using internal screws which were a pain to get at if he need to removed the boxes from the wall to take with him.

[Nixie] started by laser-cutting a negative pattern for a mounting bracket that would fit the dovetail rails already on the sides of the boxes. He then pressed a piece of polymorph into this mold, slid the bracket along the side of the box…and realized it wouldn’t work. The piece wiggled around too much because it did not sit firmly in the rail. Back at the drawing board, [Nixie] split the project into two steps. He cast the screw-hole portion of the bracket in its own separate mold, then cast the railing part of the bracket directly in the dovetail section of the box, providing him a much higher degree of accuracy. After joining the two pieces, [Nixie] had a sturdy support bracket that he duplicated and attached around the rest of the bins.

A Collection Of Hands To Inspire Your Halloween Animatronics

Jump scares are a lot of fun, but if you want to hold the attention of all those trick-or-treaters we’d suggest a creepy prop. One of the best choices in that category is a ghoulishly lifelike hand. You can draw some inspiration from this roundup of robot hands which Adafruit put together.

We’ve chosen four examples for the image above but there are more to be had than just these. In the upper left there is a laser-cut acrylic hand that actually features some force sensitive resistors on the fingertips to help implement some haptic feedback. This project was inspired by the hand seen in the lower right which uses flex sensors on a glove to control the bot’s movement. If you’re looking for something more realistic the 3D printed parts on the lower left are the best bet. But if you’re looking to put something together by Halloween night the offering in the upper right is the way to go. It’s hacked together using cardboard templates to cut out plastic parts and using polymorph to form joints and brackets.

A Friendly Spiderbot Named Chopsticks

chopsticks_the_spiderbot

After seeing his fair share of hexapod-style bots on the Internet, [Russell] decided he wanted to build one of his own. One of the downsides to building these robots is the cost. He often saw them constructed from laser cut parts and very expensive servos. Rather than blow hundreds upon hundreds of dollars on the bot, [Russell] decided he could a lightweight bot on the cheap using chopsticks and polymorph modeling plastic.

His octopod robot is aptly called “Chopsticks” and utilizes 28 different servos to control its motions. 24 servos are used for its legs, 3 more are reserved for head movements, while a single additional servo manipulates the robot’s mandibles. The robot’s legs and main structure are composed of chopsticks, while the polymorph is used for feet, servo mounts, and pretty much anywhere else chopsticks just wouldn’t do.

[Russell] even added a set of eye stalks to complete the spider theme, arming them with IR compound eyes for object tracking. The robot is quite interactive as you can see in the video below.

Keep reading to see a video of Chopsticks, or swing by his Let’s Make Robots site if you get a chance – he has a pretty detailed construction journal as well as plenty of videos showing his spider bot in action.

Continue reading “A Friendly Spiderbot Named Chopsticks”

Polymorph In Practice

[youtube=http://www.youtube.com/watch?v=gxy22VfZq0E&feature=player_embedded]

[Leesam] tipped us off to this cool tutorial for shaping Polymorph. For those who haven’t, it is pretty cool stuff. It is a plastic that comes in little pellets. You can melt it down at relatively low temperatures and mold it to the shape you need. We’ve seen it used on several projects, most notably CrabFu’s swashbot3. Generally, we see it hand shaped, so it is fairly organic and imperfect. It can be used for more precise shapes though. This tutorial walks us through the easiest way to produce sheets of the stuff to be cut and bent into brackets as well as some helpful tips on getting the best results.