Using The Raspi As An Ethernet Shield

[Alexandre] wanted to set up a web-based temperature logger with his Arduino, but found the Arduino Ethernet shield a little finicky. Since his Raspberry pi was just delivered, he figured he could use the Raspi as an Ethernet shield with just a little bit of coding.

After [Alexandre] set up his Arduino to send a thermocouple through the USB, the only thing left to do was to add node.js to the Raspi’s Debian installation. Every five minutes, the Arduino wakes up, takes a temperature reading, and sends it over to the Raspberry pi. From there, it’s easy parse the Arduino’s JSON output and serve it up on the web.

In the end, [Alexandre] successfully set up his Raspberry pi as an Ethernet shield to serve a web page displaying the current temperature (don’t F5 that link, btw). One interesting thing we have to point out is the cost of setting up this online temperature logger: the Arduino Ethernet shield sells for $45 USD, while the Raspberry pi is available for $35. Yes, it’s actually less expensive to use a Raspberry pi as an Ethernet shield than the current Arduino offerings. There you have it, just in case you were still on the fence about this whole Raspi thing.
NC Maker Faire 2012: Machine Tools And 3D Printers

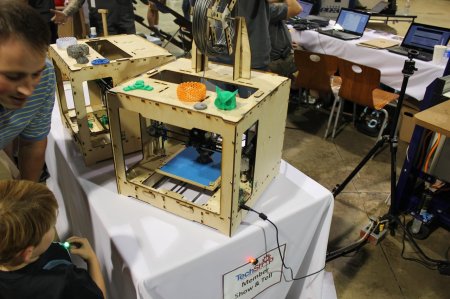
NC Maker Faire 2012 3D printer

There were quite a few 3D printers at the NC Maker Faire this year (like the [Fablicator], several [RepRap]s, and [MakerBot]s) as well as a few subtractive machining devices including a wood lathe, a [ShopBot] display (one of the sponsors), and my little CNC router. There was even a little [Eggbot] on display, which combines several CNC concepts into a really unique device for printing a picture on an egg.

Check out the video below for lots of examples of what was at the Faire. There’s always room for one more 3D printing or CNC machining enthusiast, so hopefully it inspired some makers to expand their capabilities! Continue reading “NC Maker Faire 2012: Machine Tools And 3D Printers”

I/O Extender Board And Case For A Cheap WiFi Router

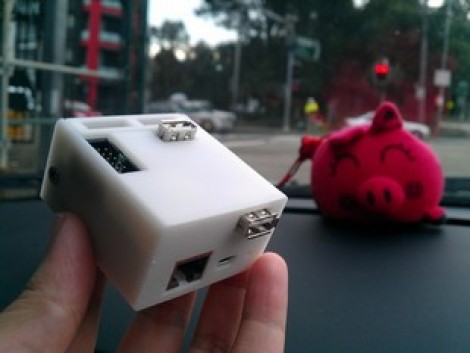
This 3d printed case houses the already small [TP-Link TL-WR703N] but also makes room for a custom expansion board. The expansion board is designed to make the device more hacker friendly, and who doesn’t need a nice case to hold it?

Since the router board already has a USB port (intended for use with USB 3G modems) the add-on acts as a USB hub. The stock USB connector is replaced by a pin header which mates with a DIL socket on the underside of the expansion board. Through the use of an FTDI chip the expander offers three USB ports and a 2×10 pin header to break out the GPIO pins from the router’s processor. Only two USB ports are visible in the image above. That’s because the third is recessed, and an opening has not been added to the enclosure. This struck us as odd until we read that the port is meant to be used with a low-profile thumb drive, essentially adding internal storage for the device.

[Thanks buZz]

Red Bull Creation Hardware (Bullduino) Arrives

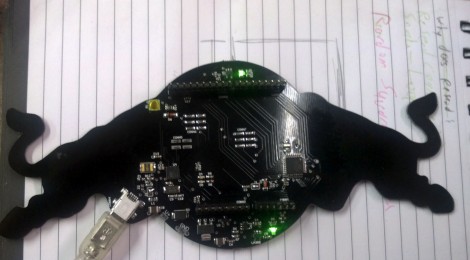
The Bullduino’s are starting to arrive. When [Arclight] received his in the mail the first thing he did was to share the hardware details. Of course this is the hardware that participants in the Red Bull Creation contest will be receiving ahead of this year’s contest.

The board is an ATmega328 Arduino clone. Instead of an FTDI chip for USB this one is sporting an ATmega8u2. That’s not too much of a surprise as it should translate to a cost savings. [Arclight] reports that the stock firmware flashes a message in Morse code. It seems the Harford HackerSpace got their Bullduino several days ago and already decoded the message. It reads:

“Wouldn’t lou prefer a good game of chess?”

The guys that did the decoding speculate that this could be a type as ‘l’ and ‘y’ are inversions of each other in Morse code; or it could be some kind of clue. At any rate, if you want to do some disassembly and see if there’s anything lurking in the firmware, [Arclight] posted FLASH and EEPROM dumps from both ATmega chips along with his article.

DIY Microcontroller-switched Power Strip

switched-power-strip

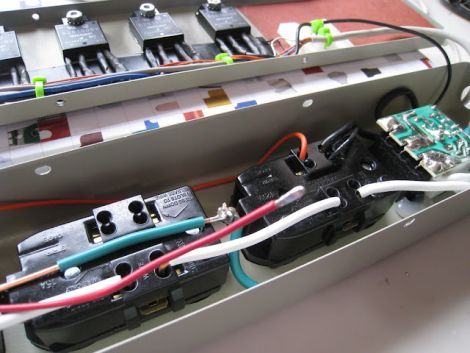
[Teknynja] was looking for a way to control several discrete AC-powered devices using a microcontroller, and while he did consider the Powerswitch tail 2 from Adafruit, handling 5 devices would get pretty expensive. Rather than buying a complete off the shelf solution, he decided to build his own 5-way switched outlet.

He picked up a sturdy metal power strip from a local hardware store along with some Sharp S201S06V relays he ordered online. After test fitting his relays inside the power strip’s chassis, he wired up 5 of the 6 outlets through them to allow for switching via a microcontroller. He configured the 6th outlet to be live at all times, providing a power source for the control system he planned on using to switch the other receptacles.

[Teknynja] pulled the connector from an old PS/2 mouse for use as a control wire, connecting one wire to each of the relays. He says that the strip is working quite well, and after a few months of use it is holding up nicely.

Checking Out The Temperature Of A Raspberry Pi

[Remy] has access to a very nice Fluke thermal camera, so when his Raspberry pi came in he pointed the thermal camera at the Raspi (Spanish, Google translation) to see how far this neat computer could be pushed before it overheated.

There are three main sources of heat on the Raspberry Pi: the voltage regulator, the USB/Ethernet controller and the Broadcom SoC. At idle, these parts read 49.9° C, 48.7° C and 53° C, respectively; a little hot to the touch, but still well within the temperature ranges given in the datasheets for these components.

The real test came via a stress test where the ARM CPU was at 100% utilization. The Broadcom SoC reached almost 65° C while the Ethernet controller and regulator managed to reach the mid-50s. Keeping in mind this test was performed at room temperature, we’d probably throw a heat sink on a Raspberry Pi if it’s going to be installed in an extreme environment such as a greenhouse or serving as a Floridian or Texan carputer.

Thanks [Alberto] for sending this in.

CD/DVD Polisher May Save Your Backups Someday

CD and DVD payers can often keep the music or movie going despite a small scratch. But occasionally you’ll have to skip to the next chapter/track or the player will just give up. But with data back-ups, a scratch can bork a whole set of files. We think that most of the time these headaches can be cured with this simple polisher.

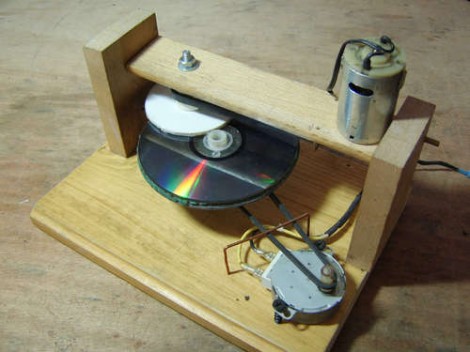
[Wotboa’s] thrift store finds yielded almost all of the components needed to build the device. It’s made up of a couple of motors and a jig. One motor slowly rotates the upturned optical disc while the other spins the polishing pad. That pad is made from felt weather-stripping and is helped along with some plastic polishing compound. [Wotboa] asserts that five minutes in the noisy contraption will work wonders on any disc. You can get an idea of what it’s capable of by watching the video clip after the break.

Continue reading “CD/DVD Polisher May Save Your Backups Someday”