It seems like only yesterday we covered a project using QR codes to archive data on paper (OK, it was last Thursday), so here’s another way to do it, this time with a dedicated codec using the full page. Optar or OPTical ARchiver is a project capable of squeezing a whopping 200 Kb of data onto a single A4 sheet of paper, with writing and reading achieved with a standard laser printer and a scanner. It’s a bit harder than you might think to get that much data on the page, given that even a 600 DPI printer can’t reliably place every dot each time. Additionally, paper is rarely uniform at the microscopic scale, so Optar utilizes a forward error-correcting coding scheme to cater for a little irregularity in both printing and scanning.
The error-correcting scheme selected was an Extended Golay code (24, 12, 8), which, interestingly, was also used for image transmission by the NASA Voyager 1 and 2 missions. In information theory terms, this scheme has a minimum Hamming Distance of 8, giving detection of up to seven bit errors. This Golay code implementation is capable of correcting three-bit errors in each 24-bit block, with 12 bits available for payload. That’s what the numbers in those brackets mean.
Another interesting problem is paper stretch during printing. A laser printer works by feeding the paper around rollers, some of which are heated. As a printer wears or gets dirty, the friction coefficient along the rollers can vary, leading to twisting and stretching of the paper during the printing process. Water absorbed by the paper can also lead to distortion. To compensate for these effects, Optar regularly inserts calibration targets throughout the bit image, which are used to locally resynchronize the decoding process as the image is processed. This is roughly similar to how the alignment patterns work within larger QR codes. Finally, similar to the position detection targets (those square bits) in QR codes, Optar uses a two-pixel-wide border around the bit image. The border is used to align to the corners well enough to locate the rows of bits to be decoded.
In the distant past of last week, we covered a similar project that uses QR codes. This got us thinking about how QR codes work, and even if encoding capacity can be increased using more colors than just black and white?
Thanks to [Petr] for the tip!


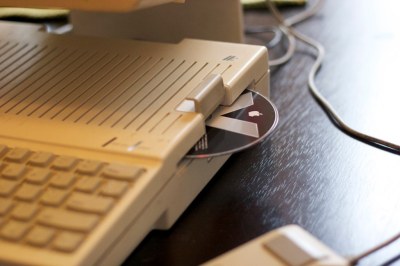 The original keyboard was adapted with an Arduino Teensy into a USB unit for the mini, but the internals of the mouse were replaced with a modern USB laser mouse running the signals over the original connector. What really sells this particular restomod is the “VGA adapter that outputs monochrome NTSC via RCA” allowing a vintage Apple CRT to make this look like a device that