Creating A Voice Controlled Robotic Arm

robotic_arm_voice_control

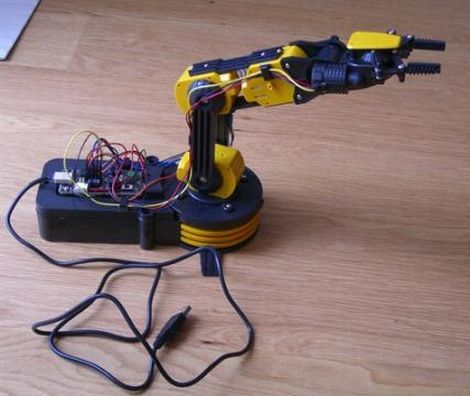
[Arthur] was laid up with a wrist injury, so he decided it would be a great time to hang out around the house and tinker with electronics, since most outdoor activities were out of the question. He picked up a robotic arm kit and assembled it to test out some code written for it that he found online. Since typing commands into a terminal was awfully cumbersome considering his injury, he figured he might as well construct a voice control system for the arm.

He documents his work in a three part series, covering the process from concept to completion. The first part centers around the creation of the vocabulary and grammar for the voice recognition system, along with the how the grammar model was trained using voice samples.

The second and third portions of his tutorial deal with the software’s decoding of his commands and the Python scripts used to translate those commands into something the robotic arm can process.

[Arthur’s] voice control system works pretty well as you can see in the video below, though he already has a wish list full of improvements he hopes to make in the near future.


Continue reading “Creating A Voice Controlled Robotic Arm”

Halloween Props: Pumpkin Battery

This one would make a nice centerpiece for your Halloween party. It’s a battery with tiny pumpkins serving as the cells. [EM Daniels] shows us how to clear out the pumpkins, fill them with some freshly mixed electrolyte, and he even throws in the directions for baking the pumpkin seeds.

Each pumpkin will need a pair of conductors made of dissimilar metals to serve as the anode and cathode. Copper wire is used for one, aluminum for the other, and both wires have a spiral pattern bent on one end to increase the surface area that contacts the electrolytic solution. Now just boil up a slurry of vinegar, gelatin, and salt, then let it sit in the fridge over night. [EM Daniels] was able get 1.5V out of this project (enough to light one LED) for two hours, and 1.4V for six hours by using seven of the pumpkin cells in series.

[Thanks Karen]

Can You Develop Film With Coffee And Vitamin C?

Are you feeling a little MacGyver-ish and have access to a film camera? Perhaps you want to try developing your pictures using coffee and vitamin C instead of a traditional developing solution. [Danish Puthan Valiyandi] does a great job of walking us through the steps he took, including precise measurements, temperatures, and timings involved in achieving great results. This is probably not for the first-timers, as he does use special equipment associated with traditional developing methods.

The process uses a couple of easily obtainable materials: instant coffee, vitamin C powder, and washing soda (sodium carbonate). Once the roll of film has been exposed, it’s put onto a jig for developing (Danish does this with the lights on to make the video after the break worth watching, but you’ll need to do it in the dark). Once nestled inside of the development container, he mixes up a batch of his diy developer and agitates according to a times schedule. When the development is finished, a chemical fixer–no diy alternative used here–is added to set the film. Dry out the strips and use a scanner to digitize your work. We’re surprised by the quality of the finished product, but we shouldn’t be… he certainly knows what he’s doing.

Continue reading “Can You Develop Film With Coffee And Vitamin C?”

C64 Joystick Adapter

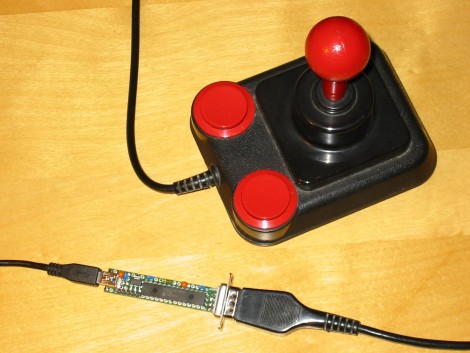
[Marcus Gritsch] wanted to do his retro gaming using retro hardware… or at least using some retro hardware. Although he was playing his Commodore 64 games in an emulator, he figured that using an original controller would boost the nostalgia quite a bit. This is a vintage Competition Pro joystick that has buttons and a joystick of a similar quality to arcade hardware and a DE-9 connector. He managed to connect new to old by building his own USB to C64 joystick adapter.

His project started out by breadboarding a circuit based on a PIC 24FJ64GB002 microcontroller. This does all of the work, having native USB support, and no problem reading and translating the signals from the old hardware which are simply conductors for each internal switch that pull to ground when actuated. Once working, he soldered everything to some protoboard; a connector at each end, the chip itself, a voltage regulator, and some passive components. It’s a, robust build that should give him years of emulated fun.

Years Of Robotic Projects – Dumped For Your Enjoyment

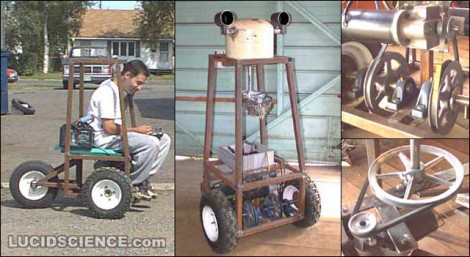
Meet tippy, just one of the multitude of robotic projects [Oneironaut] has taken on over the years. He ‘dug deep’ and put together a huge data dump of pictures and descriptions of his old robotic projects, then posted them for your enjoyment. When he wrote in to Hackaday on Monday he mentioned 33 pages of them, but he must be adding material as he finds it because we see 52 pages.

These aren’t micro-robots either. These are I’m going to chase you down because I’m your worst nightmare robots. They use heavy welded-iron frames, lead-acid batteries, and gear-motor driven locomotion. Some of his project names include The Tank, The Sentinel, and The Megatron. Bookmark the link you see above, because you’re going to want to spend some time sifting through the candy-shop of projects which seem to be too plentiful to be the hobby of just one man. Although we shouldn’t be surprised, just look at the multitude of spy-gadgets he’s come up with lately like the GPS tracker and the long-range laser night vision.

Throw Together A Temperature Logger In Minutes

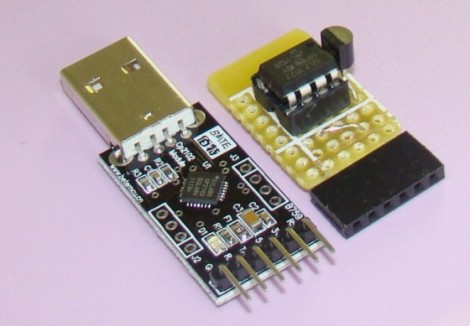
[Rajendra] found an easy way to make a USB temperature logger. He already had a USB to UART adapter that takes care of the heavy lifting. On one end it’s got the USB plug, on the other a set of pins provide a ground connection, 3.3V and 5V feed, as well as RX/TX lines.

To get the hardware up and running all he needed was something to read a temperature sensor and push that data over the serial connection. An 8-pin microcontroller in the form of a PIC 12F1822 does the trick. It runs off of the 5V pin on the USB-UART, and uses the ADC to get temperature data from an MCP9701A sensor.

The sample rate is hard-coded into to the PIC’s firmware, but adding a button, or coding some serial monitoring could easily make that configurable. [Rajendra] used Processing to write an app which displays the incoming temperature info and uses the computer to time-stamp and log the inputs. We could see this as a quick solution to tracking wort temperature during fermentation to make sure your beer comes out just right.

Building The Second Tiniest Tetris

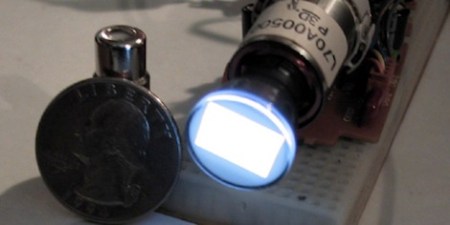
A few years ago, [Richard] pulled a crushed camcorder out of a junk box at a hamfest. After pulling the half-inch CRT out of the viewfinder, he needed to find a project. [Richard] ended up building the second tiniest game of Tetris we’ve ever seen.

After futzing around with the CRT, [Richard] discovered that one of the pins would accept an NTSC input. He also found a similar project that used a dime-sized CRT to play Tetris. With ready to go code, [Richard] started assembling his project into a handsome wooden box.

There are two PCBs for the build – a CRT driver circuit, and a small custom board that handles the game and controller code. The circuit for the game board was found on this site, but the featured boards there were too large for the project. A stripped-down board was fabricated by BatchPCB and put into the box.

There aren’t any controls on the console itself, for that a standard DB-9 connector was installed so a vintage Atari joystick could be used. For a more ergonomic Tetris experience, a Sega Genesis controller could be used. For something that looks like it comes out a steampunk laboratory, playing Tetris is a bit unexpected. Check out the demo video of the screen at 20x magnification after the break.

Continue reading “Building The Second Tiniest Tetris”