Kinect-based Turntable 3D Scanner Looks Very Promising

We know that the appearance of the Kinect 3D camera hardware, and subsequent open source driver hacking conquest, is a game-changer that brings the real world into much closer contact with the virtual world. But it still amazes us when we see a concept like this turntable-based 3D object scanner that works so incredibly well.

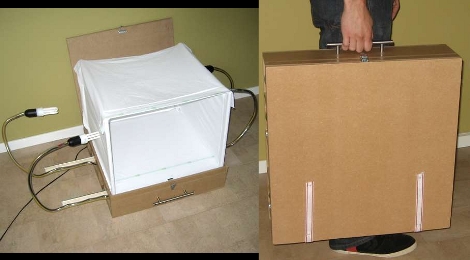
The concept is extremely simple. A box made from foamboard rests atop a turntable. At its center is the object you wish to scan being well-lit by a small LED light source at each upper corner of the box. First up some code and capture data about the sides and top of the object as it spins. To put the shoe back together in the virtual world, he used a modified version of RGBDemo v0.6.0, a Kinect focused project written by Nicolas Burrus.

[A.J] says that the scan comes out pretty well after just one pass, but that’s not stopping him from setting his sights on making this work with three of four Kinects at once. Don’t forget to check out his video demonstration which is embedded after the break.

Continue reading “Kinect-based Turntable 3D Scanner Looks Very Promising”

Color Changing Door Handles

This color changing door handle was made using a very simple manufacturing process. [Barmak] already had experience working with polyester resins when making passive component filled drawer pulls (he included a couple of pictures at the end of his post). The same process was used here except that instead making it from one solid chunk of clear resin he decided to use alternating layers of dyed resin.

The build begins with a mold made out of MDF. This material has a very smooth surface finish which will help with the final look of the door handle. Threaded rod is inserted through carefully placed holes in the side of the mold — these will serve as the mounting hardware when complete. He then pours thin coats of resin to build up the complete handle.

An RGB LED strip is incorporated in the side of the handle that will go toward the door. It seems like the wires to control the device pass through a hollow spacer surrounding the threaded rod. He makes some mention of using a 555 timer to control the colors, but there’s not much more information than that. Still, the reflected light is a unique feature if you’ve got a place in your home that needs to be spiced up.

Once you’re done, you can use any leftover resin to make your own project boxes.

Feel The Hum Of Electricity Between Your Legs

Here’s a little eye candy for motorcycle enthusiasts everywhere. This is the newest iteration of [Julian’s] electric motorcycle. He obviously knows what he’s doing because everything fits into the frame in a way that is still very pleasing to the eye. But this is actually slimmed down from the original design. If you take a look a back at some of his older posts you’ll see that the four relatively small lithium batteries are a new addition.

The frame was designed to hold four lead-acid batteries. Those things really take up a lot of space and add considerable weight to the vehicle. His recent upgrade was also accompanied by a re-gearing that allows him to reach higher speeds (although he doesn’t say what the top speed actually is). You can’t really see it above, but [Julian] included a wooden insert where the tank on a gasoline motorcycle would have been. It houses control switches as well as a 48V voltmeter. It’s a fantastic finishing touch like the cherry on a sundae.

Make W7 64 Bit Play Nice With Your Programmer

External EPROM burners are pretty handy gadgets to have around. They obviously can read and write EPROMS, but often times they will also handle a pile of PIC’s, some AVR’s, and other programmable logic like PAL/GAL and CLPD’s. While you can often find old models floating around for cheap (or free in my case) there are a few issues to be hammered out.

Typically the models you’re going to get for a song and a dance are old parallel port models that use software in MS-DOS or Windows and hasn’t been updated since. The software typically bit bangs the port using it like a 1 byte wide GPIO line, and this was a common trick, that is long gone from current operating systems by default.

[Doug] sought to find a solution to using one of these gadgets on Windows 7 X64, and lots of Google-fu, poking at libraries, and a little code modification he does just that getting his Sivava Willem EPROM programmer working like a champ on a nice new i7 with a parallel port add in card.

An Introduction To DC Boost Converters

simple_boost_converter

If you are planning on creating some sort of Nixie tube display, you will undoubtedly need to find yourself a high voltage DC power supply. If you don’t want to add a transformer to your project, you can always opt to build a boost converter instead. [Andrew Moser] shows us just how easy it is to build one, discussing the theory behind simple boost converters along the way.

Boost converters are often driven by dedicated ICs, but in this case the PWM signal from an Arduino does the job just fine. [Andrew] covers the process of choosing the proper components for the circuit, discussing duty cycles and components to avoid lest your boost converter die an untimely death.

He shows us how to implement a feedback system to get a more precise output voltage, but as Lady Ada has shown us, an open loop works pretty well too.

For the beginners that want to just get things up and running, his instructions and code should be sufficient, but [Andrew] provides plenty of reference links for those looking to delve deeper into the subject.

Impressive Lighting Console Offers Professional Features For A Fraction Of The Price

diy_dmx_lighting_control_panel

Hackaday reader [Michael] wrote in to share the build details of an impressive lighting console he has been working on for some time. He says that the 36+ channel console is on par with lighting rigs costing upwards of $5,000, but his was constructed for just around $1,000 – quite the substantial savings.

The console was constructed around an old IBM desktop computer, which handles all of the DMX output as well as preset management. An array of 20 ATMega 328Ps running the Arduino bootloader are scattered throughout the device, 18 of which are used to manage the six fader panels, while the remaining two handle management tasks. Aside from the fader banks, the console features a main control board featuring several LCD screens along with 17 capacitive touch buttons used for menu navigation and console control.

While [Michael] is finished building the board, he has just begun the documentation of the construction process. His blog should be updated regularly with more details, so be sure to check back often. Code, as well as hopefully tons of pictures and videos are all forthcoming.

[Edit: Cost comparison update]

An “Earthcore” Hexapod With Minimal Mechanical Parts

Although hexapod robots have been featured on [HAD] many times, this one features a really cool minimalistic design. With few mechanical parts to support the three servos, the “Earthcore Hexapod Robot” has a unique gait, tending to quickly slide the driving legs rather than picking the whole robot up. Although it would probably have trouble on rough terrain, for use on a smooth floor or counter, this ‘bot is perfectly suited.  Check out the video of it after the break.

Another thing that really stands out on this bot is the blue LED “eyes” and it’s tubing “hat.”  The “hat” hides the wiring for the three servos, while most of the circuitry looks to be in between the eyes. The main controller is a PICAXE 18M2 micro-controller. 3 AAA batteries seen behind the tubing power the unit.

As for the name “Earthcore”, it’s based on a book by [Scott Sigler]. If there is a movie version in the works, we hope he calls [onefivefour] to help with the special effects! Continue reading “An “Earthcore” Hexapod With Minimal Mechanical Parts”