Program An Arduino Using Your Sound Card

audioino_programming_arduino_with_sound

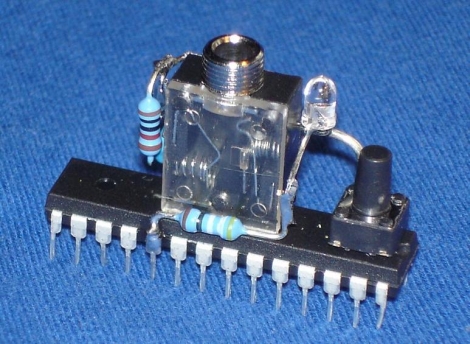
[Chris] wrote us to share a neat technique he has been using to program the Arduinos he uses in his projects. He likes to build bare bones Arduino clones rather than sacrifice full dev boards, and instead of programming them via traditional means, he is using his computer’s sound card.

He builds a simple dead bug Arduino (which he calls an Audioino) using a handful of resistors, a pair of caps, an LED, a reset switch, and most importantly – an audio jack. After burning a special audio bootloader to the chip, he can connect the Arduino directly into his computer’s speaker port for programming.

Once the microcontroller is connected to his computer, he runs the IDE-generated hex file through a Java app he created, which converts the data into a WAV file. With the Arduino put into programming mode, he simply plays the WAV file with an audio player, and the code is uploaded.

He says that this method of programming comes in handy in certain cases where he builds things for friends, because they can easily update the software on their own without a lot of fuss.
Spinning UV Light Writer

uv_light_writer_ring

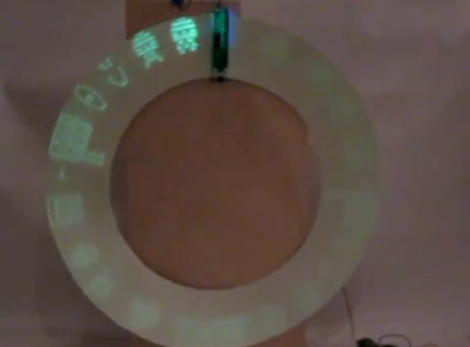
[David] has always wanted use UV LEDs to write on a phosphorescent surface ever since saw an article about it on Make. He accidentally purchased UV LEDs when he meant to buy purple ones, so he figured that his mistake was all the reason he needed to give UV light writing a try.

He built a PIC16F628 UV POV board using the LEDs, and while manually swiping the writer across various glow in the dark surfaces was cool, he wanted to keep the POV board stationary, moving the writing medium instead. He bought some phosphorescent vinyl, but found that it wasn’t too flexible, meaning he could not use a conveyor belt approach for his display. One day it dawned on him that a vinyl ring might work pretty well, and using a motor from an old cassette player, he constructed the UV writer you see above.

It seems to work pretty well despite a small flaw in the UV ring, and while [David] is happy with the results, he already has plenty of ideas in mind for the second revision.

Check out the video of his UV light ring in action after the jump.

[Thanks, Riley]

Continue reading “Spinning UV Light Writer”

No Quarters Required For This Sidescrolling Game In A Box

teagduino_game_in_a_box

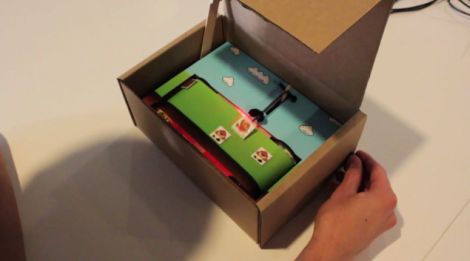
[Adam] from Teague Labs wrote in to share a new gadget they built to help demonstrate the capabilities of the Teagueduino. Their table top video game in a box was made with a bunch of electronic components they had sitting around, as well as soda straws, plenty of painter’s tape, and some popscicle sticks.

When someone pulls the string on the front of the box, a servo opens it automatically, and a second servo starts spinning the game reel. As the reel moves, the player is presented with a set of obstacles to dodge, guiding the “hero” via a knob-controlled servo. A hall sensor attached to the back of the character is tripped when passing over any of the obstacles, which are attached to the reel with magnetic tape. When the hero collides with an obstacle, the game ends and proceeds to close itself, much to the chagrin of the player.

As you can see in the video below, it’s a pretty entertaining and challenging game.

Looking to make one of your own? Swing by the Teagueduino site to grab the game’s code and be sure to share your creations with us in the comments.

Continue reading “No Quarters Required For This Sidescrolling Game In A Box”

Laser Etched PCB Production

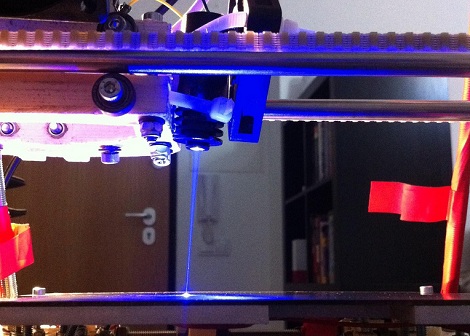
Like most of us, [reonarudo] isn’t satisfied with the current methods of homebrew PCBs, so he put a laser on a reprap and started burning some boards.

The basic procedure is to cover a copper clad board with matte black spray paint. A laser was installed on the X carriage of the reprap. [reonarudo] used cad.py to convert the board files into g-code and fired up his laser. The quality of the boards is highly dependent on the accuracy of the laser so after working through some mechanical problems [reonarudo] managed to make some passable boards.

We’ve seen just about every manufacturing method imaginable applied to PCB production. Etch resist and toner transfer do the job and a reprap milling machine is pretty neat, but lasers are so much cooler. While it may not be perfect (yet), printing PCBs with a laser shows a lot of potential. Check out a video of [reonarudo]’s bot burning some copper after the break.

Continue reading “Laser Etched PCB Production”

Engine Hacks – Tesla Turbines

Engine Hacks Theme banner

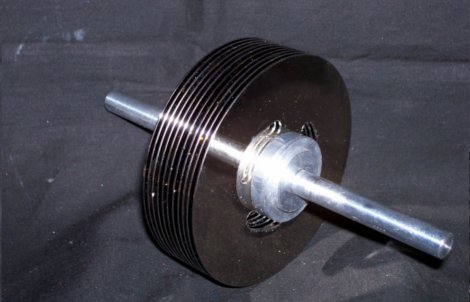
You probably weren’t expecting a project based on [Nikola Tesla’s] work to show up during the Engine Hacks theme. Most people know of him because of his pioneering work with high voltage equipment. Never the less, [Tesla] designed a device that later became known as the Tesla Turbine. Tesla turbines are made out of a series of thin disks attached to a central rotor. Air or steam is injected into the closed turbine housing at the outer edge of the disks. It swirls around through the turbine blades and eventually exits near the rotor. This type of turbine can achieve very high rotational speeds but doesn’t have a lot of torque, which limits their usefulness. Check out this instructable that shows you how to build your own Tesla turbine out of hard drive platters.

We have featured a Tesla turbine in the past on Hackaday. In this previous post, [Rick] shows us how to carve a pumpkin with a skill saw blade that is powered by one of these turbines.

Putting Laptop LCDs To Use With An FPGA

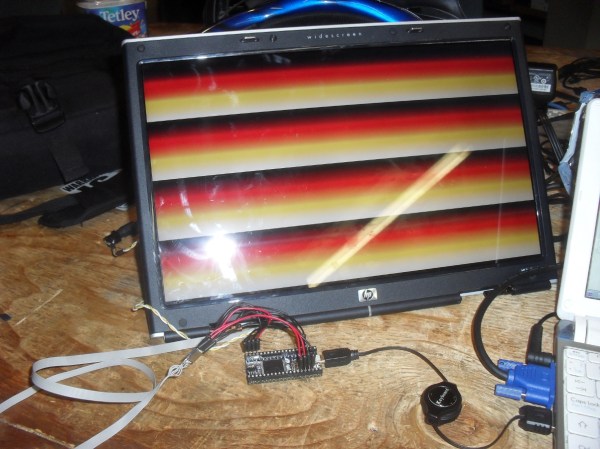
We’re always impressed with the number of laptop displays we’re able to pick out of the trash. Most of the time the computer is borked beyond repair so we end up with a lot of functional but unusable LCD panels. As a service to us all, [EiNSTeiN_] figured out how to control an LCD panel using a cheap homebrew FPGA board.

LCD panels don’t use a simple protocol like VGA for turning pixels on and off. Instead, the very high-speed LVDS is used. LVDS is beyond the capabilities of simple microprocessors, so [EiNSTeiN_] built himself a clone of an XuLA FPGA prototyping board and set to work. After figuring out the signal lines to the panel, [EiNSTeiN_] pored over the timing diagrams for the LVDS controller and the LCD panel. From the data sheets, he figured out data is usually sent to the panel at about 500 MHz. The homebrew FPGA board couldn’t manage that speed so [EiNSTeiN_] cut the FPGA clock in half.

While LCD’s 60 fps refresh rate was reduced to 30 fps, [EiNSTeiN_] says there’s only a little flicker. Not bad for something that could have easily been trashed.

Arcade Controller In A Box

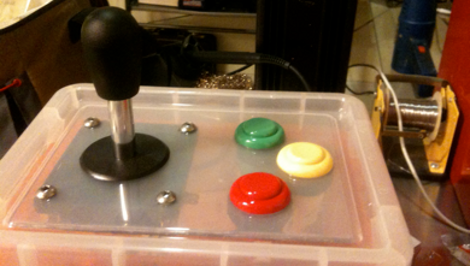
[Alex] wanted to play video games with an arcade stick and buttons, but got sticker shock after seeing the price of commercially available controllers that connect to a computer via USB. He set out to build his own and ended up with the controller-in-a box that you see above.

At first he tried using an mbed microcontroller board but was unhappy with the latency built into the system that detected a button press, sent it via USB as a keyboard press, which was then interpreted as input by the game. He ditched the microcontroller completely and picked up a couple of 4021 parallel-to-serial shift registers. He had previously used this method to make his own SNES controller. The SNES uses two 8-bit shift registers to generate an 16-bit serial packet to send to the console. [Alex’s] reused that system, adding an SNES controller plug to his arcade box, and using the SNES to USB converter he already had to connect to the computer. Now he’s got a portable controller for the cost of three buttons, the stick, and two IC’s.

He explains the project himself in the clip after the break.

Continue reading “Arcade Controller In A Box”