Ring Ring Ring Ring Ring Ring Ring Emotiphone!

emotiphone

Instructables user [zvizvi] was working on putting together a portfolio for his application into Industrial Design school, and thought it would be neat to repurpose an old rotary phone that used to belong to his grandmother.

He originally had pretty lofty goals for the phone, but eventually pared back his vision to include one-way communications to Twitter. After gutting the phone of its unnecessary parts, he got busy installing LEDs behind the dialer’s finger holes. The LEDs were connected to an MCP23017 I/O expander, which takes its direction from an Arduino he crammed into the phone’s shell.

When the receiver is lifted from the cradle, the Arduino initiates a connection to the Internet via the WiFly shield he installed. Once he dials a number, the Arduino translates the digit into a predefined emoticon, posting it to his Twitter page. While the emoticons are not quite as descriptive as the messages from the Tweeting Roomba we featured earlier this week, they relay his mood just fine.

It’s a fun project, and it happened to get [zvizvi] into the design school he was applying at, so we can’t ask for much more than that.


Selective Solar Sintering With Sand

[Markus Kayser] built an amazing solar powered SLS printer, but instead of using lasers and powdered plastics his machine uses the power of the sun to heat sand into complex shapes.

[Markus]’ printer uses the same concept as his earlier solar cutter – burning things with a magnifying glass. Interestingly, the printer isn’t controlled with stepper motors and reprap electronics – it’s completely cam driven. The solar panels only power the motor attached to the frame moving on bearings made from skateboard wheels.

We’d guess that [Markus] is using a little more than 2 square meters of Fresnel lenses in his project. Since solar irradiance is about 120 W/m² (PDF warning), [Markus] is concentrating a lot of energy onto a point the size of a quarter, which would be necessary to heat up sand to its 1500° C melting point. The resolution isn’t what you could get with a laser, but [Markus] was able to print an amazing bowl along with other complex 3d shapes.

Check out [Markus]’ video of the solar sinter printer after the break. There’s also a video of his previous experiment with the solar cutter.

Continue reading “Selective Solar Sintering With Sand”

Super Mario Coin Block Lamp Is A Nintendo Fanboy’s Dream Come True

super_mario_coin_block_lamp

[Laurence] was racking his brain coming up with potential birthday gifts for his friend when the idea of a Super Mario Bros. coin block lamp popped into his head. The block is constructed from drain pipe, a few pieces of plywood, some perspex, and a whole lot of awesome.

He wanted the lamp to make sounds when it was turned on and off, so he put together an audio circuit based on [LadyAda’s] WaveShield. His design is similar, though he swapped out the DIP packages for SOIC versions, adding a DAC, Op amp, and an audio buffer to fit his needs.

Once he had his electronics in order, he started construction of the lamp, painting the drain pipe green and mounting it under his light’s base. He built a large perspex box to serve as the coin block itself, printing the familiar graphics on tracing paper which he then glued into place. An arcade button adorns the top of the box, making for a very appropriate and fun light switch.

Be sure to check out the video below to see the lamp in action. We’re just a bit jealous of [Laurence’s] friend, and we sure wouldn’t mind having one of these in our office to sit alongside this mechanical coin block we featured a while back.

Continue reading “Super Mario Coin Block Lamp Is A Nintendo Fanboy’s Dream Come True”

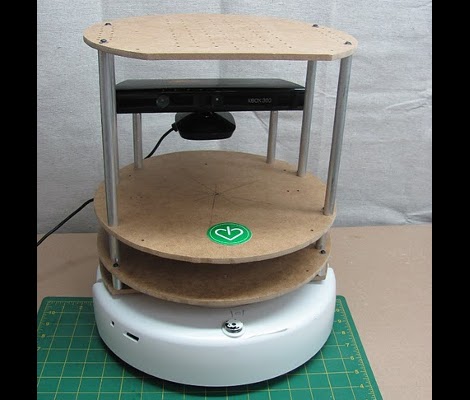
Building A Robot Without Using A Machine Shop

We usually avoid the prospect of buying new tools just for one project. In the long run we’re sure we’d use them again, but sometimes even with that outlook you can’t afford it. Case in point is our life-long-lust for a laser cutter; we just can’t justify the upfront cost but we sure would use it constantly if we had one.

If you do find that you’re interested in taking on a project that calls for laser cut parts, [I Heart Robotics] shows you how to do it with a few simple hand tools. The bot seen above is their TurtleBot. You can cut your own parts using a laser cutter, you can buy a kit from them, or you can bust out a ruler, compass, drill, coping saw, printer, and tape to make the pieces by hand.

It’s a simple enough concept. Print out the templates, tape them to your hard board, then start drilling and sawing. You won’t get the precision a machine tool can, but in some cases you don’t need to be all that perfect.

[via Adafruit]

A Pick And Place Machine For Under $1k

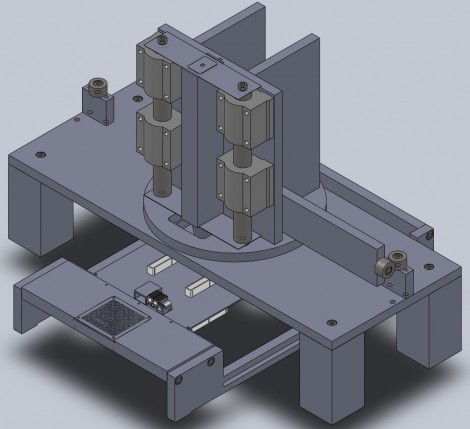
Pick and place machines are marvels of modern technology. They the can lift, orient, align and drop tiny electronic components onto a circuit board that is headed for the reflow oven. On an industrial scale they move so fast it’s a blur in front of your eyes, and they use imaging to ensure proper placement. But that kind of specialized equipment is going to cost a real bundle of money. [Bootstrap] is working on a design that will still be feature-rich, but will allow you to purchase your own pick-and-place machine for under $1000.

The design calls for a two-headed beast. One head is a vacuum tweezers which is capable of moving the parts. The other is a digital microscope that is used for precise positioning. The two heads pivot in and out of place, but it’s the table which holds the PCB that is responsible for positioning the parts. Although there’s nothing built yet, the depth of information that [Bootstrap] published in his post is impressive. He’d like your help making sure there’s no errors in the design before he builds the first three prototypes. If you’re a Solidworks guru he’ll even send you the files upon request.

We’ve seen a couple of different pick and place machines lately so take another look if you missed them the first time.

[via Adafruit]

Keeping Tabs On Your Pets’ Busy Lives

mouse_wheel_tracking

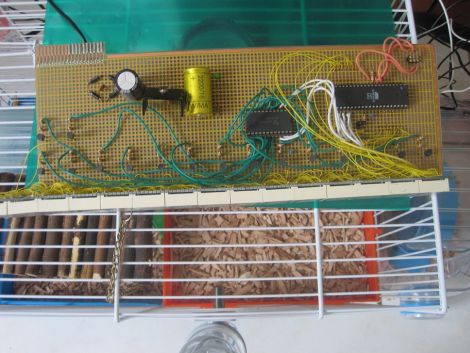
[Stephen’s] daughter has a pair of mice she keeps as pets, who happen to be quite active at night. After they kept her awake for an entire evening by running like mad in their treadmill, they were moved from her bedroom. Since they were so active in the treadmill, [Stephen] thought it would be cool to try measuring how much the mice actually ran each night.

To keep track of their activity, he built a simple circuit that records how many rotations the treadmill makes. He fitted it with a rare earth magnet, installing a reed switch on the outside of case that ticks off each spin of the wheel. Any time the wheel starts moving, his PIC begins counting the rotations, displaying them on a 7-segment LED display. To mitigate data loss in the event of a power outage, the PIC stores the current number of rotations in its EEPROM every 10 seconds or so.

The counter keeps track of the total number of rounds the mice have completed, which his daughter uses to manually calculate their running sessions. Since they started tracking the mice, they have run over 700,000 rounds, sometimes completing as many as 20,000 in an evening.

We think it’s a pretty cool project, especially since it makes it fun for his daughter to stay involved in her pets’ lives.

“Zero Overhead” Z80 Computer Focuses On Performance

z80_wirewrap_computer_zero_overhead

There’s something quite satisfying about building your own computer. Nowadays, constructing your own desktop PC is relatively easy, so if you really want to get your hands dirty, you have to take a step back in time and give some vintage hardware a spin.

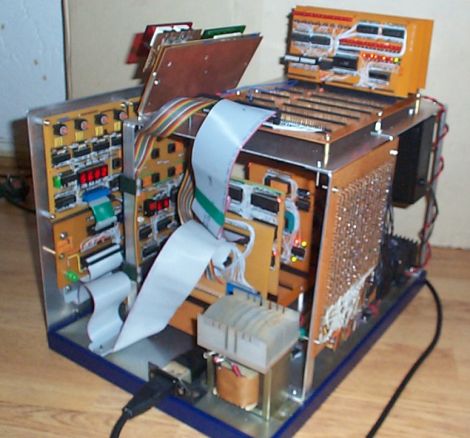
[YT2095] has spent a good portion of the last two months building a computer based on the classic Z80 CPU. His machine, called “Z Eighty Development” or “ZED” for short is an amazing build, and most definitely a labor of love. He has put an estimated 700+ hours into this machine and it’s a beaut! When closed, the machine is pretty unassuming, but once he folds down the keypad, you can see that all of his time has been put to good use.

Most of the board’s components are connected together via wire wrap, including the large 48k memory card he built, as you can see from the link above. The wide array of add on cards all work together to accomplish his goal of “zero overhead” – freeing up the Z80 from having to do any unnecessary processing, such as I/O, etc.

It’s quite an impressive build, and ranks up there with some of the best Z80 based computers we have seen through the years.