DIY Fizzy Fruit

co2inator

[Rich] over at Evil Mad Scientist Labs took it upon himself to make eating fruit a little more enjoyable for his kids by infusing it with CO2 using his CO2inator. Observing the same principles used in making soft drinks and force-carbed beer, he decided to build a CO2 pressure chamber for use in his kitchen. He gathered a handful of easy to find components to construct his rig, including a household water filter housing and a CO2 cylinder from a paintball gun. He has some helpful hints for those who are not familiar with the process, noting that refrigerated fruit absorbs the gas more quickly than warm, and that considering the water content of the fruit is important when selecting what to carbonate.

Once [Rich] had everything safely connected and checked for leaks, in went the fruit. After about half an hour to an hour, the fruit was carbonated, much to the delight of his children. This looks like a quick and fun project for adults and kids alike, that can easily fit into a busy weekend schedule.

[via Neatorama]
Classical’s Greatest Hits On Hardware’s Greatest Flops

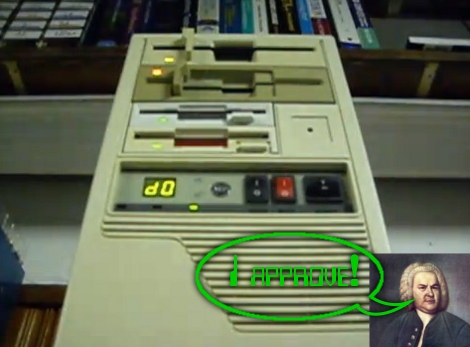
We get a lot of tips about old hardware playing recognizable tunes. But once in a while one of these projects goes above and beyond the others and this is a shining example of great hardware music. [FunToTheHead] put together a music video (embedded after the break) that shows his custom MIDI device playing Bach’s Toccata in d minor. He left some comments that clue us into the way he did it. Most obviously, he’s using the stepper motors from four floppy drives to create precisely pitched sounds. Internally, a PIC 18F14K50 acts as a MIDI-over-USB device, taking commands for all 128 MIDI notes as well as the pitch bends associated with them. The first four channels are played directly on each drive and the other twelve are triaged among the hardware by the microprocessor. But for the results heard in the video you’ll need to code your MIDI files by hand.

Bonus points to the video editor for the Phantom’s floppy-laden appearance in the video… it’s good to laugh!

Continue reading “Classical’s Greatest Hits On Hardware’s Greatest Flops”

Punch Tape Musical Synth

synthanola

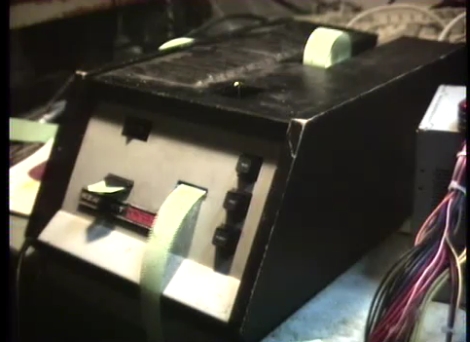
[Jeri Ellsworth] sent over a 555 design contest entry that struck her as particularly interesting. The Synthanola is a three-channel music synthesizer that accepts input from an old Heathkit paper tape reader. While this hack might seem overly retro, it’s actually an extremely appropriate use of technology, as the Heathkit H-10 and the 555 timer were both popular tech in the 70’s. This retro-focused synth uses fourteen 555 timers, twelve of which are dedicated to synthesizing audio. If this entry does not win the contest, it certainly must be a strong contender for most 555 timers used.

[Thrashbarg] gives a detailed explanation of the logic used to drive the music playback from the punch tape, as well as full circuit diagrams for his entry. So far he has encoded MP3s of Bach’s Invention and Fugue in D Minor to tape, with hopefully more to come. In order to truly appreciate his efforts, the Synthanola should be seen as well as heard. Stick around for a pair of videos of the synth in action.

If you’re interested in seeing more 555 contest entries, be sure to check out some of our previously featured projects.

Continue reading “Punch Tape Musical Synth”

38 KHz IR Communications Tutorial

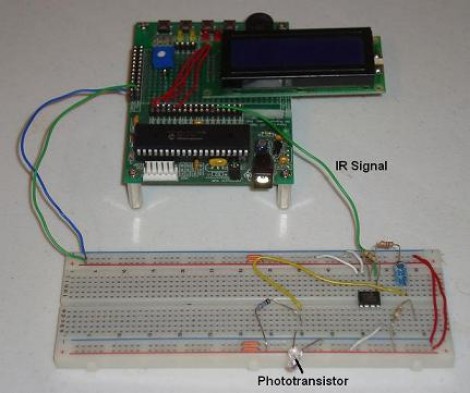
Learning about how infrared remote controls work is a great way to expand your electronics knowledge. That’s because this technology is invisible to our eye, and happening faster than we can comprehend without help from test equipment. This tutorial over at Pyroelectro talks about the theory behind how the data is transferred and shows you how to build a couple of circuits to experiment with and communicate through infrared light transmissions.

Instead of going with an IR receiver module you’ll build your own using a photo-transistor and an operational amplifier. The Opamp is used to amplify and invert the signal picked up from the IR transmission of a common home entertainment remote control. From there the digital signal is read by a PIC 18F452 microcontroller for processing. But if you want to use a different microcontroller there’s still more than enough usable information to get you across the finish line.

Voice-controlled Rolling Robot

rolling_voice_controlled_robot

[societyofrobots] recently posted an Instructable on how to build a voice controlled robot in just a few hours time. This robot isn’t particularly cheap, weighing in at about $230, but it is a fun project if you have the means. The bot is driven around by a pair of servos, taking their directions from an Axon II MCU. A VRbot voice recognition module is used to listen for commands, enabling the user to record up to 32 custom triggers for directing the robot.

All of the source code for the robot is included, as well as instructions on how to get started programing the microcontroller. The code provides some basic functionality, but there’s likely plenty more that can be done with the powerful on-board ATmega460. While this robot would make for a great beginner/intermediate project as-is, it should be noted that [societyofrobots] manufactures and sells the Axon II, so this Instructable is half guide/half self-promotion. Have any of you had experience with the Axon II? Let us know what you think.

Keep reading to see a video of the build process as well as the robot doing its thing.

Thanks, [Bill Porter].

Continue reading “Voice-controlled Rolling Robot”

Junkyard Fish Tank

So your house looks like a dumping ground for useless junk? Yeah, we know it’s the hacker’s curse… you just can’t stop salvaging stuff. But follow [Pontazy69’s] lead by building something useful out of that junk. He took an old polystyrene box and made it into this fishtank. You can see that the sides and back of the box has gone unaltered, but the front wall is missing. [Pontazy69] marked and cut straight lines while leaving a lip around the edge. Silicone was used to glue some acrylic (or perhaps glass?) to the inside of this lip. Once dried he added another bead around the outside to ensure it doesn’t leak. Few fish would be happy here without some type of filter so he built one of those out of an old plastic bottle and some other pieces. See videos that show you how to build both the tank and the filter after the break.

We love aquarium hacks almost as much as clock hacks. So check out the water exchange system, and a couple of different lighting systems. Then document your own aquarium projects and let us know about them.

Continue reading “Junkyard Fish Tank”

Printing Your Own Guitar Parts

The white parts that make up the body contours of this guitar have been 3D printed to meet [Bård S D’s] personal specifications. He started designing the pieces last year to add to his Zoybar guitar. Each of the three parts has its own function. The tail piece serves as a floor stand, as well as a hook for hanging the instrument upside down. The wide piece at the top gives the player a place to rest the forearm, and the piece at the bottom serves as a cradle to place on your leg, and contains the jack for the guitar’s pickup. You can see him playing the instrument in the video after the break.

We looked for more information on the Zoybar system but it’s a bit hard to get the facts from that website. We know that the 6-string kit comes standard without frets, and it’ll cost you a pretty penny at around $700. But if it performs as a quality instrument the price isn’t too far out of line.

Continue reading “Printing Your Own Guitar Parts”