Model Rocket Radio Telemetry

rocket_telemetry_data-analysis

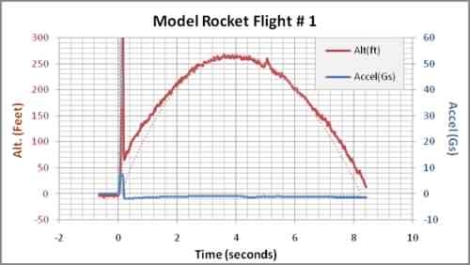
[Ken] sent us his Instructable in which he used radio telemetry to monitor the status of his air-powered model rocket through a series of launches. His setup is centered around an Arduino IDE-compatible board that looks to be about the size of a Boarduino, but has the benefit of an embedded 915 MHz radio module. The vendor he used also sells a good handful of add-on modules which he used for his in-flight recording, including a barometric pressure monitor and a 3-axis accelerometer. During flight, the rocket constantly sends data to a base station, provided it stays within radio operating range.

For is initial tests, [Ken] launched his rocket four times, getting usable data on half of them. He found out some interesting things about his model rocket, including the fact that it creates a maximum launch force of 60 Gs. He has plans to revise his setup in the future, such as lightening the battery load as well as adding a high-G analog sensor for recording the forces at take off. This kit, or a more reasonably priced clone, would make for a great addition to any rocket buff’s inventory.

More Ambient Lighting Monitor Hacks

[Christian Pigeon’s] first big project was to build this ambient light system for his computer monitor. This is based on the same concept as the Phillips Ambilight system which illuminates the area behind a television to match the color on the edges of the screen. We’ve seen clones before, but this is the first one we’ve come across based on Amblone.

With Amblone as a starting point [Christian] modified the code to work with the Arduino Duemilanove which has fewer PWM channels than its bigger brother, the Arduino Mega. No word on where he acquired the RGB LED strips that provide the illumination, but the driver boards are just protoboard with groups of resistors and transistors to switch the diodes on and off. Check out the video after the break to see effects he achieves with this setup.

Continue reading “More Ambient Lighting Monitor Hacks”

Fingertip Heart Rate Monitor

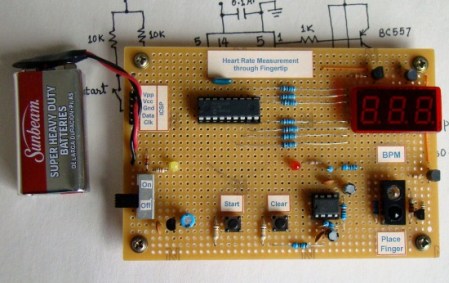
[Embedded lab] has a nice tutorial on building your own heart rate monitor. The monitor works by shining infrared light into the fingertip and looking at the changes in the reflected infrared signal caused by a heartbeat.  The IR detector produces a very small AC signal so a couple of op-amps are used to filter and amplify the signal. The output of the filter circuit is then read in by a PIC16F628A, which counts the beats and displays it on a seven segment display.  This might be a good project to try if you’ve got your microcontrollers down and you are looking to learn some analog electronics. Its noted at the end that the two main problems with building a circuit like this are going to be cross talk and adjusting the filters. The infrared diode and receiver should be close to each other to allow maximum reflection but you also need to make sure that you don’t allow the emitter to shine directly into the detector because the reflected light will be drowned out by the bright emitter.

[via make]

Your First Digital To Analog Converter Build

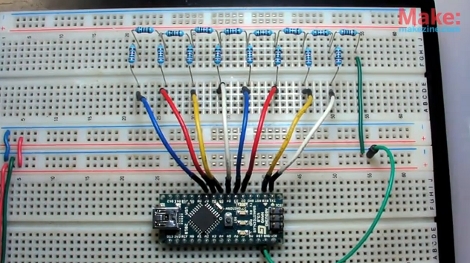
Have you ever built a Digital to Analog Converter before? This is a circuit that can take the 0 or 5V coming off of several digital logic pins, combine them together, and spit out one analog voltage that represents that value. If you’ve never made one, here’s your chance. [Collin Cunningham] over at Make put together another lab video about DACs which we’ve embedded after the break.

The circuit above uses an R-2R resistor network – often called a resistor ladder – which you can learn much more about from the reference page that [Collin] links to. Although a DAC in an IC package is by far the most commonly found application, we do see these R-2R networks in audio hacks from time to time.

Continue reading “Your First Digital To Analog Converter Build”

Electronic Tolling System

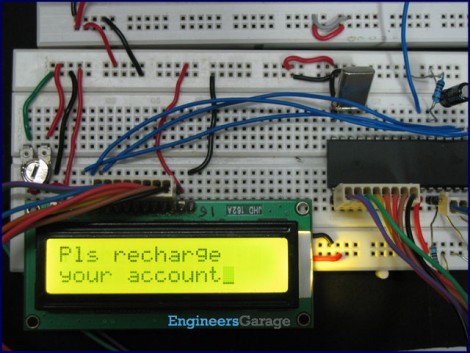
For us the hardest part of any project is coming up with the seminal idea. Once in a while you just need to cheat by recreating an existing product. That’s what EngineersGarage did with this toll plaza project. If you take a look around the various tabs at the top of that article you’ll see that they’ve used an 8051 microcontroller to bring together a character LCD, RFID reader, and a keypad. From there it’s a slew of coding to add the functionality for reading multiple tags, looking up stored value, and creating a replenishment system. Sure, it’s not really of much use in this form, but it’ll give you something to do with those shiny parts you have sitting around, and it might just lead you down a path to something more meaningful. As usual, there’s a demonstration video of this after the break.

If this doesn’t float your boat, perhaps this other RFID access system is more your thing.

Continue reading “Electronic Tolling System”

Etching Panel Faces On The Cheap

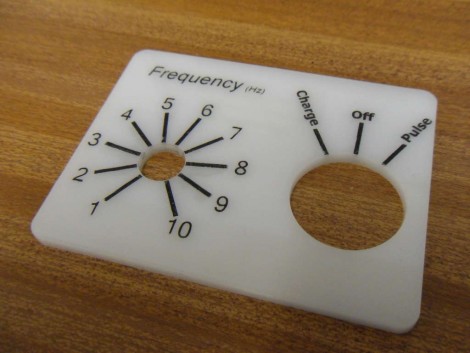
[James] came up with a way to make small numbers of high-contrast instrument panels cheaply, and without too much labor. We’ll make with the bad news right away; you’re going to need a laser cutter to use this method. Traditionally, panels that look like the one above are etched onto special composite that has one color at the surface and a contrasting color beneath. [James] started with plain old acrylic, etched his labels, then filled the voids with black wax crayon. Just scribble all over the etched face to rub wax into the grooves, go through a couple of cleaning steps using white spirit, then bake the panel to even out and harden the wax layer. He’s got several examples of his work, including medallions that are used to label LED indicators.

Propeller Platform Logic Analzyer

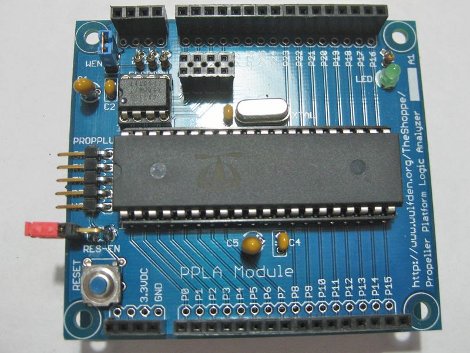
[Wulfden’s] new gadget is a 28 channel 3.3 volt digital logic analyzer. Powered by a Parallax Propeller running at 100MHz (permitting a 10 nanosecond sampling rate), using all though hole parts, and open design so it is possible to whip up your own.

Data is collected and sent to a host computer running Propalyzer which looks to be a very nice logic analyzer front end, and sports all the needed features and a HP inspired design. The design of the board allows you to plug it on to any Propeller Platform board, and this is very handy for those who have other Propeller boards, though others will have to source a regulated 3.3 volt power supply, and serial converter.

Overall this looks to be a very handy tool to have around, whether you opt for the kit to use on your Propeller Platform boards or roll your own, the features and cost are very attractive if you need a logic analyzer.

Join us after the break for a quick introduction video by [Nick] (of Gadget Gangster)

Continue reading “Propeller Platform Logic Analzyer”