Solar Panel Charger Analysis With Ladyada

[vimeo = http://vimeo.com/13936259%5D

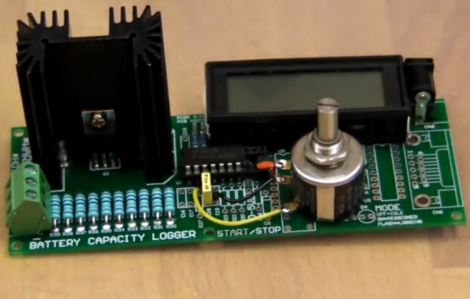
[Phillip Torrone], one of the original crew of HackaDay, now working with [LadyAda] tipped us off to this video of her explaining the device they built for configuring the charging circuits to be used with their solar panels. Unlike most of their tutorials, this one is not intended to be a final product sold on their store. Rather, this is a project that helps them deliver the best quality they can.

The unit itself is built around an Arduino and can log the statistics to an SD card, show battery voltage, panel voltage, and current from panel to charger. You can see in the video above how she uses this to refine her design in real time for optimal results.
Texas Instruments Watch Claims It’s A Computer Mouse

[youtube http://www.youtube.com/watch?v=TDL3JRG_zrs%5D

[Jack Toole] and his team [Aaron King] and [Libo He] sent in their computer interface dubbed the Chronos Flying Mouse. The video above explains the concept very thoroughly, but we’ll reiterate some of the highlights here. The project uses a Chronos EZ430 with its accelerometers to wirelessly transmit delta positions of the user’s wrist. Add a little open source software and you have a regular PC mouse, a video game joystick, a game wheel, and a few other different devices in one. We just love the suave feeling of snapping to click.

Open Graphing Calculator: Beagleboard + R

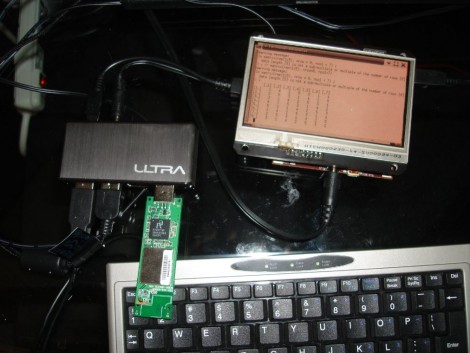
It looks like we missed the boat on this one but just in case you missed it everywhere else on the Internet, last Saturday [Matt Stack] introduced the world to a completely open source calculator. This marries two heartily tested open source projects; the R Project for Statistical Computing and the Beagleboard. The hardware side of things is very similar to that Linux tablet from back in June. It uses a stock Beagleboard with the BeagleTouch module.

Why do we care? First off, don’t forget what’s under the hood. That ARM processor kicks the 6 MHz Z80 processor found in TI’s calculators to the curb. The R language is a boon as well, offering plots of almost limitless quality and allowing extensibility that can’t be equaled with the current non-open offerings. But mostly because it’s a hack. We like seeing software run on hardware it wasn’t intended for.

Miniscule Intervalometer

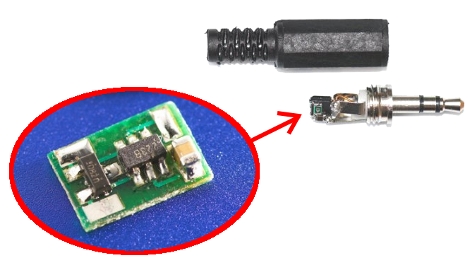
Calling this intervalomemter small would be a glaring understatement. It’s tiny enough to fit inside the plastic cover for a 2.5mm jack for use with a Canon DSLR camera. We should point out that the image we put together is a bit misleading. The picture of the jack is version 1 of this circuit and uses an 8-pin SOIC chip. The board in the oval is version 2, with a PIC 10f222 SOT23-6 package making it even smaller than the original version.

This is used for time-lapse photography. When plugged in the chip draws power from the camera. Get this: it learns the timing interval by listening for the first two images. Once you’ve snapped the first two pictures the PIC will continue to take images based on that initial delay. Amazing.

[Thanks AW via DIY Photography]

Dummy Loads And Heat Sinks

In [Dave’s] latest episode of the EEVblog he takes a look at constant current dummy loads. These are used to test power supply designs and instead of just chaining resistive loads together every time he’s decided to look into building a tool for the job. What he ends up with is a reliable constant current load that can be dialed anywhere from 1.5 mA up to just over 1A. There’s even an onboard meter so you don’t have to probe the setting before use.

It may look like he sent his design off to the board house for production but that’s actually a re-purposed PCB. In walking though his junk-box assembled dummy load [Dave] shares some great tips, like using multiple 1% resistors instead of shelling our for one large and accurate power resistor. But our favorite part comes at about 12:00 when he takes us through some rough math in calculating heat sinks. We’ve always just guessed, but like any good teacher, [Dave] explains the theory and then measures the actual performance taking the guesswork out of the design. See for yourself after the break. Continue reading “Dummy Loads And Heat Sinks” →

Make Your Own Mindstorm Sensors

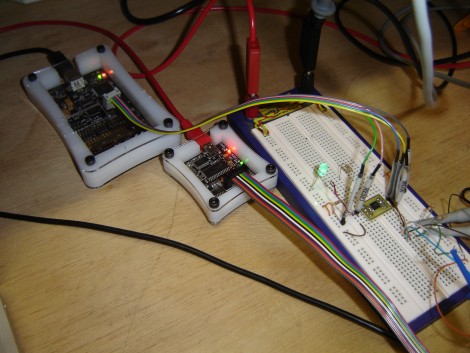
[Stewart Allen] acquired a Mindstorm kit about a month ago and he’s already building his own sensors for it. He wanted a more accurate range finder with a narrower measurement field than the stock sensor. Mindstorm has the option to communicate with sensors via an I2C bus. [Stewart] set up an ATtiny45 to act as a the slave on the bus, facilitating the analog measurement of the distance voltage by using and lookup table, and handling the data transfer with the NXT brick. His testing setup is pictured above, with an AVR Dragon for programming the tiny45 and a Bus Pirate for sniffing the I2C data during the development process. The sensor, looking great on a professionally made PCB he ordered, requires a simple driver that [Stewart] hammered out for use with leJOS, the alternative Mindstorm firmware we’ve seen before.

Bluetooth Multimedia Remote

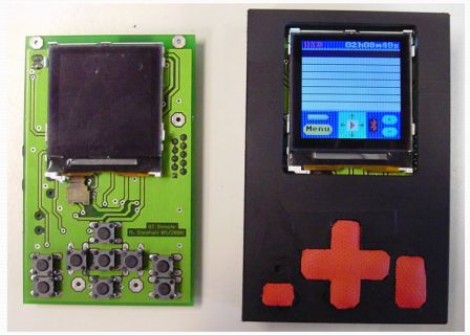
[Mathieu] spent three months developing this multimedia remote control. It connects to a PC via USB or Bluetooth and communicates with Winamp to pull down track information for display on a Nokia LCD screen. It can also be used as a wireless headset via the two on-board jacks. [Mettieu] thinks it’s just a small hop away from working as a Skype client if you take the time to write a plugin for that API.