Brute Forcing A Mobile’s PIN Over USB With A $3 Board

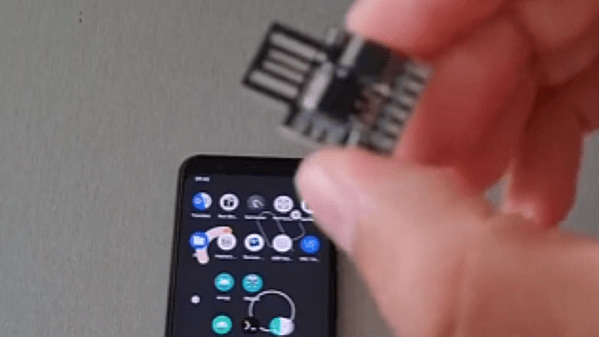
Mobile PINs are a lot like passwords in that there are a number of very common ones, and [Mobile Hacker] has a clever proof of concept that uses a tiny microcontroller development board to emulate a keyboard to test the 20 most common unlock PINs on an Android device.
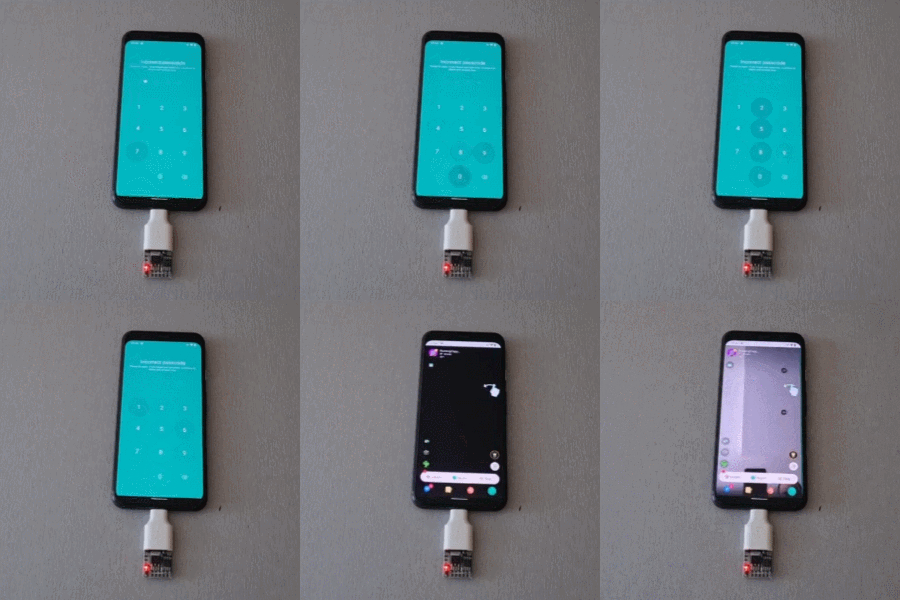
Trying the twenty most common PINs doesn’t take long.

The project is based on research analyzing the security of 4- and 6-digit smartphone PINs which found some striking similarities between user-chosen unlock codes. While the research is a few years old, user behavior in terms of PIN choice has probably not changed much.

The hardware is not much more than a Digispark board, a small ATtiny85-based board with built-in USB connector, and an adapter. In fact, it has a lot in common with the DIY Rubber Ducky except for being focused on doing a single job.

Once connected to a mobile device, it performs a form of keystroke injection attack, automatically sending keyboard events to input the most common PINs with a delay between each attempt. Assuming the device accepts, trying all twenty codes takes about six minutes.

Disabling OTG connections for a device is one way to prevent this kind of attack, and not configuring a common PIN like ‘1111’ or ‘1234’ is even better. You can see the brute forcing in action in the video, embedded below.

Continue reading “Brute Forcing A Mobile’s PIN Over USB With A $3 Board”

A PCB with an OLED display, a screw terminal block and a Raspberry Pi Zero board

Hackaday Prize 2023: Pi Pico Measures Volts, Amps And Watts

Measuring a voltage is pretty easy: just place your multimeter’s probes across the relevant pins and read the value. Probing currents is a bit trickier, since you need to open up the circuit and place your probes in series. Checking a circuit’s power consumption is the hardest, since you need to measure both voltage and current as well as multiply them at each moment in time. Fed up with having to hook up two multimeters and running a bunch of synchronized measurements, [Per-Simon Saal] built himself an automatic digital power meter.

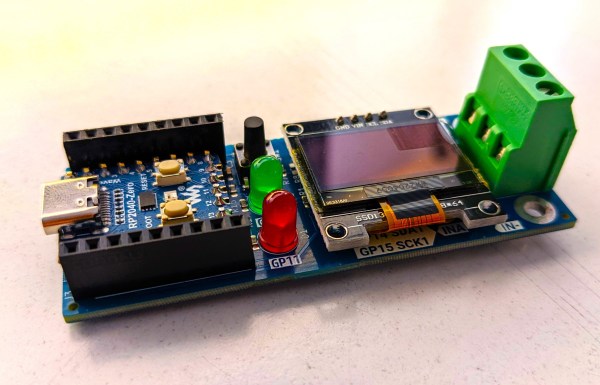
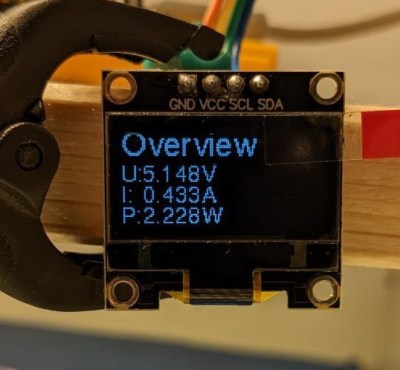
The heart of this instrument is an INA219 chip, which can measure and digitize voltage and current simultaneously. It outputs the results through an I2C bus, which [Per-Simon] hooked up to a miniaturized version of the Raspberry Pi Pico called an RP2040-Zero. A screw terminal block is provided to connect the system to the device under test, while a 0.96″ OLED display shows the measured voltage, current and power.

A small OLED display showing voltage, current and power measurementsThe maximum voltage that can be measured is 26 V, while the current range is determined by the shunt resistor mounted on the board. The default shunt is 0.1 Ω, resulting in a 3.2 A maximum current range, but you can get pretty much any range you want by simply mounting a different resistor and changing the software configuration. In addition to displaying the instantaneous values, the power meter can also keep a log of its measurements – very useful for debugging circuits that use more energy than expected or for measuring things like the capacity of a battery.

There are lots of ways to measure electric power, but they all boil down to multiplying current and voltage in some way. The multiplication was done magnetically in the old days, but modern meters like [Per-Simon]’s of course use digital systems. Some can even plug directly into a USB port. If you want to measure mains power, transformers are an essential component for safety reasons.

Reverse Engineering A Classic ThinkPad Battery

The ThinkPad 701 is an iconic laptop series from the mid-90s and is still highly sought after today because of its famous butterfly keybaord. The laptop itself is tiny even by the standards of the time, so in order to fit a full-size keyboard IBM devised a mechanism where the keyboard splits and slides over itself to hide away as the screen is closed. But, like most 30-year-old laptops, the original batteries for these computers are well past their prime. [polymatt] takes us through all of the steps needed in order to recreate a battery from this era down to the last detail.

He starts by disassembling an old battery with extensive damage from the old, leaky batteries. The first part of the recreation is to measure the battery casing so a new one can be modeled and printed. The control boards for the batteries of these computers were not too sophisticated, so [polymatt] is able to use a logic analyzer with a working unit to duplicate its behavior on an ATtiny microcontroller. With that out of the way, a new PCB is created to host the cloned chip and a new battery pack, made out of 9 NiMH cells is put together.

[polymatt] wanted this build to be as authentic as possible, so he even goes as far as replicating the label on the underside of the battery. With everything put together he has a faithful recreation of this decades-old battery for a famous retro laptop. ThinkPads are popular laptops in general, too, due to their fairly high build quality (at least for their enterprise lineups) and comprehensive driver support especially for Linux and other open-source software projects like coreboot and libreboot.

Thanks to [Roman UA] for the tip!

Continue reading “Reverse Engineering A Classic ThinkPad Battery”

Gravity Wave Detector Is Galactic Sized

Detecting gravity waves isn’t easy. But what if you had a really big detector for a long time? That’s what researchers did when they crunched 15 years’ worth of data from the NANOGrav data set. The data was collected from over 170 radio astronomers measuring millisecond pulsars as a way to potentially detect low-frequency gravity waves.

Millisecond pulsars spin fast and make them ideal for the detection of low-frequency gravity waves, which are difficult to detect. The bulk of the paper is about the high-powered data analysis for a very large data set.

Continue reading “Gravity Wave Detector Is Galactic Sized”

Pi Zero Runs DOOM Via Wireless Power

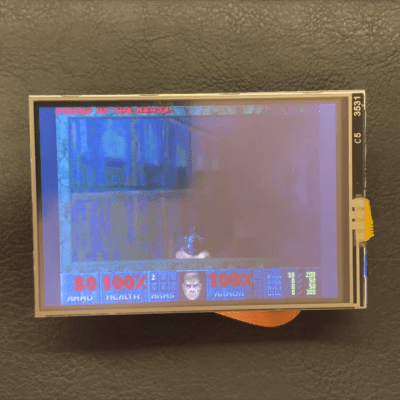
What’s better than a Raspberry Pi Zero running DOOM on a 3.5″ touchscreen? Running it over wireless power, of course!

[atomic14] has been interested in wireless power for a while, and while most of the hardware he’s tested over the years has been less than impressive, he demonstrates one that’s able to reliably deliver 5 V at about 1 A which is more than enough to boot a Raspberry Pi W2 into X and launch DOOM. But while that’s neat, he explains that wireless power isn’t quite yet an effortless solution.

The hardware can deliver 5 V at about 1 A wirelessly, which is plenty, but coil alignment is critical to efficiency.

For one thing, the hardware he’s using — similar to those used for mobile phone charging — need the receiver to be very close to the transmitter. In addition, they need to be aligned well or efficiency drops off sharply. For mobile phones this isn’t much of a problem, but it’s difficult to position a Raspberry Pi and display just so when one can’t see the coils. Misalignment means brownouts and other unreliable operation.

So while the wireless power is capable of running the Pi directly, [atomic14] attempts to put a small battery and charger circuit into the mix in order to make the whole thing both portable and more reliable. But because nothing is easy, he discovers that his charging board — which should be able to output as low as 4.5 V — isn’t able to be adjusted down any lower than 5.66 V. It turns out that a resistor marked 104 (which should be 100 kΩ) is actually measuring 57 kΩ, and the trim pot doesn’t go lower than 10 kΩ. The solution is a bit of component swapping, but we suppose it’s a reminder that sometimes with cheap parts, one pays in other ways.

You can see [atomic14]’s wireless power Raspberry Pi running the classic shooter in the video below. Wireless power may have its issues, but it’s certainly a lot less messy than running DOOM with a gigantic potato battery.

Continue reading “Pi Zero Runs DOOM Via Wireless Power”

Hackaday Prize 2023: OMOTE Universal Remote

A good universal remote can help tame today’s complex home entertainment systems, combining both classic IR and more modern WiFi and Bluetooth connectivity with programmable functions that allow the user to execute multi-step operations with a single button. Unfortunately, programming them often involves the use of clunky proprietary software.

Which is why [Maximilian Kern] has developed the OMOTE. This open source universal remote is powered by the ESP32, and features the usual collection of physical buttons in addition to a 2.8” 320 x 240 touchscreen with a responsive graphical interface that can display more advanced user interfaces. Everything is packed into an ergonomic 3D printed case that gives it an exceptionally professional look.

The remote’s USB-C port can be used to recharge the internal 2,000 mAhA battery, as well as reprogram the ESP32’s firmware via a CH340C serial chip. The battery life is estimated to be about six months given the considerable low-power capabilities of the ESP32, which includes the use of a LIS3DH 3-axis accelerometer to keep the hardware in sleep mode until it’s picked up.

The software side is still in development, so the IR codes for the remote are currently hardcoded and its WiFi capabilities are limited to MQTT. But in the future, [Maximilian] imagines a web-based configuration interface that runs on the ESP32 and lets you add codes and setup the remote via your phone or desktop.

It looks like the hardware is more or less complete, so presumably the focus from here on out will be bringing the software across the finish line. Don’t worry, there’s still plenty of time — since it’s an entry into the Gearing Up challenge of the 2023 Hackaday Prize, the judges won’t pick the finalists until August 8th.

Continue reading “Hackaday Prize 2023: OMOTE Universal Remote”

SSH Can Handle Spaces In Command-line Arguments Strangely

One of the things ssh can do is execute a command on a remote server. Most of us expect it to work transparently when doing so, simply passing the command and its arguments on without any surprises in the process. But after 23 years of using OpenSSH on a nearly daily basis, [Martin Kjellstrand] got surprised.

It turns out that the usual rules around how things are parsed can have some troublesome edge cases when spaces are involved. [Martin] kicks off an example in the following way:

One would reasonably expect the commands figlet foobar bar\ baz and ssh localhost figlet foobar bar\ baz to be functionally equivalent, right? The former ultimately runs the command “figlet” with arguments “foobar” and “bar baz” on the local machine. The second does the same, except with ssh being involved in the middle. As mentioned, one would expect both commands to be functionally identical, but that’s not what happens. What happens is that ssh turns bar\ baz into two distinctly separate command-line arguments in the process of sending it for remote execution: “bar” and “baz”. The result is mystification as the command fails to run the way the user expects, if it runs at all.

What exactly is going on, here? [Martin] goes into considerable detail tracking down this odd behavior and how it happens, but he’s unable to ultimately explain why ssh does things this way. He suspects that it is the result of some design decision taken long ago. Or perhaps a bug that has, over time, been promoted to entrenched quirk.

Do you have any insights or knowledge about this behavior? If so, [Martin] wants to hear about it and so do we, so don’t keep it to yourself! Let us know in the comments, below.