Garage Door Controller Gets The IoT Treatment

[TheStaticTurtle] built a custom controller for automating his garage doors. He wanted to retain the original physical button and RF remote control interfaces while adding a more modern wireless control accessible from his internet connected devices. Upgrading an old system is often a convoluted process of trial and error, and he had to discard a couple of prototype versions which didn’t pan out as planned. But luckily, the third time was the charm.

The original door-closer logic was pretty straightforward. Press a button and the door moves. If it’s not going in the desired direction, press the button once again to stop the motor, and then press it a third time to reverse direction. With help from the user manual diagrams and a bit of reverse-engineering, he was able to get a handle on how to plan out his add-on controller to interface with the old system.

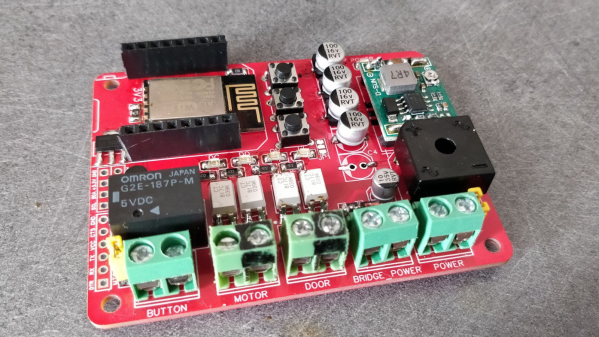
There are many micro-controller options available these days when you want to add IoT to a project, but [TheStaticTurtle] decided to use the old faithful ESP8266 as the brains of his new controller. For his add-on board to work, he needed to detect the direction in which the motor was turning, and detect the limit switches when the door reached end of travel in either direction. Finally, he needed a relay contact in parallel with the activation button to send commands remotely.

To sense if the motor was moving in the “open” or “close” direction, he used a pair of back-to-back opto-couplers in parallel with the motor terminals. He connected another pair of opto-couplers across the two end-limit switches which indicated when the door was fully open or closed, and shut off the motor supply. Finally, a GPIO from the ESP8266 actuates a relay to send the door open and close commands. The boards were designed in EasyEDA and with a quick turnaround from China, he was able to assemble, test and debug his boards pretty quickly.

The code was written using the Arduino IDE and connects the ESP8266 to the MQTT server running on his home automation computer. The end result is a nice dashboard with three icons for open, close and stop, accessible from all the devices connected to his home network. A 3D printed enclosure attaches outside the original control box to keep things tidy. Using hot melt glue as light pipes for the status LED’s is a pretty nifty hack. If you are interested in taking a deeper look at the project, [TheStaticTurtle] has posted all resources on his Github repository.

This Week In Security: Ubiquity Update, PHP Backdoor, And Netmask

Back in January, we covered the news that Ubiquiti had a breach of undisclosed severity. One reader pointed out the compromise of a handful of devices as potentially related. With no similar reports out there, I didn’t think too much of it at the time. Now, however, a whistleblower from Ubiquiti has given Krebs the juicy details.

The “third party cloud provider” the original disclosure referred to was Amazon Web Services (AWS). According to the whistleblower, just about everything was accessible, including the keys to log in to any Ubiquiti device on the internet, so long as it was cloud enabled. The attackers installed a couple of backdoors in Ubiquiti’s infrastructure, and sent a 50 bitcoin blackmail threat. To their credit, Ubiquiti ignored the blackmail and cleaned up the mess.

To the claim that there was no evidence attackers had accessed user accounts, it seems that the database in question simply has no logging enabled. There was no evidence, because nothing was watching. So far, I’ve only seen the one report of device compromise that was potentially a result of the attack. If you had a Ubiquiti device go rogue around December 2020 – January 2021, be sure to let us know. Continue reading “This Week In Security: Ubiquity Update, PHP Backdoor, And Netmask”

Homebrew Doorknob Caps For High-Voltage Fun

Mouser and Digi-Key are great for servicing most needs, and the range of parts they offer is frankly bewildering. But given the breadth of the hardware hacking community’s interests, few companies could afford to be the answer to everyone’s needs.

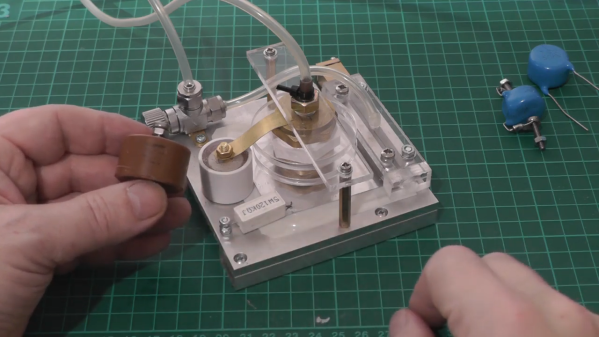
That’s especially true for the esoteric parts needed when one’s hobby involves high voltages and homemade lasers, like [Les Wright]. He recently came up with a DIY doorknob capacitor design that makes the hard-to-source high-voltage caps much easier to obtain. We’ve seen [Les] use these caps in his transversely excited atmospheric (TEA) lasers, a simple design that uses high-voltage discharge across a long, narrow channel filled with either room air or nitrogen. The big ceramic caps are needed for the HV supply, and while [Les] has a bunch, they’re hard to come by online. He tried a follow-up using plain radial-lead ceramic capacitors, and while the laser worked, he did get some flashover between the capacitor leads.

[Les]’s solution was to dunk the chunky caps in acetone for a week or so to remove their epoxy covering. Once denuded, the leads were bent into a more axial configuration and soldered to brass machine screws. The dielectric slug is then put in a small section of plastic tubing and potted in epoxy resin with the bolts protruding from each end. The result is hard to distinguish from a genuine doorknob cap; the video below shows the build process as well as some testing.

Hats off to [Les] for taking pity on those of us who want to replicate his work but find ourselves without these essentials. It’s nice to know there’s a way to make unobtanium parts when you need them.

Continue reading “Homebrew Doorknob Caps For High-Voltage Fun”

Indoor Antennas Worthy Of 007

Many ham radio operators now live where installing an outdoor antenna is all but impossible. It seems that homeowner’s associations are on the lookout for the non-conformity of the dreaded ham radio antenna. [Peter] can sympathize, and has a solution based on lessons of spycraft from the cold war.

[Peter] points out that spies like the [Krogers] needed to report British Navy secrets like the plans for a nuclear boomer sub to Russia but didn’t want to attract the attention of their neighbors. In this case, the transmitter itself was so well-hidden that it took MI5 nine days to find the first of them. Clearly, then, there wasn’t a giant antenna on the roof. If there had been, the authorities could simply follow the feedline to find the radio. A concealed spy antenna might be just the ticket for a deed-restricted ham radio station.

The antenna the [Kroger’s] used was a 22-meter wire in the attic of their home. Keep in mind, the old tube transmitters were less finicky about SWR and by adjusting the loading circuits, you could transmit into almost anything. Paradoxically, older houses work better with indoor antennas because they lack things like solar cell panels, radiant barriers, and metallic insulation.

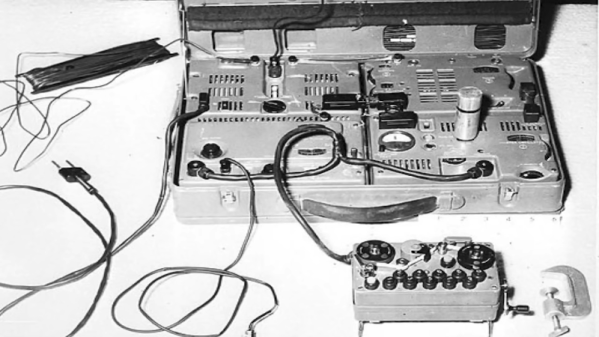
Like many people, [Peter] likes loop antennas for indoor use. He also shows other types of indoor antennas. They probably won’t do as much good as a proper outdoor antenna, but you can make quite a few contacts with some skill, some luck, and good propagation. [Peter] has some period spy radios, which are always interesting to see. By today’s standards, they aren’t especially small, but for their day they are positively tiny. Video after the break.

Continue reading “Indoor Antennas Worthy Of 007”

No Doorknobs Needed For This Nitrogen Laser Build

Sometimes the decision to tackle a project or not can boil down to sourcing parts. Not everything is as close as a Digi-Key or Mouser order, and relying on the availability of surplus parts from eBay or other such markets can be difficult. Knowing if and when a substitute will work for an exotic part can sometimes be a project all on its own.

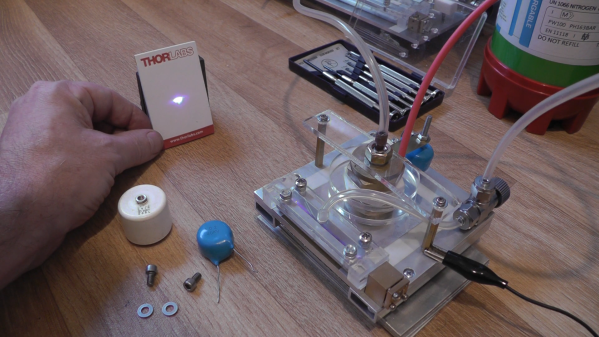
Building lasers is a great example of this, and [Les Wright] recently looked at substitutes for hard-to-find “doorknob” capacitors for his transversely excited atmospheric lasers. We took at his homebrew TEA lasers recently, which rely on a high voltage supply and very rapid switching to get nitrogen gas to lase. His design uses surplus doorknob caps, big chunky parts rated for very high voltages but also with very low parasitic inductance, which makes them perfect for the triggering circuit.

[Les] tried to substitute cheaper and easier-to-find ceramic power caps with radial wire leads rather than threaded lugs. With a nominal 40-kV rating, one would expect these chunky blue caps to tolerate the 17-kV power supply, but as he suspected, the distance between the leads was short enough to result in flashover arcing. Turning down the pressure in the spark gap chamber helped reduce the flashover and prove that these caps won’t spoil the carefully engineered inductive properties of the trigger. Check out the video below for more details.

Thanks to [Les] for following up on this and making sure everyone can replicate his designs. That’s one of the things we love about this community — true hackers always try to find a way around problems, even when it’s just finding alternates for unobtanium parts.

Continue reading “No Doorknobs Needed For This Nitrogen Laser Build”

DIY ESP32 Video Doorbell Locks Out Big Brother

There’s no question that being able to see who’s at your front door from your computer or mobile device is convenient, which is why the market is currently flooded with video doorbells. Unfortunately, it’s not always clear who else has access to the images these devices capture. Organizations such as the Electronic Frontier Foundation have argued that by installing one of these Internet-connected cameras on their front door, consumers are unwittingly contributing to a mass surveillance system that could easily be turned against them.

Luckily, there’s a solution. As [Sebastian] shows in his latest project, you can build your own video doorbell that replicates the features of the commercial offerings while ensuring you’re the only one who has access to the data by leveraging open source, community developed projects such as ESPHome and Home Assistant. At the same time, modern manufacturing techniques like desktop 3D printing and low-cost PCB fabrication mean your DIY doorbell doesn’t have to look like you made it yourself.

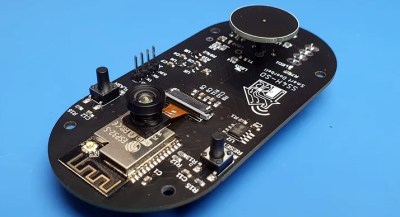
The project starts with a custom PCB that combines the ESP32, a camera module, a capacitive touch sensor, a relay to optionally trigger an electronic door lock, and a DC-DC converter that will let you power the device from a wide range of input voltages. The board even has a spot where you can solder on an additional 8 MB of external PSRAM for the ESP32, which will enable the chip to capture higher resolution video.

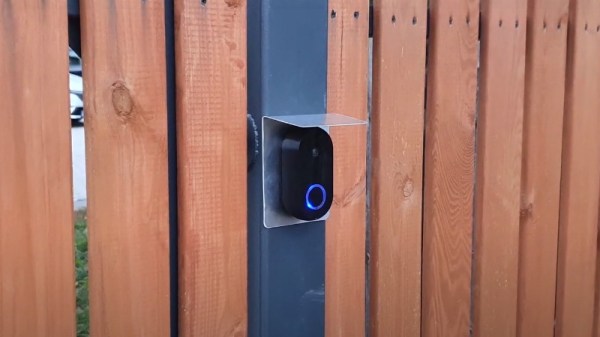
The electronics are housed in a minimalistic 3D printed enclosure that would fit right in alongside similar gadgets from the likes of Ring and Arlo; especially if you have access to a CNC and can cut the front panel out of acrylic. The lighted touch sensor looks phenomenal, and really gives the device a professional feel. That said, it doesn’t look like the case would last very long if exposed to harsh weather and there are some obvious physical security issues with this approach. But to be fair, we’ve seen the same problem with commercial hardware.

Naturally with a project like this, the hardware is only half of the story. It takes a considerable amount of software poking and prodding to get things like mobile device notifications working, and as a special added annoyance, the process is different depending on which MegaCorp produced the OS your gadget is running. [Sebastian] has documented the bulk of the process in the video after the break, but the finer points will likely need some adjustment depending on how you want to set things up.

This is an exceptionally impressive project for sure, but if the whole slick futuristic look isn’t your style, you could always opt to go with the DIY video door bell that looks like it came from an alternate reality version of 1986.

Continue reading “DIY ESP32 Video Doorbell Locks Out Big Brother”

A Walking Rover Destined Explore Your Fridge Door

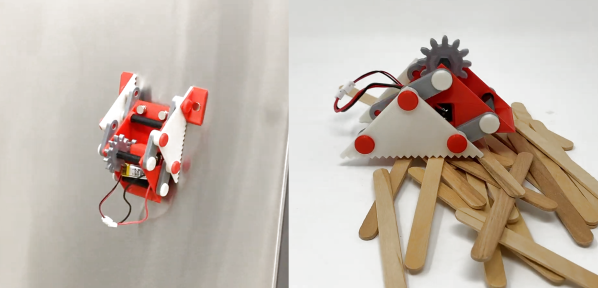
It’s usually the simple ideas that sprout bigger ones, and this was the case when we saw [gzumwalt]’s single-motor walking robot crawling up a fridge door with magnets on its feet. (Video, embedded below.)

The walking mechanism consists of an inner foot and two outer feet, connected by three sets of rotating linkages, driven by a single geared motor. The feet move in a leapfrog motion, in small enough steps that the center of mass always stays inside the foot area, which keeps it from tipping over. Besides the previously mentioned ability to crawl around on a vertical magnetic surface, it’s also able to crawl over almost any obstacle shorter than its step length. A larger version should also be able to climb stairs.

As shown, this robot can only travel in a straight line, but this could be solved by adding a disc on the bottom of the inner foot to turn the robot when the outer feet are off the surface. Add some microswitch feelers and an Arduino, and it can autonomously explore your fridge without falling off. Maybe we’ll get around to building it ourselves, but be sure to drop us a tip if you beat us to it!

[gzumwalt] is a master of 3D printed devices like a rigid chain and a domino laying robot. The mechanism for this robot was inspired by one design from [thang010146]’s marvelous video library of mechanisms.

Continue reading “A Walking Rover Destined Explore Your Fridge Door”