We’ve seen a few advances in the finishing processes of 3D prints over the last few months that result in some very attractive parts that look like they were injection molded. Smoothing ABS prints is now a necessary skill for anyone looking to produce professional parts, but those of us using PLA for our RepRaps have been left in the cold. After some experimentation, the guys over at protoparadigm have come up with a way to smooth out those PLA prints, using the same technique and a chemical that’s just as safe as acetone.
Instead of acetone, the guys at protoparadigm are using tetrahydrofuran, or THF, as a solvent for PLA. Other PLA solvents aren’t friendly to living organisms or are somewhat hard to obtain. THF has neither of these qualities; you still need to use it in a well ventilated area with nitrile gloves, but the same precautions when using acetone or MEK still apply. It’s also easy to obtain, as well: you can grab some on Amazon, even.
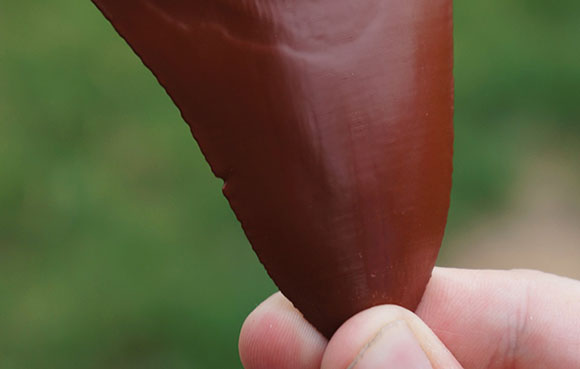
The process for smoothing PLA prints with THF is the same as smoothing ABS prints with acetone. Just suspend the print in a glass container, pour in a tiny amount of the solvent, and (gently) heat it. The evaporated solvent will smooth all the ridges out of the print, leaving a shiny and smooth surface. You can, of course, hand polish it by dedicating a lint-free cloth and a pair of gloves to the task.
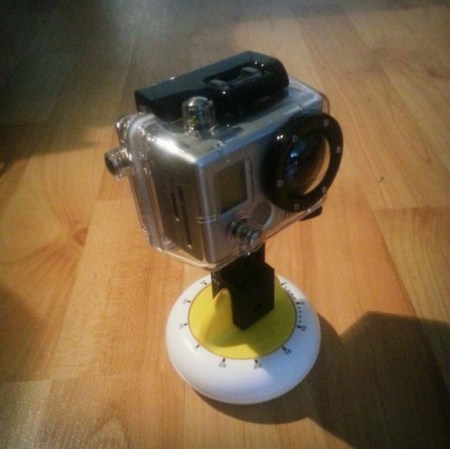
[Sebastian Schuster’s] weekend project was to turn his GoPro camera into a panning time-lapse rig. You’ll notice it’s in a waterproof case as his demo for the hack was an outdoor session and the weather’s not the best right now. He put this together quickly, easily, and on-the-cheap thanks to the Ikea egg timer and a 3D printed camera mount.
An egg timer is a popular choice for panning hacks. Any type that includes a dial that spins on the horizontal axis will do. The Ikea Stam egg timer has that raised handle which is easily gripped by the 3D printed part. You can get a hold of the design files through a web service which is new to us. [Sebastian] used Tinkercad for the design, and shared it in his project post linked above.
Planning started off with a render of the design using Blender 3D. Not only did this give him a 3D model to use as his building reference, but the animation framework allowed him to test the kinematics of the design. After ordering an extruded rail system and assembling the frame he found the pillars had too much flex to them due to the rails used on the top and bottom. The fix was to mill a top and bottom plate to stiffen things up. After testing out the motors and the extruder head mount he made one final design change. He exported his Blender design as dxf files to cut and weld an aluminum replacement for the extruder mounting platform. As you can see in this video, the preliminary results are looking good!
We love the look, and most especially the gait, of [Theo Jansen’s] walker designs. We don’t fully understand them or the math behind them. But that could change if we spend enough time studying [Aaron Birenboim’s] body of work. He wants to incorporate the legs in a project so he’s been trying to optimize the Jansen leg design.
The calculations are delivered in a source code package available from his site. To make heads or trails out of the numbers you need a way to visualize them. He has provided that as well in the form of a MATLAB script which shows leg piece design and can even spit out an animated .gif file of the virtual legs in motion.
If you have no idea what we’re talking about make sure to check out [Jansen’s] original creations. We’re also excited to read more about the Klann and Ghassaei linkage designs which [Aaron] talks about in his post.
I’m not above admitting that it is childish of me. I was told I couldn’t have this thing and suddenly I knew I had to make it. I see it with my kids all the time. Toys can sit in a corner collecting dust for ages, but the second it is in threat of being removed, they have renewed interest, at least for a few minutes.
I figured, if I’m going to be childish about it and print a gun that a) won’t work because I don’t have the right printer, and b) I won’t use anyway because I don’t generally play with guns, I might as well make a fun timelapse video of the more recognizable parts being made.
It initially seemed like it was going to be quick and easy. However, I quickly found that just printing this thing was going to be a time consuming and frustrating task.
1. the scale on the individual files was way off.
I suspect this has something to do with the printer it was designed for. It seemed very close to being 1 inch = 1 mm. Not a completely uncommon problem. Manually resizing got some files to look right, but I found many simply wouldn’t resize.
2. Almost every single item had errors.
If you’ve done 3d printing, you’ve found that a model can have all kinds of issues that will stop it from printing correctly. I found every single item for the gun had errors. I actually learned a lot about how to repair non-manifold items from this exercise, so it was good in the end.
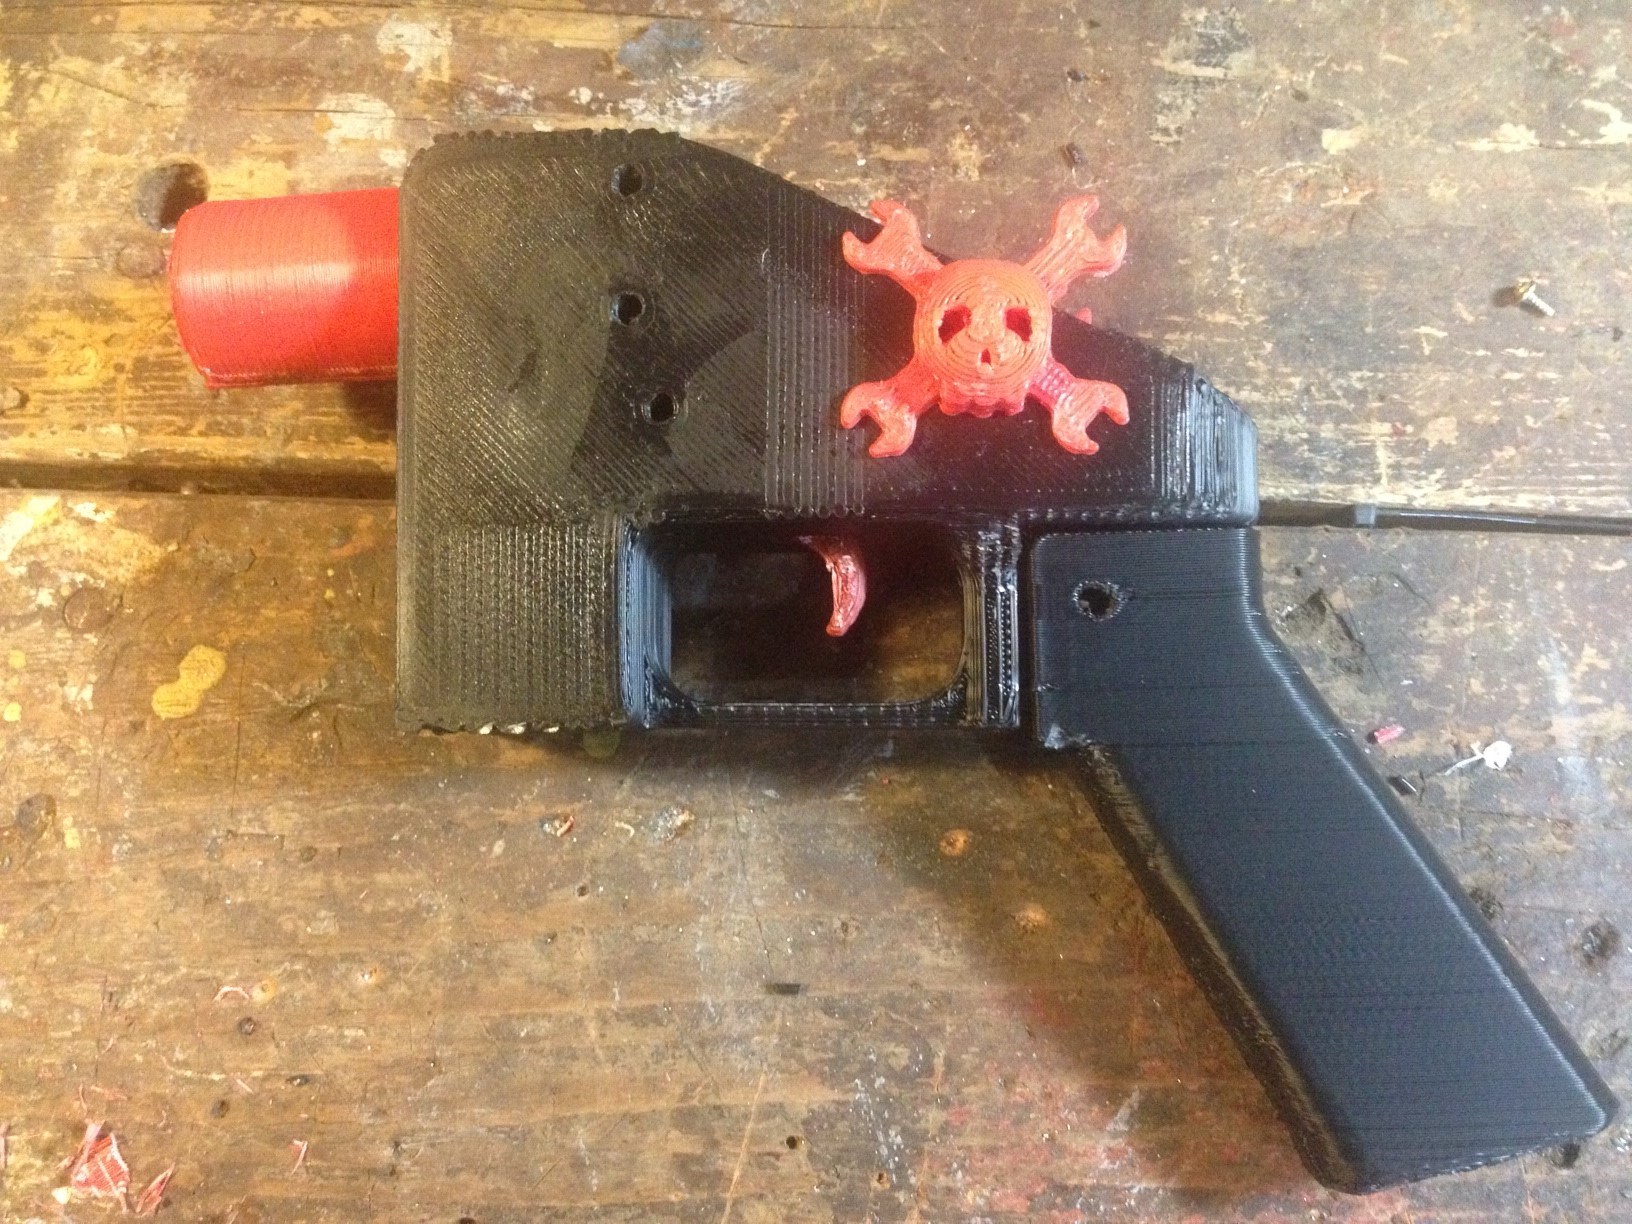
Some items, like the hammer and the hammer springs simply would not print. I ran them through systems to repair them and fix errors. It would say that everything was fixed, but when I tried to “slice” them for printing, the software would crash. This means that my gun is incomplete. It has no hammer. Not really that big of a deal to me.
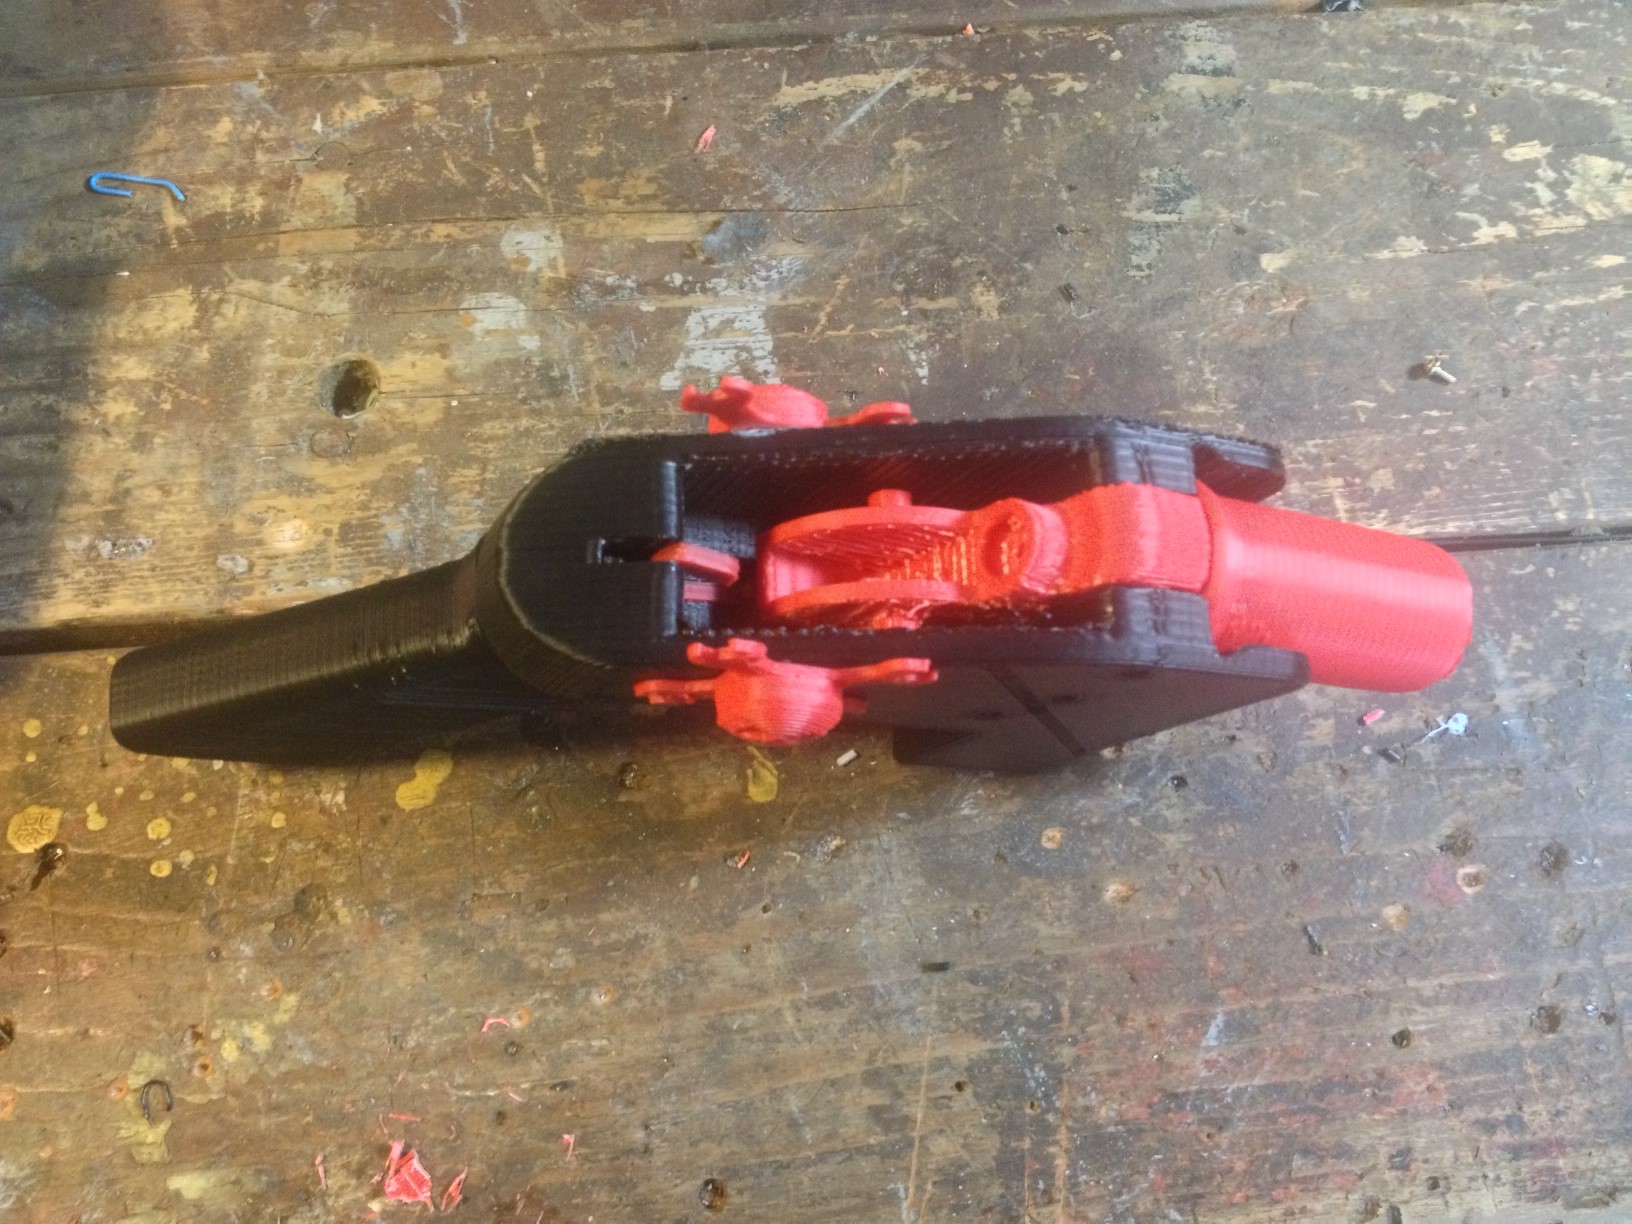
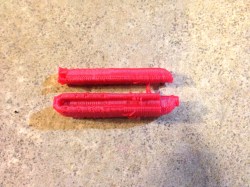
the whole gunNote that it is missing the hammer mechanism. More on that later.disassembled
trigger spring. Cool design, I might use this idea for something else later
black: initial print with errors. Red: fixed print.
the gopro fell into the printer stopping it from moving the bed correctly. You can see the top two layers are shifted about an inch. The rest of that mess is just support material I was ripping out.
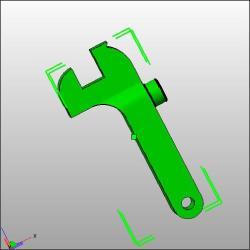
The hammer that refused to print correctly despite repeated repairs.
what the hammer was supposed to look like.
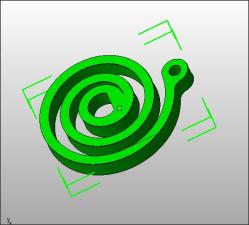
the spring that crashed my slicing program every time I tried to prepare it for a print.
Do I care now?
Nope. I climbed to the top of the fridge and got my cookies. I’m a happy child. The reality is that a zip gun is still cheaper, easier, safer, and more reliable. Here’s an example.
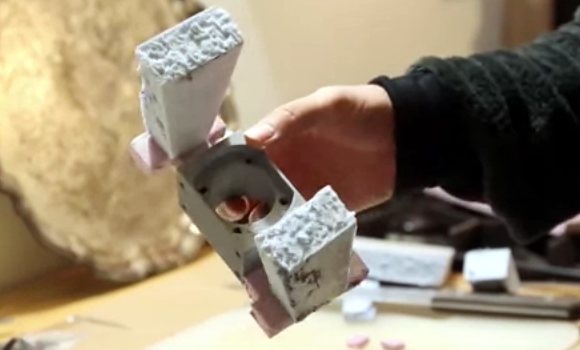
The thirty-five minute video walks through every part of the process which we originally learned about in September of last year. The process was developed as a way to fabricate parts that will be used in high-stress applications. For instance, the part seen above is a mounting bracket for the ball screws that moves the Z axis on a huge CNC build he’s been working on. A plastic part will break under the strain so he needed to make it out of aluminum alloy.
To start, the piece is modeled and printed in plastic to check the fit. Once it’s just right he scales it to 103% and prints it again to account for the shrinking of the metal as it cools. The next step is pictured above, adding paths using rigid foam insulation that allow for the metal pour and for air to escape. This is packed into a plaster and sand mold which dries before being cooked in a furnace to vaporize the foam and PLA. This leaves a perfect mold for the metal pour.
After the break you can see a 5-minute overview version of the project.
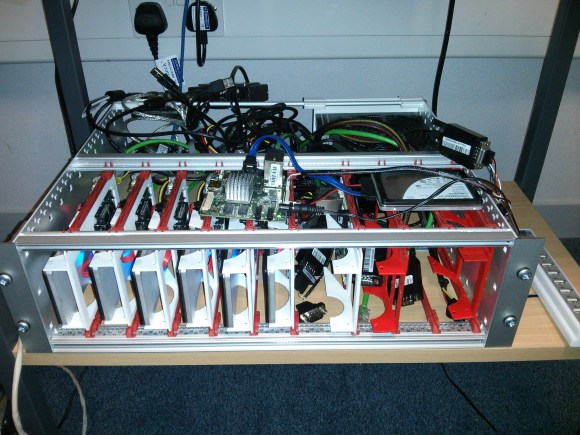
We usually have no problem hacking together electronics into something useful. But finding an enclosure that makes sense for the build can be a real drag. In this case [Vincent Sanders] already had a working ARM build farm that leveraged the power of multiple ARM boards. But it was lying in a heap in the corner of the room and if it ever needed service or expansion it was going to be about as fun as having a cavity drilled. But no longer. He took inspiration from how a blade server rack works and 3D printed his own modular rail system for the hardware.
Each group of boards is now held securely in its own slot. The collection seen above mounts in a server rack which has its own power supply. This image is part way through the retrofit which explains why there’s a bunch of random pieces lying around yet. Instead of printing continuous rail [Vincent] uses a threaded rod to span the larger frame, securing small chunks of rail where needed by tightening nuts on either side of them. The white and red trays are prints he ordered from Shapeways designed to secure the eurocard form factor parts.