The problem with hanging on to old consumer products is that the original batteries no longer hold a charge. To make matters worse, replacement batteries ordered online have likely been sitting on a warehouse shelf for years and are no better. [Larry G] faced this issue with his old Nintendo DS Lite. Luckily he remembered a hack from his youth where a friend’s Dad had duct-taped a massive alkaline D-cell battery pack to the back of a Gameboy to give it a longer life. And so [Larry] gave new life to his Nintendo DS Lite by designing and 3D printing a case for a battery with an even larger capacity than the original.
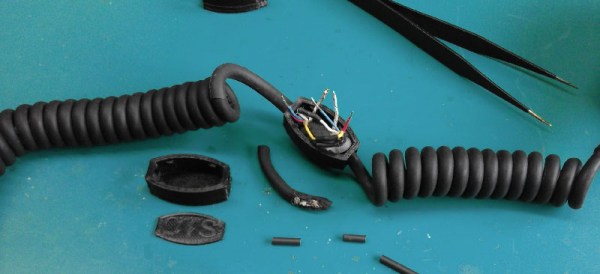
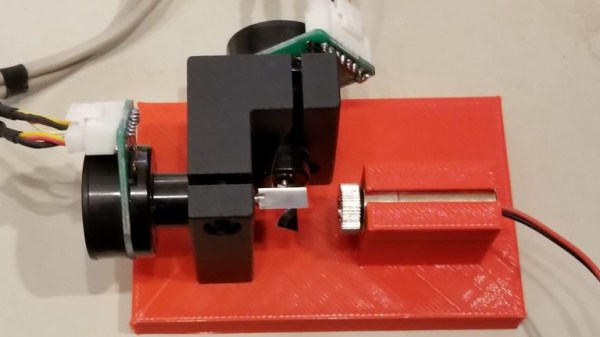
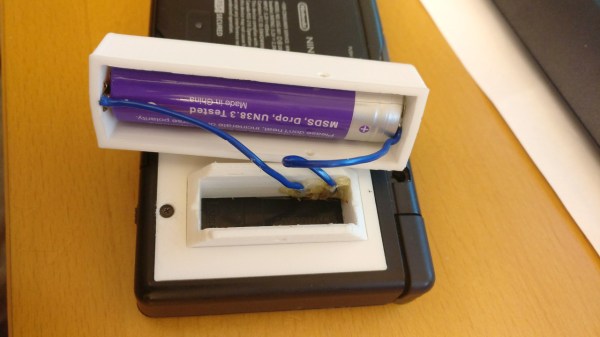
He first obtained a 2400 mAh 18650 lithium-ion cell, one with over voltage and under voltage protection. With that as a guide, he designed and 3D printed a case for it made up of four printed parts. The case was needed because the 18650 doesn’t fit in the NDS Lite’s battery compartment. Instead, one of the parts, which he calls the fake battery, fits in the compartment and has copper strips glued to it for connecting to the NDS Lite. From there, wires go to another part wherein sits the 18650. The remaining parts secure it all in place. Charging is done using the NDS Lite’s built-in charger. Even though the new case adds significant bulk, it actually fits well in the hand.
No doubt many of you have your own old NDS Lite sitting around that can benefit from this repair. The project details and STL files can be found on his Hackaday.io page using the above link.
This is also [Larry]’s entry for our Repairs You Can Print contest which puts him in the running for one of two Prusa i3 Mk3s plus the multi-material upgrade.
![A Chevy Corvair (not [Ken]'s one). Greg Gjerdingen [CC BY 2.0].](https://hackaday.com/wp-content/uploads/2018/02/1024px-flickr_-_dvs1mn_-_64_chevrolet_corvair_monza_1.jpg)