Ditch OpenSCAD For C++

There’s an old saying that a picture is worth a thousand words. If you’ve ever tried to build furniture or a toy with one of those instructions sheets that contains nothing but pictures, you might disagree. 3D design is much the same for a lot of people. You think you want to draw things graphically, but once you start doing complex things and making changes, parametric modeling is the way to go. Some CAD tools let you do both, but many 3D printer users wind up using OpenSCAD which is fully parametric.

If you’ve used OpenSCAD you know that it is like a simple programming language, but with some significant differences from what you normally use. It is a good bet that most Hackaday readers can program in at least one language. So why learn something new? A real programming language is likely to have features you won’t find readily in OpenSCAD that, in theory, ought to help with reuse and managing complex designs.

I considered OpenJSCAD. It is more or less OpenSCAD for JavaScript. However, JavaScript is a bit of a scripting language itself. Sure, it has objects and some other features, but I’m more comfortable with C++. I thought about using the OpenCSG library that OpenSCAD uses, but that exposes a lot of detail.

Instead, I turned to a project that uses C++ code to generate OpenSCAD output, OOML (the Object Oriented Mechanics Language)). OpenSCAD does the rendering, exporting, and other functions. Unfortunately, the project seems to have stalled a few years back and the primary web-based documentation for it seems to be absent. However, it is very usable and if you know how to find it, there is plenty of documentation available.

Why not OpenSCAD?

Continue reading “Ditch OpenSCAD For C++”

RooBee One, An Open-source SLA/DLP 3D Printer

[Aldric Negrier] is no stranger to the 3D printing world. Having built a few already, he designed and built an SLA/DLP 3D printer, named RooBee One, sharing the plans on Instructables. He also published tons of other stuff, like a 3D Printed Syringe Pump Rack and a 3D Scanning Rig And DIY Turntable. It’s really worth while going through his whole Instructables repository.

This open-source 3D printer was inspired by the Cristelia – SLA/LCD 3d printer and the Vulcanus MAX 3D printer (that he designed). RooBee One has an aluminium frame and an adjustable print area of 80x60x200 mm, with up to 150x105x200mm build volume using an ACER DLP projector. In addition, a fan on top of the printer was added to extract the toxic vapours outside and away from the printer operator. The electronics are based on the Arduino MEGA with the RAMPS 1.4 shield and one NEMA 17 stepper motor. As for the Arduino Mega firmware, [Aldric] choose to use Repetier, which he usually uses in his other printers.

The SLA resin he used is the Standard Blend Resin from Fun to Do Resins. These resins tend to release toxic airborne particles, so extra care should be taken to ventilate the area while printing and also do a proper cleaning afterwards.

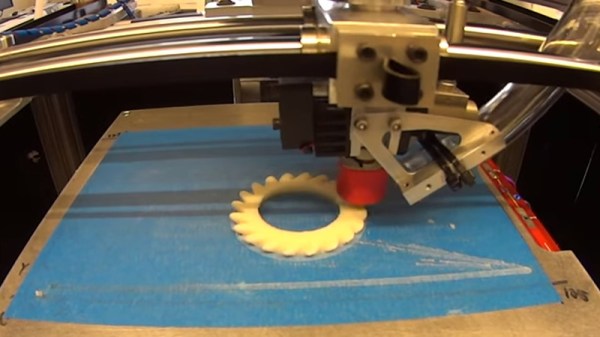
You can get a glimpse of the printer making a small gear come to life in the following video:

Continue reading “RooBee One, An Open-source SLA/DLP 3D Printer”

3D Printed Mini-Printer Enables Obsession With Lists

When going about a busy day, a hard copy listing all your tasks helps if you aren’t inclined to pull up a notepad — or whatever app you use — on your phone each time; doubly so if you want to pin it up in one place to refer to. Besides, using a full sheet of paper for a few items is impractical — and wasteful. To that end, [Jed Hodson] has concocted a mini printer for all your listing needs.

[Hodson] designed and 3D printed the case, making the files available for download and instructions on how to assemble it. Being an IoT device, the printer uses a Photon board to connect to the Internet, wherein Microsoft Flow is used to liaise between the Adafruit printer and Wunderlist — the list app [Hodson]’s chosen for this project.

Continue reading “3D Printed Mini-Printer Enables Obsession With Lists”

Smartphone Case For The Retro Gamer

A well-designed phone case will protect your phone from everyday bumps with only as much style flair as you’d like. While protection is usually the only real function of a case, some designs — like [Gabbelago]’s Emucase — add specific utility that you might not have known you needed.

Contrary to most cases, the Emucase fits over your phone’s screen, and the resulting facelift emulates the appearance of a Game Boy for easier — you guessed it — Game Boy emulation play on your smartphone.

Cannibalizing a USB SNES gamepad for its buttons and rubber contact pads, Gabbelago then threaded some wire through the contacts, securing it with copper tape and glue; this provides a measurable level of capacitance to register on the touchscreen. Using heat to bend the sides of the 3D printed case so it can attach to the phone is probably the trickiest part of this cool project. Check out his build instructions for any pointers you need.

Continue reading “Smartphone Case For The Retro Gamer”

Sorting Resistors With 3D Printing And A PIC

If you aren’t old enough to remember programming FORTRAN on punched cards, you might be surprised that while a standard card had 80 characters, FORTRAN programs only used 72 characters per card. The reason for this was simple: keypunches could automatically put a sequence number in the last 8 characters. Why do you care? If you drop your box of cards walking across the quad, you can use a machine to sort on those last 8 characters and put the deck back in the right order.

These days, that’s not a real problem. However, we have spilled one of those little parts boxes — you know the ones with the little trays. We aren’t likely to separate out the resistors again. Instead, we’ll just treasure hunt for the value we want when we need one.

[Brian Gross], [Nathan Lambert], and [Alex Parkhurst] are a bit more industrious. For their final project in [Bruce Land’s] class at Cornell, they built a 3D-printed resistor sorting machine. A PIC processor feeds a resistor from a hopper, measures it, and places it in the correct bin, based on its value. Who doesn’t want that? You can see a video demonstration, below.

Continue reading “Sorting Resistors With 3D Printing And A PIC”

Fully 3D Printed Snow Blower

For anyone living in cooler climates, the annual onslaught of snow means many hours shoveling driveways and sidewalks. After a light snow, shoveling might seem a waste of time, while a snow blower would be overkill. If only there were a happy middle ground that required minimal effort; perhaps an RC snow groomer with a 3D printed snow blower would work.

We featured an earlier version of this project last year. This year’s model features a slipper clutch — combined with a differential from a heavy RC truck — to forestall damage to the attachment if you happen to hit any rocks or ice chunks. The blades are also thicker and lack teeth in this iteration, as they would catch on anything hard and shatter the blade more often than not. Designed by [Spyker Workshop] (aka [The_Great_Moo]) the snow blower attaches to the front of RC snow groomer — which is originally meant to act like a plow. Seeing the snow blower attachment in action, we’re inclined to believe that he may be onto something.

Continue reading “Fully 3D Printed Snow Blower”

Liar’s 3D Printing: Multiple Colors With One Extruder

Good 3D printers now have multiple hot ends. You ought to be able to print in different colors or print support material. However, a lot of us don’t have multiple hot ends. Turns out, you don’t have to have multiple hot ends to print in multiple colors. To accomplish that you need a lot of patience and the willingness to tell bald-faced lies. Don’t worry, though, you’ll only be lying to some computer hardware and software, so that doesn’t count.

You may have seen people talk about putting a pause between layers to switch from one color to another. That works, but it limits your options. For example, if you want to put some colored text on a different colored background, you have to either have the text poke out, or it has to be “under” the background. It can’t be flush if you only have a single extruder and hot end. My method is a lot more trouble, but it can generate good results.

Keep in mind, with hobby-grade printers, multiple color printing has a lot of problems even if you do have multiple extruders. This isn’t a panacea. But you can get results on par with a similar printer that has multiple heads.

Bottom Line Up Front

Here are a few pictures of test prints that use this technique. A Monoprice Mini printer with the stock extruder and hot end created them using different PLA filament. On the left is a test cube, with a color spot in the middle of the layers (as well as some spots on the top surface you can’t see). To the right is a plate with my call sign in a contrasting color. It is hard to tell in the picture, of course, but there is one surface. The text is at the same height as the yellow surface.

I didn’t spend a lot of time making these prints since I was more focused on perfecting the methodology. The layer heights aren’t very fine, the infill is sparse, and the print speed was fast. However, you could invest time into making better-looking prints. You can also use the usual techniques that you use with a “real” multi-extrusion printer (such as priming towers, ooze shields, etc.).

Continue reading “Liar’s 3D Printing: Multiple Colors With One Extruder”