Repurposing Inkjet Technology For 3D Printing

You would be forgiven for thinking that 3D printing is only about plastic filament and UV-curing resin. In fact, there are dozens of technologies that can be used to create 3D printed parts, ranging from welders mounted to CNC machines to the very careful application of inkjet cartridges. For this year’s Hackaday Prize, [Yvo de Haas] is modifying inkjet technology to create 3D objects. If he gets this working with off-the-shelf parts, this will be one of the most interesting advances for 3D printing in recent memory.

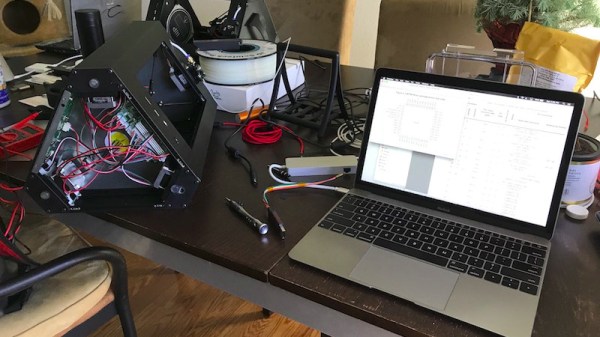
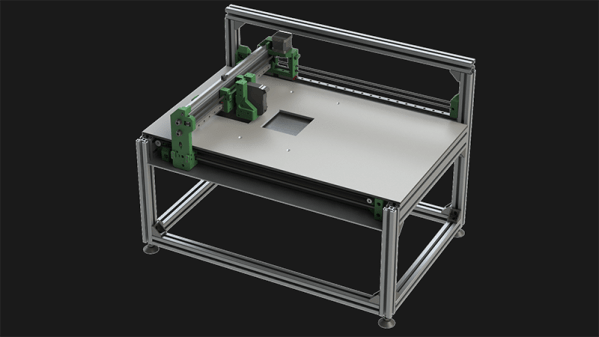
The core of this build is a modification of HP45 inkjet print heads to squirt something other than overpriced ink. To turn this into a 3D printer, [Yvo] is filling these ink cartridges with water or alcohol. This is then printed on a bed of powder, either gypsum, sugar, sand, or ceramic, with each layer printed, then covered with a fine layer of powder. All of this is built around a 3D printer with an X/Y axis gantry, a piston to lower the print volume, and a roller to draw more powder over the print.

The hardest part of this build is controlling the inkjet cartridge itself, but there’s prior work that makes this job easier. [Yvo] is successfully printing on paper with the HP45 cartridges, managing to spit out 150 x 150 pixel images, just by running the cartridge over a piece of paper. Already that’s exceptionally cool, great for graffiti, and something we can’t wait to see in a real, working printer.

You can check out [Yvo]’s handheld printing efforts below.

Continue reading “Repurposing Inkjet Technology For 3D Printing” →
RoMA: Robotic modeling assistant

3D Printing And Modelling With A Robot Assistant

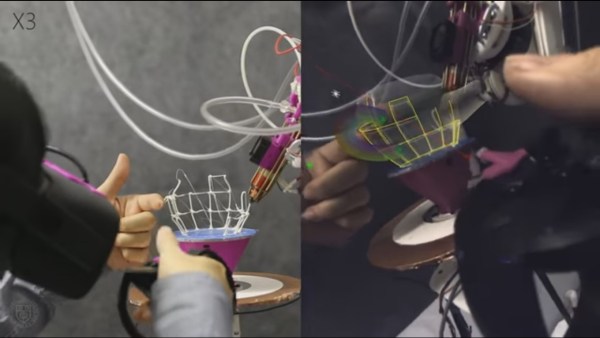
[Huaishu Peng] and a group of other researchers have come up with a system that allows them to use virtual reality (VR) to model an object in a space in front of them while a robot simultaneously 3D prints that object in that same space, a truly collaborative effort they call the RoMA: Robotic Modelling Assistant. This is a step toward fixing the problem of designing something and then having to wait for the prototype to be made before knowing how well it fits the design goals.

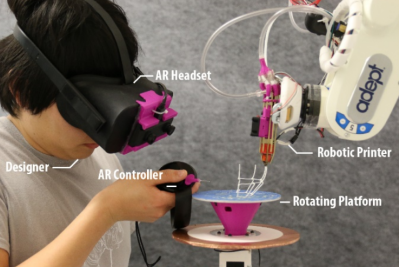
The parts: designer, AR headset, AR controller, rotating platform, robotic printer
The parts

How does the designer/robot collaboration work? The designer wears an Oculus Rift VR headset with a camera mounted to the front, turning it into an AR (Augmented Reality) headset. In front of the designer is a rotating platform on which the object will be 3D printed. And on the other side of the platform is the 3D printing robot. In the AR headset, the designer views the platform, the object, and the robot as seen by the camera but with the model he’s working on overlayed onto the object. An AR hand controller allows him to work on the model. Meanwhile, the robot 3D prints the model. See it in action in the video below.

Continue reading “3D Printing And Modelling With A Robot Assistant” →

3D Printer Halts And Catches Fire — Analysis Finds A Surprising Culprit

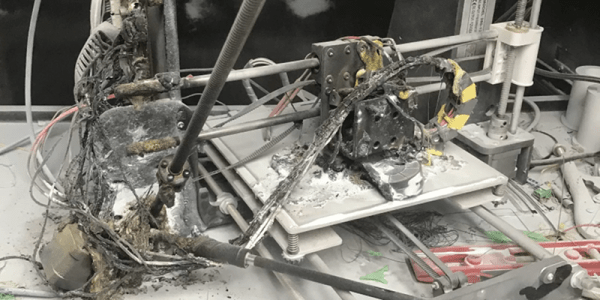
Let’s build a robot that gets hot. Really hot — like three times hotter than McDonald’s coffee. Then make it move around. And let’s get the cost in at around $100. Sounds crazy? Not really, since that describes the cheap 3D printers we all have been buying. [John] found out the hard way that you really need to be careful with hot moving parts.

The short story is that [John’s] Anet A8 caught on fire — significantly caught on fire. Common wisdom says that cheap printers often don’t have connectors for the heated bed that can handle the current. There have been several well-publicized cases of those connectors melting, especially on early production models of several printers. However, this printer had an add-on heater with a relay, so that shouldn’t be the problem. Of course, a cheap power supply could do it, too, but the evidence pointed to it being none of those things.

Continue reading “3D Printer Halts And Catches Fire — Analysis Finds A Surprising Culprit” →

3D Printed Stethoscope Makes The Grade

On the off chance that initiatives like the Hackaday Prize didn’t make it abundantly clear, we believe strongly that open designs can change the world. Putting technology into the hands of the people is a very powerful thing, and depending on where you are or your station in life, can quite literally mean the difference between life and death. So when we saw that not only had a team of researchers developed a 3D printable stethoscope, but released everything as open source on GitHub, it’s fair to say we were pretty interested.

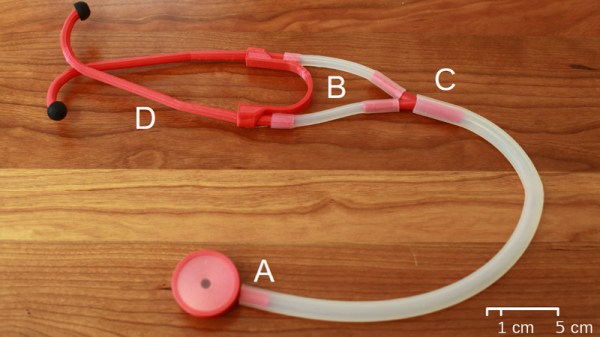
The stethoscope has been in development for several years now, but has just recently completed a round of testing that clinically validated its performance against premium brand models. Not only does this 3D printed stethoscope work, it works well: tests showed its acoustic performance to be on par with the gold standard in medical stethoscopes, the Littmann Cardiology III. Not bad for something the researchers estimate can be manufactured for as little as $3 each.

All of the 3D printed parts were designed in OpenSCAD (in addition to a Ruby framework called CrystalSCAD), which means the design can be evaluated, modified, and compiled into STLs with completely free and open source tools. A huge advantage for underfunded institutions, and in many ways the benchmark by which other open source 3D-printable projects should be measured. As for the non-printed parts, there’s a complete Bill of Materials which even includes links to where you can purchase each item.

The documentation for the project is also exceptional. It not only breaks down exactly how to print and assemble the stethoscope, it even includes multi-lingual instructions which can be printed out and distributed with kits so they can be assembled in the field by those who need them most.

From low-cost ultrasounds to truly personalized prosthetics, the future of open source medical devices is looking exceptionally bright.

[Thanks to Qes for the tip]

3D Printed Antenna Is Broadband

Antennas are a tricky thing, most of them have a fairly narrow range of frequencies where they work well. But there are a few designs that can be very broadband, such as the discone antenna. If you haven’t seen one before, the antenna looks like — well — a disk and a cone. There are lots of ways to make one, but [mkarliner] used a 3D printer and some aluminum tape to create one and was nice enough to share the plans with the Internet.

As built, the antenna works from 400 MHz and up, so it can cover some ham bands and ADS-B frequencies. The plastic parts act as an anchor and allow for coax routing. In addition, the printed parts can hold a one-inch mast for mounting.

Continue reading “3D Printed Antenna Is Broadband” →

Laser Cut Your 3D Printed Trash

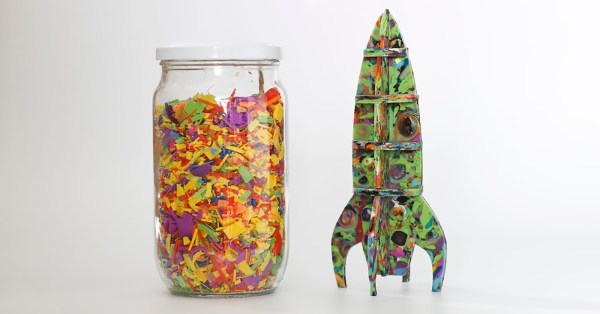
If you have a 3D printer, you’re surrounded by plastic trash. I’m speaking, of course, of failed prints, brims, and support material that builds up in the trash can near your printer. Although machines that turn that trash into filament exist, they’re not exactly common. But there’s another way to turn that waste into new building materials. [flowalistic], 3D designer extraordinaire, is using that trash to create panels of plastic and throwing that into a laser cutter. It’s a plastic smoothie, and if you can sort your scrap by color, the results look fantastic.

The first step in turning garbage plastic into a plastic sheet is throwing everything into a blender. Only PLA was used for this experiment because using ABS will release chlorine gas. These plastic fragments were placed in the oven, on a cookie sheet with a sheet of parchment paper. After about a half an hour of baking at 200 °C, the sheet was pressed between sheets of wood and left to cool. From there, the PLA sheet was sent to the laser cutter where it can be fabricated into rings, models, coasters, spirographs, and toys.

While this is an interesting application of trash using parts and equipment [flowalistic] had sitting around — therefore, a hack — it must be noted this should never be replicated by anyone. That big bag of scrap plastic could contain ABS, and you should never put ABS in a laser cutter unless you want your workspace to smell awful. And/or be sure to crack a window.

Unbricking A 3D Printer The Hard Way: By Writing A Bootloader

There’s a sinking feeling when a firmware upgrade to a piece of equipment goes wrong. We’ve all likely had this happen and  bricked a device or two. If we are lucky we can simply reapply the upgrade or revert to a previous version, and if we’re unlucky we have to dive into a serial debug port to save the device from the junk pile. But what happens when both those routes fail? If you are [Arko], you reverse-engineer the device and write your own bootloader for it.

The offending bricked object was a Monoprice MP Mini Delta 3D printer to which he was foolhardy enough to apply new firmware after seeing a friend’s machine taking it without issue. Finding the relevant debug interface on its main PCB he applied the firmware upgrade again, only to realise that in doing so he had overwritten its bootloader. The machine seemed doomed, but he wasn’t ready to give up.

What follows in his write-up is a detailed examination of the boot mechanism and memory map of an ARM Cortex M0 processor as found in the Monoprice’s STM32F070CB. We learn about vector tables for mapping important addresses of interrupts and execution points, and the mechanics of a bootloader in setting up the application it launches. This section is well worth a read on its own, even for those with no interest in bricked 3D printers.

In the end he had a working bootloader to which he appended the application firmware, but sadly when he powered up the printer there was still no joy. The problem was traced to the serial connection between the ARM doing the printer’s business and the ESP8266 running its display. After a brainstorm suggestion with a friend, a piece of code was found which would set the relevant registers to allow it to run at the correct speed.

So after a lot of work that resulted in this fascinating write-up, there was a working 3D printer. He suggests that mere mortals try asking Monoprice for a replacement model if it happens to their printers, but we’re extremely glad he persevered. Without it we would never have had this fascinating write-up, and would be the poorer without the learning experience.

This isn’t the first time we’ve brought you 3D printer bootloader trickery.