Did you know that most of the current advances in desktop consumer 3D printing can be traced back to a rather unknown project started in 2005? This little-known RepRap project was dedicated to building Open Source hardware that was self-replicating by design. Before the great mindless consumerization of 3D printing began, the RepRap project was the greatest hope for Open Source hardware, and a sea change in what manufacturing could be.
While the RepRap project still lives on in companies like Lulzbot, Prusa, SeeMeCNC, and others, the vast community dedicated to creating Open Hardware for desktop manufacturing has somehow morphed into YouTube channels that feature 3D printed lions, 3D printed Pokemon, and a distinct lack of 3D printed combs. Still, though, there are people out there contributing to the effort.
[Nick Seward] is famous in the world of RepRap. He designed the RepRap GUS Simpson, an experimental 3D printer that is able to print all of its components inside its own build volume. The related LISA Simpson is an elegant machine that is unlike any other delta robot we’ve seen. He’s experimented with Core XZ machines for years now — a design that is only now appearing on AliBaba from random Chinese manufacturers. In short, [Nick Seward] is one of the greats of the RepRap project.
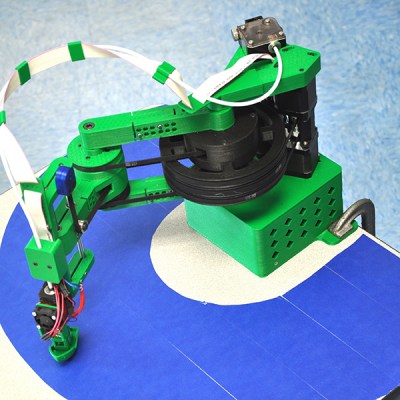 [Nick] is designing a new kind of RepRap, and he’s entered it in the Hackaday Prize. It can print most of its own component parts, it has an enormous build volume, and it’s unlike any 3D printer you’ve seen before. It’s a SCARA — not a, ‘robotic arm’ because SCARA is an acronym for Selective Compliance Articulated Robot Arm — that puts all the motors in the non-moving portion of the base. Its design is inspired by the RepRap Morgan, a printer whose designer won $20,000 in the GADA prize for being mostly self-replicating.
Improvements over the RepRap Morgan include a huge build volume (at least three 200x200mm squares can be placed in this printer’s build volume), a relatively fast print speed, high accuracy and precision, and auto bed leveling. Despite being more capable than some RepRap printers in some areas, the RepRap Helios should wind up being cheaper than most RepRap printers. It can also print most of its component parts, bringing us ever closer to a truly self-replicating machine.
You can check out a few of the videos of this printer in action below.
Continue reading “Hackaday Prize Entry: RepRap Helios” →