Fitting 3D Prints In A Snap

The good news is that 3D printing lets you iterate on your design until it is just right. The bad news is that you often have to iterate your design over and over to get things to fit together. It is a little easier if you are designing both parts, but matching sizes and positions on a printed part that fits something that already exists can be a pain. Sure, you can grab the calipers and make fidgety measurements — but [Maker Tales] has a different approach. As you can see in the video below, he takes a photo, imports it into CAD, scales it, and then uses it as a reference.

If you have one, you could, of course, scan the existing part. However, if you’ve ever tried that, results vary wildly, especially with cheap hardware. [Maker Tales] just takes a picture with his phone, trying to get as straight as possible and from a distance. Once in CAD, he makes one measurement and scales the image to the correct size.

This is one of those things that should be obvious, but you don’t always think it through. Of course, it is possible to measure everything precisely or — even better — if you have the original CAD or drawing for the part that has exact measurements. But compared to making numerous precise measurements, this method is a lot less work and gives good results.

If you are creating mating parts, think about shadow lines. Many commercial parts now have CAD models as STEP files if you want to skip the scanning.

Continue reading “Fitting 3D Prints In A Snap”

[Thomas Sanladerer]’s YouTube Channel Goes In The Toilet

We like [Thomas Sanladerer], so when we say his channel has gone in the toilet, we mean that quite literally. He had a broken toilet and wanted to compare options for effecting a 3D printed repair. The mechanism is a wall-mounted flush mechanism with a small broken plastic part. Luckily, he had another identical unit that provided a part that wasn’t broken.

The first attempt was to 3D scan the good part. The first scanner’s software turned out to be finicky, and [Thomas] finally gave up on it. He finally used a handheld scanner which took about a half hour. It wasn’t, of course, perfect, so he also had to do some more post-processing.

The next step was to make measurements and draw the part in CAD. It took the same amount as the scan, and it is worth noting that the part had curves and angles — it wasn’t just a faceplate. The printed results were good, although a measurement error made the CAD model bind a bit instead of pivoting the way it should. The scan, of course, got it right.

A quick revision of the design solved that problem but, of course, it added some time to the process. At the end, he noticed that the scanned “good” part was also broken but in a different way. He added the additional part, which didn’t seem to bother the function. The scanned object required a little trimming but nothing tremendous.

In the end, the scanning was a bit quicker, partly because it didn’t suffer from the measurement error. However, [Thomas] noted that it was more fun to work in CAD. We thought the results looked better, anyway. [Thomas] thinks the scanners, at least the budget ones, are probably better for just getting reference objects into CAD to guide you when you create the actual objects to print.

It isn’t hard to make a cheap scanner. Some of the open designs are quite sophisticated.

Continue reading “[Thomas Sanladerer]’s YouTube Channel Goes In The Toilet”

Get A Fresh Build Plate At The Push Of A Button

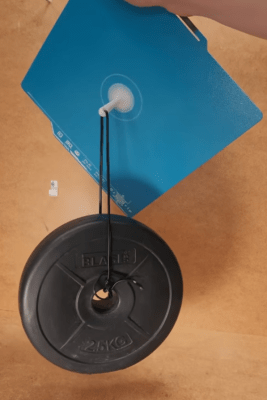
For best results, a build sheet for a 3D printer’s print bed should be handled and stored by the edges only. To help make that easier, [Whity] created the Expandable Steel Sheet Holder system that can store sheets efficiently without touching their main surfaces, and has a clever mechanism for ejecting them at the push of a button.

Pushing the button (red, bottom left) pivots the section at the top right, ejecting the plate forward for easy retrieval.

The design is 3D printable and made to be screwed to the bottom of a shelf, which is great for space saving. It can also be extended to accommodate as many sheets as one wishes, and there’s a clever method for doing that.

Once the first unit is fastened to a shelf, adding additional units later is as simple as screwing them to the previous one with a few M3 bolts, thanks to captive nuts in the previously-mounted unit. It’s a thoughtful feature that makes it easy to expand after the fact. Since build sheets come in a variety of different textures and surfaces for different purposes, one’s collection does tends to grow.

Interested, but want it to fit some other manufacturer’s sheets? The design looks easy to modify, but before you do that, check out the many remixes and you’re likely to find what you’re looking for. After all, flexible magnetic build sheets are useful in both resin and filament-based 3D printing.

Clean Up Your Resin-Printing Rinse With Dialysis

There’s a lot to like about resin 3D printing. The detail, the smooth surface finish, the mechanical simplicity of the printer itself compared to an FDM printer. But there are downsides, too, not least of which is the toxic waste that resin printing generates. What’s one to do with all that resin-tainted alcohol left over from curing prints?

How about sending it through this homebrew filtering apparatus to make it ready for reuse? [Involute] likens this process to dialysis, and while we see the similarities, what’s going on here is a lot simpler than the process used to filter wastes from the blood in patients with failing kidneys — there are no semipermeable membranes used here. Not that the idea suffers from its simplicity, mind you; it just removes unpolymerized resin from the isopropyl alcohol rinse using the same photopolymerization process used during printing. Continue reading “Clean Up Your Resin-Printing Rinse With Dialysis”

3D Printed — Um — Hook And Loop Fasteners

[Teaching Tech’s] latest video discusses “3D printed Velcro.” But as even he admits, Velcro is a trademark, so we think it is more appropriate to talk about hook and loop fasteners. In fact, you can see the good-natured official video about the trademark below [Teaching Tech’s] video. Regardless, his experiments with several 3D-printed Vel… fastener designs are worth watching.

Some of the designs were rather large, like we would have expected. However, some of the designs were fairly small and looked almost like real Velcro. However, since the pattern is not as random as the fabric portions of the real deal, it seems like alignment between parts is more critical when you are joining the two halves.

Continue reading “3D Printed — Um — Hook And Loop Fasteners”

Developing A 4,500 RPM Twin-Cylinder Air Engine

Compressed air isn’t really a practical form of energy storage for headline uses like transport or heating, but it’s a fun thing to tinker with at the small scale. [Tom Stanton] is plenty experienced in that area, having built a series of compressed air engines over the years. His latest effort is capable of running at up to 4,500 RPM, and delivering a full 0.05 horsepower.

Two-cylinder power!

[Tom’s] ultimate goal is to put his new tiny air engine on a small model aircraft. To enable consistent performance, his engine needs a regulator, but off-the-shelf models for industrial use were too hefty for his use. Thus, he set about equipping his engine with a lightweight regulator of his own 3D-printed design.

His latest ball-valve air engine was then designed to run on this lower regulated pressure of approximately 30 psi. It initially proved less efficient than his previous designs, but some engineering analysis revealed the problem. [Tom] does a great job of stepping through his process of understanding how these engines perform, and how he uses these findings to guide his design choices going forward.

It’s also great to see a YouTuber not just building fun things, but taking measurements and doing some real engineering. [Tom’s] air engines keep getting better, and we can’t wait to see where he takes his designs next.

Continue reading “Developing A 4,500 RPM Twin-Cylinder Air Engine”

Hackaday Prize 2023: Gen5X A Generatively Designed 5-Axis 3D Printer

[Ric Real] is entering the 2023 Hackaday Prize with the Gen5X, a generatively designed 3D printed five-axis 3D printer. The concept is not a new one, with the type of construction being seen a few times here and there. In addition to the usual three directions of motion, we’re familiar with, with the cartesian bot design, these types of machines add an additional two rotation axes, one which can swing the build platform front and back around the X-axis, and a second that provides rotation around the Z-axis. These combined motions give rise to some very interesting capabilities, outside of our familiar 3D printing design constraints.

As for the generative side of things, this is a largely theoretical idea. Essentially the concept is that the machine’s design can be iteratively updated and optimised for performance to fit into the constraints of available hardware such as motors and other ‘vitamins’ needed to create the next generation of machines. The design files should be parameterised enough such that this optimisation process can be automated, potentially via input from AI, but we suspect we’re a way off from that yet. Whether this project as yet satisfies any of these lofty goals remains to be seen, but do keep an eye on it if you’re so inclined. There is a Fusion 360 project here to dig into, but if you’re not interested in the research side of the project, but just want to build a 5-axis machine to play with, then you can find the project source on the GitHub Page.

If this feels familiar, you’d be on the right track, as we covered at least one other 5D printer recently. We have also touched upon generative design at least once. We’re sure we will see more on this topic in the future.

Continue reading “Hackaday Prize 2023: Gen5X A Generatively Designed 5-Axis 3D Printer”