If there’s one problem with the RepRap, it’s the cost of filament. Sure, there’s also the computationally difficult problem of slicing 3D models, but a 5 to 10 times markup on turning plastic pellets into filament is the biggest problem. It’s even a bigger problem than the problems of compatibility and interchangeable parts that comes with everyone forking a ‘standard’ printer design dozens of times. The cost of filament, though, is the biggest problem, right up there with RepRap developers focusing nearly entirely on different printer designs instead of the software, firmware, and electronics that are also vitally important to the RepRap project.
Nearly a year ago, we caught wind of a competition to create a home-based filament manufacturing station that takes cheap plastic pellets available for about $5/kg and turns them in to 3D printer filament that usually sells for $50/kg. A winner for this competion has finally been announced. The winner, [Hugh Lyman] just won $40,000 for his home filament creation station, the Lyman Filament Extruder
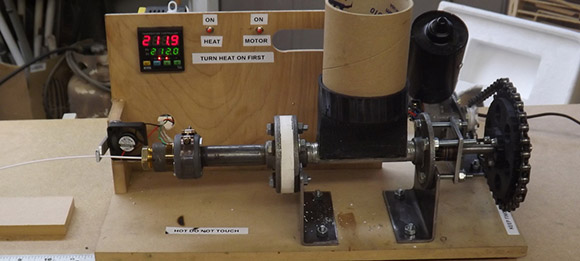
The goal of the Desktop Factory Competition was to create a machine that produces filament suitable for 3D printers with a total build cost of under $250 USD. [Lyman] met the goal by using a few motors, 3D printed parts, a PID controller, and off the shelf auger drill bit (that’s the actual model and supplier he used, by the way) that is able to reliably churn out plastic filament.
If you want to build your own Lyman Extruder, all the plans are up on Thingiverse, but LulzBot, the awesome people who gave us a 3D printer, hope to sell a pre-assembled version of this extruder sometime in the future, hopefully with a chain guard around that sprocket.