Injection Molds From Your 3D Printer

Last time we checked in with [CrafsMan] he had bought a benchtop injection molding machine. This time, he shows off how to 3D print molds. If you have ever had to spend to make tooling for injection molding, you’ll appreciate being able to make molds relatively inexpensively.

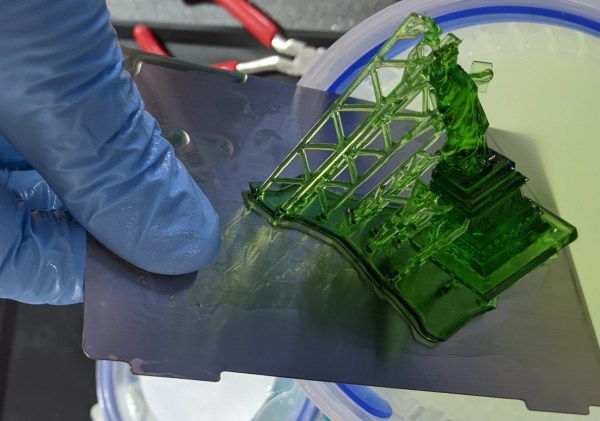
To test his workflow, [CrafsMan] created a little 3D figurine and brought it into TinkerCad. From there he created a mold and used Lychee Slicer to print it using resin.

Continue reading “Injection Molds From Your 3D Printer”

DIY Fume Extractor Keeps Air Clean While You Solder

Soldering is a key skill to learn when building electronics, but it’s also a process that can put out a lot of fumes. The best way to deal with this is to use a fume extractor. Of course, you can always make your own, as [Open Green Energy] ably demonstrates. It’s a guided build of the design [rdmmkr] published on Thingiverse.

The build relies on a 120mm case fan for suction, and it’s combined with a activated carbon filter to best capture the harmful fumes from the soldering process. The fan is neatly installed inside a 3D printed enclosure of custom design, which also includes a removable tray which holds the filter material. The fan is run from a DC power supply via a barrel jack, and a basic speed controller is installed to allow the fan to be turned up higher for more suction, or lower to reduce noise.

It’s a useful item to have around the home workshop, and it’s something that you could easily whip up at home with parts from the junk bin if you’re so inclined. The benefit of 3D printing is that you can easily alter the design to suit whatever parts you have on hand.

We’ve seen a few fume extractor builds over the years, from the simple and basic to the very fancy. Video after the break.

Continue reading “DIY Fume Extractor Keeps Air Clean While You Solder”

DIY Camera Dolly Costs More Time Than Money

A camera dolly can be fantastic filmmaking tool, and [Cornelius] was determined to create his own version: the “Dope” DIY Dolly. The result not only upped his production quality, but was also entirely in line with his DIY approach to filmmaking in general.

A basic dolly design is straightforward enough: a flat platform with wheels, and some aluminum tubing upon which to roll. But while dolly assemblies are easy to purchase or rent, [Cornelius] found that his DIY version — which used easily sourced parts and about 80 hours worth of 3D printing — provided perfectly acceptable results, while opening the door to remixing and sharing with like-minded filmmakers.

Interested? Download the STL files to get started on your own version. As for the track, smooth metal pipe is best, but sometimes track made from PVC can do the job. [Cornelius] has a few additional STL files for those planning to make a base from 1″ PVC pipe, and those are on a separate download link near the bottom of the project page (here’s that link again.) Watch the Dope Dolly in action in the brief video embedded below.

On the other hand, if you prefer your DIY camera equipment to be on the smaller and more complicated end of the spectrum, be sure to check out this multi-axis camera slider.

Continue reading “DIY Camera Dolly Costs More Time Than Money”

SOL75 Uses AI To Design Standard Mechanical Parts

[Francesco] developed a parametric design tool called SOL75 which aims to take the drudgery out of designing the basic mechanical parts used in projects. He knows how to design things like gears, pulleys, belts, brackets, enclosures, etc., but finds it repetitive and boring. He would rather spend his time on the interesting and challenging portions of his project instead.

The goal of SOL75 is to produce OpenSCAD and STL files of a part based on user requirements. These parameters go beyond the simple dimensional and include performance characteristics such as peak stress, rigidity, maximum temperature, etc. The program uses OpenSCAD to generate the geometries and a core module to evaluate candidate designs. In an attempt to overcome the curse of dimensionality, [Francesco] has trained an AI oracle to quickly accept or reject candidate solutions.

In the realm of parametric design aids, you have projects like NopSCADlib which dimensionally parameterize a large collection of common objects by numbers alone ( a 100 cm long, 6.35 mm diameter brass tube with 1.22 mm wall thickness ) or industry standard specifications ( a 10 mm long M3 socket head cap screw ). This approach doesn’t take into account whether the object will hold up in your application nor does it consider any 3D printing issues. At the other extreme, there are the generative design and optimization tools found in professional packages like Fusion 360 and SolidWorks which can make organic-looking items that are optimized precisely for the specified conditions.

SOL75 seems to fall in the middle, combine characteristics of both approaches. It gives you the freedom to select dimensional parameters and performance requirements, yet bounds the solution space by only offering objects that have been prepared ahead of time by domain experts — if you ask for an L-bracket, you’ll get an L-bracket and not something that looks like a spider web or frog leg.

Once you compile the design, SOL75 generates the OpenSCAD and/or STL files and a bill of materials. But wait — there’s more– it also makes a thorough design handbook documenting the part in great detail, including the various design considerations and notes on printing. Here is a demonstration link for an electronics enclosure which is pretty interesting. There is also an example of using SOL75 to make a glider, which you can read about on the Hackaday.io project page.

For now, [Francesco] has only made SOL75 available in a register-by-email online Beta version, as he’s still undecided on what form the final version will be. Do you have any success (or failure) stories regarding generative designs? Let us know in the comments below.

3D Print In The Air With A Little Software Support

We all love 3D printing, but printing anything that has an overhang requires support, right? Maybe not. [Create Inc] has a video showing some 3D prints that seem to hang impossibly in the air — not bridges, but loops just floating in the air. You can see the effect in the video below.

The first part of the post covers gcode basics. Around the 5:30 mark, [Create] talks about his inspiration: FullControl Gcode Designer. You can do a lot with this tool and it inspired [Create’s] similar web-based version.

The point of these tools is to make it easier to create gcode directly instead of using a slicer. You can think of it as assembly language for 3D printing — you can do almost everything in the high-level language — 3D models — but if you want ultimate control you use assembly language, or, in this case, gcode.

The original tool uses Excel which didn’t visualize the output directly and could not provide proper error checking. The new tool solves those problems and is much easier to use.

If you know gcode, you can do a lot of interesting things. You can even put a spring in your step.

Continue reading “3D Print In The Air With A Little Software Support”

Big 3D-Printed Lamp Tries Some New Features

In lamp design, bulbs are usually given generous clearances because they get hot during use. LED bulbs however give off comparatively little heat, which opens a few new doors. [Mark Rehorst] created this huge 3D printed lamp, made with his custom 3D printer and a hefty 1 mm diameter nozzle, and the resulting device not only looks great, but shows off a few neat design features.

The LED filament bulb doesn’t give off much heat, so a PETG partial shade mounted directly to the bulb works fine.

[Mark] printed a partial shade in PETG that is made to sit directly on the bulb itself. The back of the shade is open, allowing light to spill out from behind while the front of the bulb is shielded, making it easier on the eyes. The result is pretty nifty, as you can see here. It sits in the center of the 600 mm tall lamp, which takes up most of the build volume of his self-made CoreXY-based printer, the UMMD.

The LED filament strands in this style of bulb are pretty neat in their own way, and some of you may remember that when they first became available as separate components, no time was lost in finding out what made them tick.

3D-Printed, Hot-Swap Keyboard PCB Generator Is Super Cool

About a month ago, [50an6xy06r6n] shared their hot swap 3D-printed circuit board for keyboard design with the mechanical keyboard subreddit. It’s more of a prototyping tool than a permanent fixture, though nothing is stopping you from using it permanently. Well, now it’s even better, and open source to boot.

[50an6xy06r6n] came up with this to test split ergo layouts faster and not have to solder anything — the switch pins make contact with the row wires and folded diode legs. In fact, prepping all the diodes is probably the thing that takes the longest.

The design can be generated from layout data, or you can convert directly from a KLE JSON file. We love how delightfully clean this keyboard breadboard generator looks, and we wish we had thought of it!

[50an6xy06r6n]’s PCB generator currently supports Cherry MX/clones and Kailh Choc switch footprints. If you want ALPS, somebody’s gonna have to send [50an6xy06r6n] some ALPS to make that happen.

As long as all the contact points are good, you should be able to use this as the final PCB indefinitely. We’ve certainly seen our share of 3D-printed wire guides. Really, you could print the whole thing, including the switches.