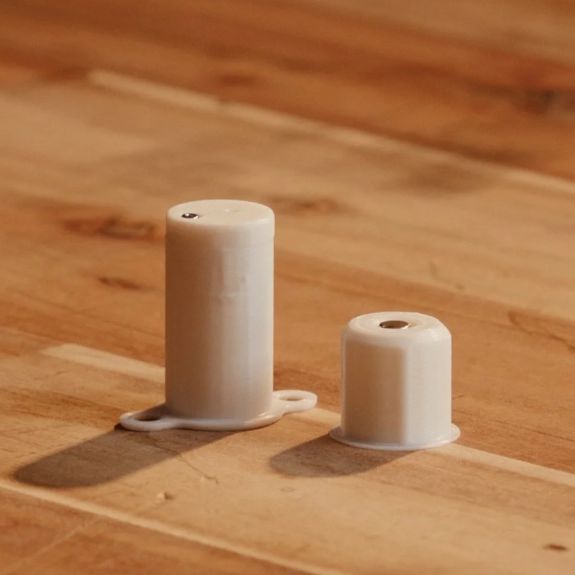
If you want smooth top surfaces on your 3D printed parts, a common technique is to turn on ironing in your slicer. This causes the head to drag through the top of the part, emitting a small amount of plastic to smooth the surface. [Make Wonderful Things] asserts that you don’t need to do this time-consuming step. Instead, he proposes using statistical analysis to identify the optimal settings to place the top layer correctly the first time, as shown in the video below.
The parameters he thinks make a difference are line width, flow ratio, and print speed. Picking reasonable step sizes suggested that there were 19,200 combinations of settings to test. Obviously, that’s too many, so he picked up techniques from famous mathematician [George E. P. Box] and also used Bayesian analysis to reduce the amount of printing required to converge on the perfect settings.
Did it work? Judging from the video, it appears to have done so. The best test pieces looked as good as the one that used traditional ironing. Compared to ironing, the non-ironed parts saved about 34% of print time. Not bad.
Of course, there are variations on traditional ironing, so your results may vary.

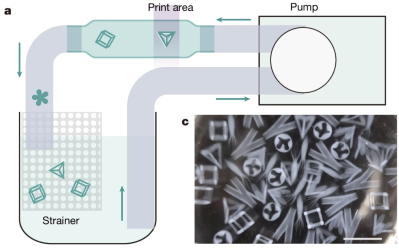 Normal volumetric printing uses a rotating volume of photosensitive resin to print nearly any geometry desired. However, this method presents issues when printing at high speeds. If you rapidly rotate a liquid, it won’t exactly stay still. So why not rotate the projector itself? This change also allows the use of less viscous resins, which is particularly useful if you want to pump fluid around.