Speed-Test Your Toys With Die-Cast Drag Strip

I’m sure many of us remember building toy car race tracks as kids, racing the cars, and then arguing over which car came in first and who cheated because they let go of their car too soon. Ah, good times. [Phil] wanted to create a drag strip race track for his son to introduce him to die-cast cars. The only commercial drag strip [Phil] could find didn’t have an electronic start gate or a timer, so he created his own with the help of an Arduino, a servo, and some light dependent resistors.

The Arduino controls everything, the button input, the lightrace2 sensor input, and the servo. A button press tells the Arduino to start the race by pulling the start gate down and starting the timer. When the light sensor is covered, the timer for that lane stops. The time is shown for each lane using a different colored 4-digit 7-segment LED.

There were a couple of problems that had to be solved. The servo launching the cars was pulling too much power when activated so that the IR LEDs used at the finish line would dim enough to trigger before the race had even begun! [Phil]’s article goes over these issues and his design ideas as he built the track.

It’s a simple build that should provide hours of fun for [Phil]’s son and his friends over the years and will hopefully put to rest any arguments over who won. There are lots of photos in [Phil]’s article, as well as several videos showing off how things work and at the end of the article, he includes the code he used to control everything. This would be a great surprise for any nieces and nephews coming to visit over the holidays — you might want to wait for final assembly and include them in the fun!

If you like these kind of projects, we’ve seen a similar Hot Wheels timing system, and a different kind of race track based on a turntable system.

Continue reading “Speed-Test Your Toys With Die-Cast Drag Strip”

Revealed: Homebrew Controller Working In Steam VR

[Florian] has been putting a lot of work into VR controllers that can be used without interfering with a regular mouse + keyboard combination, and his most recent work has opened the door to successfully emulating a Vive VR controller in Steam VR. He uses Arduino-based custom hardware on the hand, a Leap Motion controller, and fuses the data in software.

We’ve seen [Florian]’s work before in successfully combining a Leap Motion with additional hardware sensors. The idea is to compensate for the fact that the Leap Motion sensor is not very good at detecting some types of movement, such as tilting a fist towards or away from yourself — a movement similar to aiming a gun up or down. At the same time, an important goal is for any added hardware to leave fingers and hands free.

Continue reading “Revealed: Homebrew Controller Working In Steam VR”

Real-Time Planet Tracker With Laser-Point Accuracy

Space. The final frontier. Unfortunately, the vast majority of us are planet-locked until further notice. If you are dedicated hobbyist astronomer, you probably already have the rough positions of the planets memorized. But what if you want to know them exactly from the comfort of your room and educate yourself at the same time? [Shubham Paul] has gone the extra parsec to build a Real-Time Planet Tracker that calculates their locations using Kepler’s Laws with exacting precision.

An Arduino Mega provides the brains, while 3.5-turn-pan and 180-degree-tilt servos are the brawn. A potentiometer and switch allow for for planet and mode selection, while a GPS module and an optional MPU9250 gyroscope/magnetometer let it know where you are. Finally a laser pointer shows the planet’s location in a closed room. And then there’s code: a lot of code.

The hardware side of things — as [Shubham Paul] clarifies — looks a little unfinished because the focus of the project is the software with the intent to instruct. They have included all the code they wrote for the RTPT, providing a breakdown in each section for those who are looking to build their own.

Continue reading “Real-Time Planet Tracker With Laser-Point Accuracy”

Make Your Own Arduino Header Pins

There are two kinds of people in the world (and, no, this isn’t a binary joke). People who love the Arduino, and people who hate it. If you’ve ever tried to use a standard prototype board to mount on an Arduino, you’ll know what kind of person you are. When you notice the pins aren’t on 0.1 inch centers, you might think, “What the heck were those idiots thinking!” Or, you might say, “How clever! This way the connectors are keyed to prevent mistakes.” From your choice of statement, we can deduce your feelings on the subject.

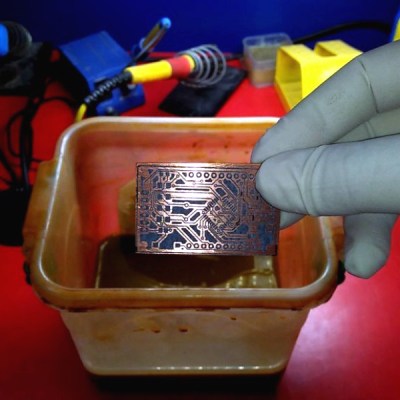
[Rssalnero] clearly said something different. We weren’t there, but we suspect it was: “Gee. I should 3D print a jig to bend headers to fit.” Actually, he apparently tried to do it by hand (we’ve tried it, too). The results are not usually very good.

He created two simple 3D printed jigs that let you bend an 8-pin header. The first jig bends the correct offset and the second helps you straighten out the ends again. You can see the result in the picture above.

Continue reading “Make Your Own Arduino Header Pins”

All I Want For Christmas Is A 4-Factor Biometric Lock Box

It’s the most wonderful time of the year! No, we’re not talking about the holiday season, although that certainly has its merits. What we mean is that it’s time for the final projects from [Bruce Land]’s ECE4760 class. With the giving spirit and their mothers in mind, [Adarsh], [Timon], and [Cameron] made a programmable lock box with four-factor authentication. That’s three factors more secure than your average Las Vegas hotel room safe, and with a display to boot.

Getting into this box starts with a four-digit code on a number pad. If it’s incorrect, the display will say so. Put in the right code and the system will wait four seconds for the next step, which involves three potentiometers. These are tuned to the correct value with a leeway of +/- 30. After another four-second wait, it’s on to the piezo-based knock detector, which listens for the right pattern. Finally, a fingerprint scanner makes sure that anyone who wants into this box had better plan ahead.

This project is based on Microchip’s PIC32-based Microstick II, which [Professor Land] starting teaching in 2015. It also uses an Arduino Uno to handle the fingerprint scanner. The team has marketability in mind for this project, and in the video after the break, they walk through the factory settings and user customization.

We have seen many ways to secure a lock box. How about a laser-cut combination safe or a box with a matching NFC ring?

Continue reading “All I Want For Christmas Is A 4-Factor Biometric Lock Box”

More Blinky = More Better – The WS2812FX Library

The WS2812 is an amazing piece of technology. 30 years ago, high brightness LEDs didn’t even exist yet. Now, you can score RGB LEDs that even take all the hard work out of controlling and addressing them! But as ever, we can do better.

Riffing on the ever popular Adafruit NeoPixel library, [Harm] created the WS2812FX library. The library has a whole laundry list of effects to run on your blinkenlights – from the exciting Hyper Sparkle to the calming Breathe inspired by Apple devices. The fantastic thing about this library is that it can greatly shorten development time of your garden-variety blinkables – hook up your WS2812s, pick your effect, and you’re done.

[Harm]’s gone and done the hard yards, porting this to a bevy of platforms – testing it on the Arduino Nano, Uno, Micro and ESP8266. As a proof of concept, they’ve also put together a great demonstration of the software – building some cute and stylish Christmas decorations from wood, aluminium, and hacked up Christmas light housings. Combining it with an ESP8266 & an app, the effects can be controlled from a smartphone over WiFi. The assembly video on YouTube shows the build process, using screws and nails to create an attractive frame using aluminium sheet.

This project is a great example of how libraries and modern hardware allow us to stand on the shoulders of giants. It’s quicker than ever to build amazingly capable projects with more LEDs than ever. Over the years we’ve seen plenty great WS2812 projects, like this sunrise alarm clock or this portable rave staff.
As always, blink hard, or go home. Video after the break.

Continue reading “More Blinky = More Better – The WS2812FX Library”

DIY Mini Printer Is 95% Wood, Prints Tiny Cute Images

This little DIY 64×64 graphical printer by [Egor] is part pen plotter in design, somewhat dot matrix-ish in operation, and cleverly designed to use unmodified 9G servos. The project page is all in Russian (translation to English here) but has plenty of photos that make the operation and design clear. Although nearly the entire thing is made from laser-cut wood, [Egor] says that a laser cutter is optional equipment. The first version was entirely cut with hand tools.

screenshot-2016-12-06-10-49-13Small DIY CNC machines driven over a serial line commonly use Arduinos and CD-ROM drive guts (like this Foam Cutter or this Laser Paper Cutter) but this build uses its own custom rack-and-pinion system, and has some great little added details like the spring-loaded clip to hold paper onto the print pad.

The frame and parts (including all gears) are laser-cut from 4 mm plywood and the unit is driven by three small servos. A simple Java program processes images and an Arduino UNO handles the low-level control. A video of everything in action is embedded below.
Continue reading “DIY Mini Printer Is 95% Wood, Prints Tiny Cute Images”