Multi-Channel Battery Monitor Aces First Sea Trial

A little over a a year ago, we covered an impressive battery monitor that [Timo Birnschein] was designing for his boat. With dedicated batteries for starting the engines, cranking over the generator, and providing power to lights and other amenities, the device had to keep tabs on several banks of cells to make sure no onboard systems were dipping into the danger zone. While it was still a work in progress, it seemed things were progressing along quickly.

But we know how it is. Sometimes a project unexpectedly goes from having your full attention to winning an all-expense-paid trip to the back burner. In this case, [Timo] only recently put the necessary finishing touches on his monitor and got it installed on the boat. Recent log entries on the project’s Hackaday.io page detail some of the changes made since the last time we checked in, and describe the successful first test of the system on the water.

Certainly the biggest issue that was preventing [Timo] from actually using the monitor previously was the lack of an enclosure and mounting system for it. He’s now addressed those points with his 3D printer, and in the write-up provides a few tips on shipboard ergonomics when it comes to mounting a display you’ll need to see from different angles.

The printed enclosure also allowed for the addition of some niceties like an integrated 7805 voltage regulator to provide a solid 5 V to the electronics, as well as a loud piezo beeper that will alert him to problems even when he can’t see the screen.

Under the hood he’s also made some notable software improvements. With the help of a newer and faster TFT display library, he’s created a more modern user interface complete with a color coded rolling graph to show voltages changes over time. There’s still a good chunk of screen real estate available, so he’s currently brainstorming other visualizations or functions to implement. The software isn’t using the onboard NRF24 radio yet, though with code space quickly running out on the Arduino Nano, there’s some concern about getting it implemented.

As we said the first time we covered this project, you don’t need to have a boat to learn a little something from the work [Timo] has put into his monitoring system. Whether you’re tracking battery voltages or temperatures reported by your BLE thermometers, a centralized dashboard that can collect and visualize that data is a handy thing to have.

3D Printed Gesture-Controlled Robot Arm Is A Ton Of Tutorials

Ever wanted your own gesture-controlled robot arm? [EbenKouao]’s DIY Arduino Robot Arm project covers all the bases involved, but even if a robot arm isn’t your jam, his project has plenty to learn from. Every part is carefully explained, complete with source code and a list of required hardware. This approach to documenting a project is great because it not only makes it easy to replicate the results, but it makes it simple to remix, modify, and reuse separate pieces as a reference for other work.

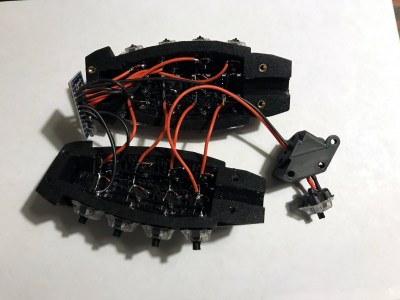
[EbenKouao] uses a 3D-printable robotic gripper, base, and arm design as the foundation of his build. Hobby servos and a single NEMA 17 stepper take care of the moving, and the wiring and motor driving is all carefully explained. Gesture control is done by wearing an articulated glove upon which is mounted flex sensors and MPU6050 accelerometers. These sensors detect the wearer’s movements and turn them into motion commands, which in turn get sent wirelessly from the glove to the robotic arm with HC-05 Bluetooth modules. We really dig [EbenKouao]’s idea of mounting the glove sensors to this slick 3D-printed articulated gauntlet frame, but using a regular glove would work, too. The latest version of the Arduino code can be found on the project’s GitHub repository.

Most of the parts can be 3D printed, how every part works together is carefully explained, and all of the hardware is easily sourced online, making this a very accessible project. Check out the full tutorial video and demonstration, embedded below.

Continue reading “3D Printed Gesture-Controlled Robot Arm Is A Ton Of Tutorials”

Handheld Farkle Really Sparkles

Farkle is a classic dice game that only requires 6 dice and a way to write down scores based on the numbers rolled. Even so, this type of game isn’t inherently portable — it would be fairly difficult to play on a road trip, for instance. [Sunyecz22] decided that Farkle would make an excellent electronic game and got to work designing his first PCB.

This little game has everything you could want from a splash screen introduction to a handy scoring guide on the silkscreen. After choosing the number of players, the first player rolls using the momentary button and the electronic dice light up to indicate what was rolled. As long as the player rolled at least one scoring die, they can take the points by selecting the appropriate die/dice with the capsense pads, and either pass or keep going. The current player’s score is shown on the 7-segment, and the totals for each player are on the OLED screen at the bottom.

The brains of the operation is an Arduino Pro Mini. It controls two MAX7219s that drive the 42 LEDs plus the 7-segment display. A game like this is all in the code, and lucky for us, [Sunyecz22] made it available. We love how gorgeous the glossy 3D printed enclosure looks — between the glossy finish and the curved back, it looks very comfortable to hold. In the future, [Sunyecz22] plans to make a one player versus the computer mode. Check out the demo and walk-through video after the break.

The capsense modules are a great touch, but some people want a little more tactility in their handheld games. We say bring on the toggle switches.

Continue reading “Handheld Farkle Really Sparkles”

On-Air Sign Helps Keep Your Broadcasts G-Rated

Like many of us, [Michael] needed a way to let the family know whether pants are required to enter the room — in other words, whenever a videoconference is in progress. Sure he could hang a do not disturb sign, but those are easy to forget. There’s no need to worry about forgetting to change status because this beautiful wall-mounted sign can be controlled with Alexa.

Inside the gorgeous box made from walnut, curly maple, and oak is an ESP32, some RGB LEDs, and three MOSFETs. [Michael] is using the fauxmoESP library to interface the ESP32 with Alexa, which emulates a Phillips Hue bulb for the sake of using a protocol she already knows. [Michael] can change the color and brightness percentage with voice commands.

The sign is set up as four different devices — one default, and one for each color. Since talking to Alexa isn’t always appropriate, [Michael] can also change the color of the LEDs using sliders on a website that’s served up by the ESP. Check out the full build video after the break.

Need something quick and dirty that works just as well? Our own [Bob Baddeley] made a status indicator that’s simple and effective.

Continue reading “On-Air Sign Helps Keep Your Broadcasts G-Rated”

Arduino Wannabe Should Have Used A 555. Oh Wait, It Does.

It’s a little known secret that when the Hackaday writers gather in their secret underground bunker to work on our plans for world domination, we often take breaks to play our version of the corporate “Buzzword Bingo”, where paradigms are leveraged and meetings circle back to loop in offline stakeholders, or something like that. Our version, however, is “Comment Line Bingo”, and right in the middle of the card is the seemingly most common comment of all: “You should have used a 555,” or variations thereof.

So it was with vicious glee that we came across the Trollduino V1.0 by the deliciously named [Mild Lee Interested]. It’s the hardware answer to the common complaint, which we’ll grant is often justified. The beautiful part of this is that Trollduino occupies the same footprint as an Arduino Uno and is even pin-compatible with the microcontroller board, or at least sort of. The familiar line of components and connectors sprout from the left edge of the board, and headers for shields line the top and bottom edges too. “Sketches” are implemented in hardware, with jumpers and resistors and capacitors of various values plugged in to achieve all the marvelous configurations the indispensable timer chip can be used for. And extra points for the deliberately provocative use of Comic Sans in the silkscreen.

Hats off to [Lee] for a thoroughly satisfying troll, and a nice look at what the 555 chip can really do. If you want a more serious look at the 555, check out this 555 modeled on a breadboard, or dive into the story of the chip’s development.

USB-C Programmable Power Supply For Any Project

USB-C Power Delivery 3.0 (PD3.0) introduces a new Programmable Power Supply (PPS) mode, which allows a device to negotiate any supply of 3.3-21 V in 20 mV steps, and up to 5 A of current in 50 mA steps. To make use of this new standard, [Ryan Ma] create the PD Micro, an Arduino-compatible development board, and a self-contained software library to allow easy integration of PD3.0 and the older PD2.0 into projects.

The dev board is built around an ATMega32U4 microcontroller and FUSB302 USB-C PHY. The four-layer PCB is densely packed on both sides to fit in the Arduino Pro Micro Form factor. The board can deliver up to 100W (20 V at 5 A) from an appropriate power source and shows visual feedback on the PD status through a set of LEDs.

The primary goal of the project is actually in the software. [Ryan] found that existing software libraries for PD take up a lot of memory, and are difficult to integrate into small projects. Working from the PD specifications and PD PHY chip data sheet, he created a lighter weight and self-contained software library which consumes less than 8 K of flash and 1 K of RAM. This is less than half the Flash and RAM available on the ATmega32U4.

[Ryan] is running a Crowd Supply campaign (video after the break) to get some of these powerful boards out in the wild, and has released all the source code and schematics on GitHub. The PCB design files will be released during the last week of the campaign, around 25 January 2021.

USB-C and power delivery are not simple standards, but the ability to add a high-speed data interface and a programmable power supply into almost any project has real potential.

Continue reading “USB-C Programmable Power Supply For Any Project”

Remote Control Robot Deals Dominoes

Oh, dominoes — the fun of knocking them down is inversely proportional to the pain of setting them all up again. [DIY Machines] is saving loads of time by automating the boring part with a remote control domino-laying machine. If only it could pick them back up.

This machine can be driven directly over Bluetooth like an R/C car, or programmed to follow a predetermined path via Arduino code. Here’s how it works: an Arduino Uno drives two servos and one motor. The 1:90 geared motor drives the robot around using a 180° servo to steer. A continuous servo turns the carousel, which holds nearly 140 dominoes. We love that the carousel is designed to be hot-swappable, so you can keep a spare ready to go.

[DIY Machines] really thought of everything. Every dozen or so dominoes, the machine leaves a gap in case one of the dominoes is tipped prematurely. There are also a couple of accessories for it, like a speedy domino loading stick and a fun little staircase bridge to add to your domino creations. Though all the machine files are freely available, [DIY Machines] requests a small donation for the accessories files. Check out the complete build video after the break, followed by a bonus video that focuses on upgrading the machine with an HM10 Bluetooth module for controlling it directly with a phone.

This certainly isn’t the first domino-laying device we’ve seen, though it might be the most accessorized. [Matthias Wandel]’s version uses only one motor to move and deal the dominoes.

Continue reading “Remote Control Robot Deals Dominoes”