Robotic Cornhole Board Does The Electric Slide

There’s a reason why bowling lanes have bumpers and golf games have mulligans. Whether you’re learning a new game or sport, or have known for years how to play but still stink at it, everyone can use some help chasing that win. You’ve heard of the can’t-miss dart board and no-brick basketball goal. Well, here comes the robot-assisted game for the rest of us: cornhole.

The game itself deceptively simple-looking — just underhand throw a square wrist rest into a hole near the top of a slightly angled box. You even get a point for landing anywhere on the box! Three points if you make it in the cornhole. In practice, the game not that easy, though, especially if you’ve been drinking (and drinking is encouraged). But hey, it’s safer than horseshoes or lawn darts.

[Michael Rechtin] loves the game but isn’t all that great at it, so he built a robotic version that tracks the incoming bag and moves the hole to help catch it. A web cam mounted just behind the hole takes a ton of pictures and analyzes the frames for changes.

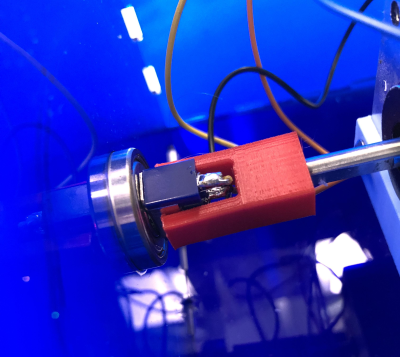
The web cam sends the bag positions it sees along with its predictions to an Arduino, which decides how it will move a pair of motors in response. Down in the cornhole there’s a pair of drawer sliders that act as the lid’s x/y gantry.

We love how low-tech this is compared to some of the other ways it could be done, even though it occasionally messes up. That’s okay — it makes the game more interesting that way. We think you should get 2 points if it lands halfway in the hole. Aim past the break to check out the build video.

Seems like there’s a robotic-assisted piece of sporting equipment for everything these days. If cornhole ain’t your thing, how’d you like to take a couple strokes off your golf game?

Continue reading “Robotic Cornhole Board Does The Electric Slide”

Open Source Stream Deck Does It Without Touch Screens

[Adam Welch] has built macro pads in the past out of pre-fab key matrices and handfuls of Cherry MX clones. But all the stickers and custom keycaps in the world wouldn’t make those macro pads as versatile as a stream deck — those visual shortcut panels with tiny touchscreens for each button that some streamers use to change A/V settings or switch between applications.

Let’s face it, stream decks are expensive. But 0.96″ OLED displays are not, and neither are SMD tactile buttons. Why not imitate a screen deck on the cheap by making it so the screens actuate buttons behind them? [Adam] based this baby on the clever design of [Kilian Gosewisch]’s FreeDeck, and they ended up working together to improve it with a dedicated PCB.

The brains of the operation is an Arduino Pro Micro, which addresses each screen individually via two 74HC4051 mux ICs. Thanks to an SD card module, there’s no need to flash the ‘duino every time you want to change a shortcut or its picture. Even if this deck doesn’t hold up forever, it won’t break the bank to build another one. Poke past the break for the build video, which has all the links you’d need to make your own, including a handy configurator.

There’s more than one way to do a visual macro pad. Here’s one that uses a single screen and splits it Brady Bunch style to match the matrix.

Continue reading “Open Source Stream Deck Does It Without Touch Screens”

This Freezer Failure Alarm Keeps Your Spoils Unspoiled

Deep freezers are a great thing to have, especially when the world gets apocalyptic. Of course, freezers are only good when they’re operating properly. And since they’re usually chillin’ out of sight and full of precious goods, keeping an eye on them is important.

When [Adam] started looking at commercial freezer alarms, he found that most of them are a joke. A bunch are battery-powered, and many people complain that they’re too quiet to do any good. And you’d best hope that the freezer fails while you’re home and awake, because they just stop sounding the alarm after a certain amount of time, probably to save battery.

If you want something done right, you have to do it yourself. [Adam]’s homemade freezer failure alarm is a cheap and open solution that ticks all the boxen. It runs on mains power and uses a 100dB piezo buzzer for ear-splitting effectiveness to alert [Adam] whenever the freezer is at 32°F/0°C or above.

If the Arduino loses sight of the DHT22 temperature sensor inside the freezer, then the alarm sounds continuously. And if [Adam] is ever curious about the temperature in the freezer, it’s right there on the 7-segment. Pretty elegant if you ask us. We’ve got the demo video thawing after the break, but you might wanna turn your sound down a lot.

You could assume that the freezer is freezing as long as it has power. In that case, just use a 555.

Continue reading “This Freezer Failure Alarm Keeps Your Spoils Unspoiled”

Cakeday Countdown Clock Is A Sweet Little Scroller

If you want strangers to give you well wishes on your birthday out in the real world, you have call attention to the occasion by wearing a pointy hat or a button that says ‘today is my birthday, gimme presents’. But on your reddit cakeday, aka the day you joined, you’re automatically singled out with the addition of a slice of 8-bit cake next to your username. The great thing about your cakeday is that you’re almost guaranteed to get some karma for once, especially if you make something cakeday related like [ScottyD]’s cakeday countdown clock. But plenty of people forget what their cakeday is and miss out on the fun.

This countdown clock works like you might expect — every day that isn’t your cakeday, a message scrolls by with the number of days remaining until your next one. When the big day comes, the message becomes TODAY IS YOUR CAKE DAY. Both messages are bookended by cute little pixelated cake slices that we would apply liberally to the day-of message if we made one of these.

This simple but fun project shouldn’t put too big of a dent in your parts box, since it’s essentially an Arduino, a real-time clock module, and a 32×8 LED matrix to display the text. We love the uni-body design of the enclosure because it creates a shelf for the Arduino and gives easy access for gluing in the display from the rear. If for some reason you don’t reddit, then make one anyway and use it to count down to your IRL birthday or something. We’ve got the build video cut and plated for you to consume after the break.

We would understand if 2020 is supplying you with enough existential crises, but if not, consider building a clock that counts down the rest of your life expectancy.

Continue reading “Cakeday Countdown Clock Is A Sweet Little Scroller”

Multi-Volume Knob Gives All Your Programs A Turn

We’ve all been there. You’re manning the battle station, deep in the sim-racing or some other n00b-pwning zone and suddenly some loudmouth blows out your eardrums over Discord. It’s insulting to have to stop what you’re doing to find the right Windows volume slider. So why do that? Build [T3knomanzer]’s simple yet elegant multi-volume knob and stay zen in the zone.

It’s easy, just turn the knob to cycle through your programs until Discord comes up on the little screen, and then push down to change it into a volume knob. If you need to change another volume, just click it again. Since there’s no Alt+Tabbing out to the desktop, no checkered flags should ever slip through your fingers.

Inside the well-designed case you’ll find the usual suspects — Arduino Nano, rotary encoder, an OLED display, and an LED ring, each with their own place carved out.

This completely open-source knob looks great, and we love that it’s been made incredibly easy to replicate by standing up a site with foolproof, well-depicted, step-by-step instructions. Watch them take it for a spin after the break.

Want more than volume at your fingertips? Here’s a DIY USB knob that does shortcuts, too.

Continue reading “Multi-Volume Knob Gives All Your Programs A Turn”

Custom Packet Sniffer Is A Great Way To Learn CAN

Whilst swapping out the stereo in his car for a more modern Android based solution, [Aaron] noticed that it only utilised a single CAN differential pair to communicate with the car as opposed to a whole bundle of wires employing analogue signalling. This is no surprise, as modern cars invariably use the CAN bus to establish communication between various peripherals and sensors.

In a series of videos, [Aaron] details how he used this opportunity to explore some of the nitty-gritty of CAN communication. In Part 1 he designs a cheap, custom CAN bus sniffer using an Arduino, a MCP2515 CAN controller and a CAN bus driver IC, demonstrating how this relatively simple hardware arrangement could be used along with open source software to decode some real CAN bus traffic. Part 2 of his series revolves around duping his Android stereo into various operational modes by sending the correct CAN packets.

These videos are a great way to learn some of the basic considerations associated with the various abstraction layers typically attributed to CAN. Once you’ve covered these, you can do some pretty interesting stuff, such as these dubious devices pulling a man-in-the-middle attack on your odometer! In the meantime, we would love to see a Part 3 on CAN hardware message filtering and masks [Aaron]!

Continue reading “Custom Packet Sniffer Is A Great Way To Learn CAN”

Mini Library For Kids Gets Blinky Lights And Solar Upgrade

Reading is big in Québec, and [pepelepoisson]’s young children have access to a free mini library nook that had seen better days and was in dire need of maintenance and refurbishing. In the process of repairing and repainting the little outdoor book nook, he took the opportunity to install a few experimental upgrades (link in French, English translation here.)

The mini library pods are called Croque-Livres, part of a program of free little book nooks for children across Québec (the name is a bit tricky to translate into English, but think of it as “snack shack, but for books” because books are things to be happily devoured.)

After sanding and repairs and a few coats of new paint, the Croque-Livres was enhanced with a strip of WS2812B LEDs, rechargeable battery with solar panel, magnet and reed switch as door sensor, and a 3.3 V Arduino to drive it all. [pepelepoisson]’s GitHub repository for the project contains the code and CAD files for the 3D printed pieces.

The WS2812B LED strip technically requires 5 V, but as [pepelepoisson] found in his earlier project Stecchino, the LED strip works fine when driven directly from a 3.7 V lithium-polymer cell. It’s not until around 3 V that it starts to get unreliable, so a single 3.7 V cell powers everything nicely.

When the door is opened, the LED strip lights up with a brief animation, then displays the battery voltage as a bar graph. After that, the number of times the door as been opened is shown on the LED strip in binary. It’s highly visual, interactive, and there’s even a small cheat sheet explaining how binary works for anyone interested in translating the light pattern into a number. How well does it all hold up? So far so good, but it’s an experiment that doesn’t interfere at all with the operation of the little box, so it’s all good fun.