UDP Between STM32-F4 Discovery Boards

stm32-f4-udp

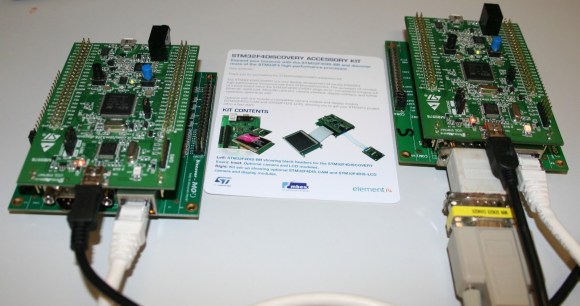
[The Backwoods Engineer] tested out a new accessory kit for the STM32-F4 Discovery board. The image above shows two boards communicating with the UDP protocol. Notice the extra PCB into which each Discovery board has been plugged. This is a third-party add-on which adds Ethernet, RS-232, SD card slot, and a connector for LCD or Camera. We’ve had one of these F4 Discovery boards on hand for a while and haven’t figured out a good way to connect external hardware to the huge dual pin-headers. This doesn’t solve the problem — the base board also includes dual headers to break-out all the pins — but having Ethernet, serial, and SD certainly reduces the need to add all that much more. The other drawback to the hardware is that the sample firmware is targeted at the IAR Embedded Workbench which is neither free, nor in the realm of affordable for hobbyists.

The NIC used on the baseboard has auto-crossover capabilities so the boards were connected using a regular Cat6 patch cable. This example has the boards constantly sending UDP packets with the module on the right reporting status information to a terminal via the serial connection.
Stellaris Launchpad Shield Shows Good Fabrication Technique

launchpad-shield-with-great-fabrication

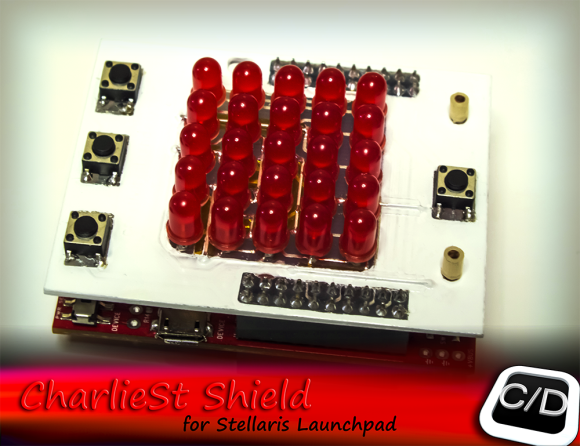
Here’s an LED and Button shield for the Stellaris Launchpad (translated) which you can fabricate at home. It gives you access to a 5×5 matrix of LEDs, and adds four more buttons. In order to cut down on the number of I/O pins required to operate the lights [Cosimo] is using the concept of Charlieplexing. This lets him get away with just six driver pins and four button pins.

It’s not just the finished product that interests us here. The fabrication itself is worth clicking through to his project post. What initially caught our eye is the use of Kapton tape as an insulator so that clipped off LEDs could be used as jumpers flat against the top side of the board before populating the LEDs themselves. After those are soldered in place he masks them off, as well as the button footprints, and uses spray paint to protect the top side of the board. The final look is more polished than most at-home project boards.

A Better Template For Your STM32 F3 Dev Board

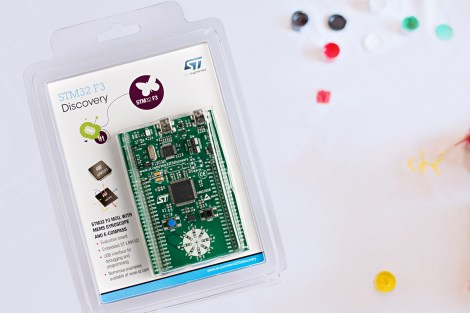
If you’ve picked up one of those really cool STM32 ARM dev boards, you’ve probably poked around looking for a good toolchain. No fear, then, because [Matt] has your back. He put together a template for the ARM Cortex-M4 powered STM32 board.

[Matt] had been using a template for the STM32 F4 we’d covered before, but found the implementation a bit lacking. Wanting to exploit the functionality of his fancy STM32 F3 board, [Matt] took the F0 template whipped up by our very own [Mike S] and got it to work with the newer, fancier dev board.

There are a few bonuses to using [Matt]’s template; the ARM chip in the F3 Discovery board has a hardware floating-point unit that is inaccessible using the Code Sourcery G++: Lite Edition toolchain. [Matt]’s use of gcc-arm-embedded allows access to the hardware FPU, a great benefit for a great board.

A Guide And Helper Script For ARM Cross Compiling Toolchain On A Mac

mac-arm-toolchain-script

[Mitchell Johnson] wanted to develop for the STM32F4 Discovery board on his Mac. There are a few ready-to-use options when it comes to the ARM toolchains, but he couldn’t find one that satisfied all of his needs. After working out all the kinks he wrote a guide and tweaked a script to install the ARM tools on a Mac.

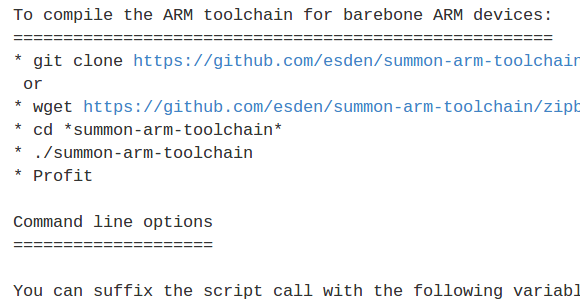
The problem he had with some of the pre-packaged tool chains is that they didn’t support the hardware floating point functionality of STM’s Cortex-M4 chips. To get around this without doing his own ground-up build (which can be quite a challenge) he forked the Summon Arm Toolchain script and modified it to include ST-Link support in the build. One of the things that we like about that script is it installs the tools in a sub-directory of your home directory. This way if you already have another ARM toolchain you can switch between the two by tweaking your PATH variable.

Electric Imp Makes A Cat Door Tweet Its Activities

electric-imp-tweeting-cat-door

This Tweeting cat door uses the Electric Imp to read a sensor and report back to the server. The hardware is pretty neat. The board hosts an ARM Cortex-M3 processor and gets on your home network via WiFi. The mini-USB cable simply provides the power. Programming is done over the network. Our own [Brian Benchoff] had a chance to try the Imp out earlier in the Fall.

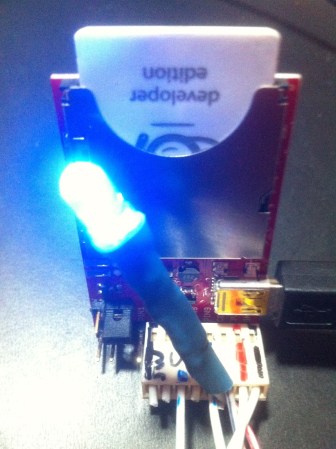
Monitoring a cat door is as good a reason as any to undertake a project. The hardware added to the board includes a reed switch mounted on the jamb along with a magnet on the door itself. There is also a blue LED that gives a bit of user feedback. The software isn’t quite as easy but it still wasn’t that bad. As with most web-connected projects getting all the parts to talk to each other was a bit of a chore. The Imp reports back to a server on the local network which then activates a PHP script that uses Sen.se to push out a Tweet.

[Thanks Pat]

Stellarino Brings Wiring-style Coding To The Stellaris Launchpad

wiring-for-stellaris-launchpad

[Sultan Qasim] wrote in to tell us about the work he’s been doing on the Stellarino library. It’s goal is to break down the coding barriers present for those looking to move from Arduino to ARM. This is accomplished by facilitating Wiring-stlye code for the Stellaris Launchpad ARM development board.

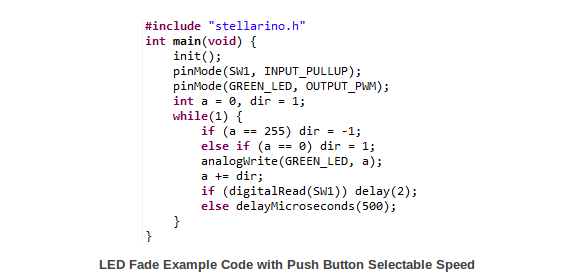
Right off the bat [Sultan] mentions that the interface is Wiring-like, but is not compatible with it. This means you can’t just plop your existing sketches into a C file and get them to work with the addition of a simple include file. But what it does do is provide access to the functions to which seasoned Arduino users have grown accustomed. You can see some examples above, including analogWrite(), digitalRead(), and a simple delay function.

We had a quick look at the library. It uses StellarisWare components which are stored in the ROM of the chip (these are all preceded by ‘ROM_’). The one thing missing is the UARTstudio library which apparently carries a license incompatible with GPL.

Using Newlib With Stellaris Launchpad

using-newlibc-with-stellaris-launchpad

[Brandon] is taking us further down the rabbit hole by demonstrating how to use newlib with the TI Stellaris Launchpad. This is a nice continuation of the framework he built with his post about using GCC with ARM hardware. But it is most certainly one level of complexity deeper than that initial article.

Using newlib instead of glibc offers the option of compiling C code that includes system calls common when coding for computers but which are rare in embedded systems. Using something like printf is generally avoided because of the overhead associated with it. But these processors are getting so fast and have so much RAM that it may be useful in certain cases. We briefly thought about implementing malloc for creating a linked list when working on our STM32 snake game. [Brandon’s] work here makes the use of that command possible.

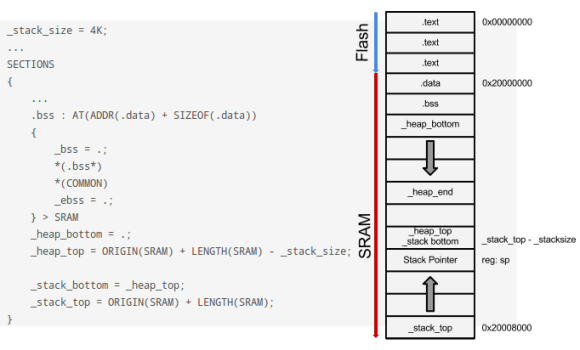
The process starts by adding labels for the beginning and end of the stack/heap. This makes it possible for functions to allocate memory. After taking care of the linker script changes you must implement a few system call functions like _sbrk.