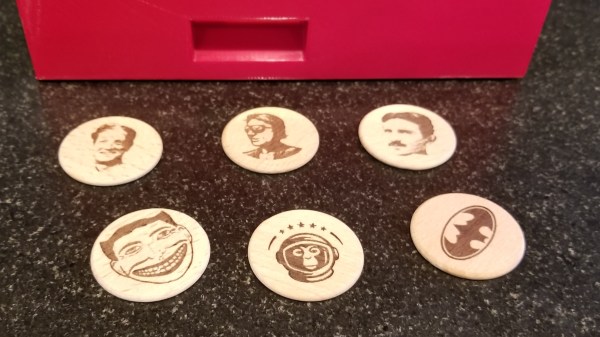
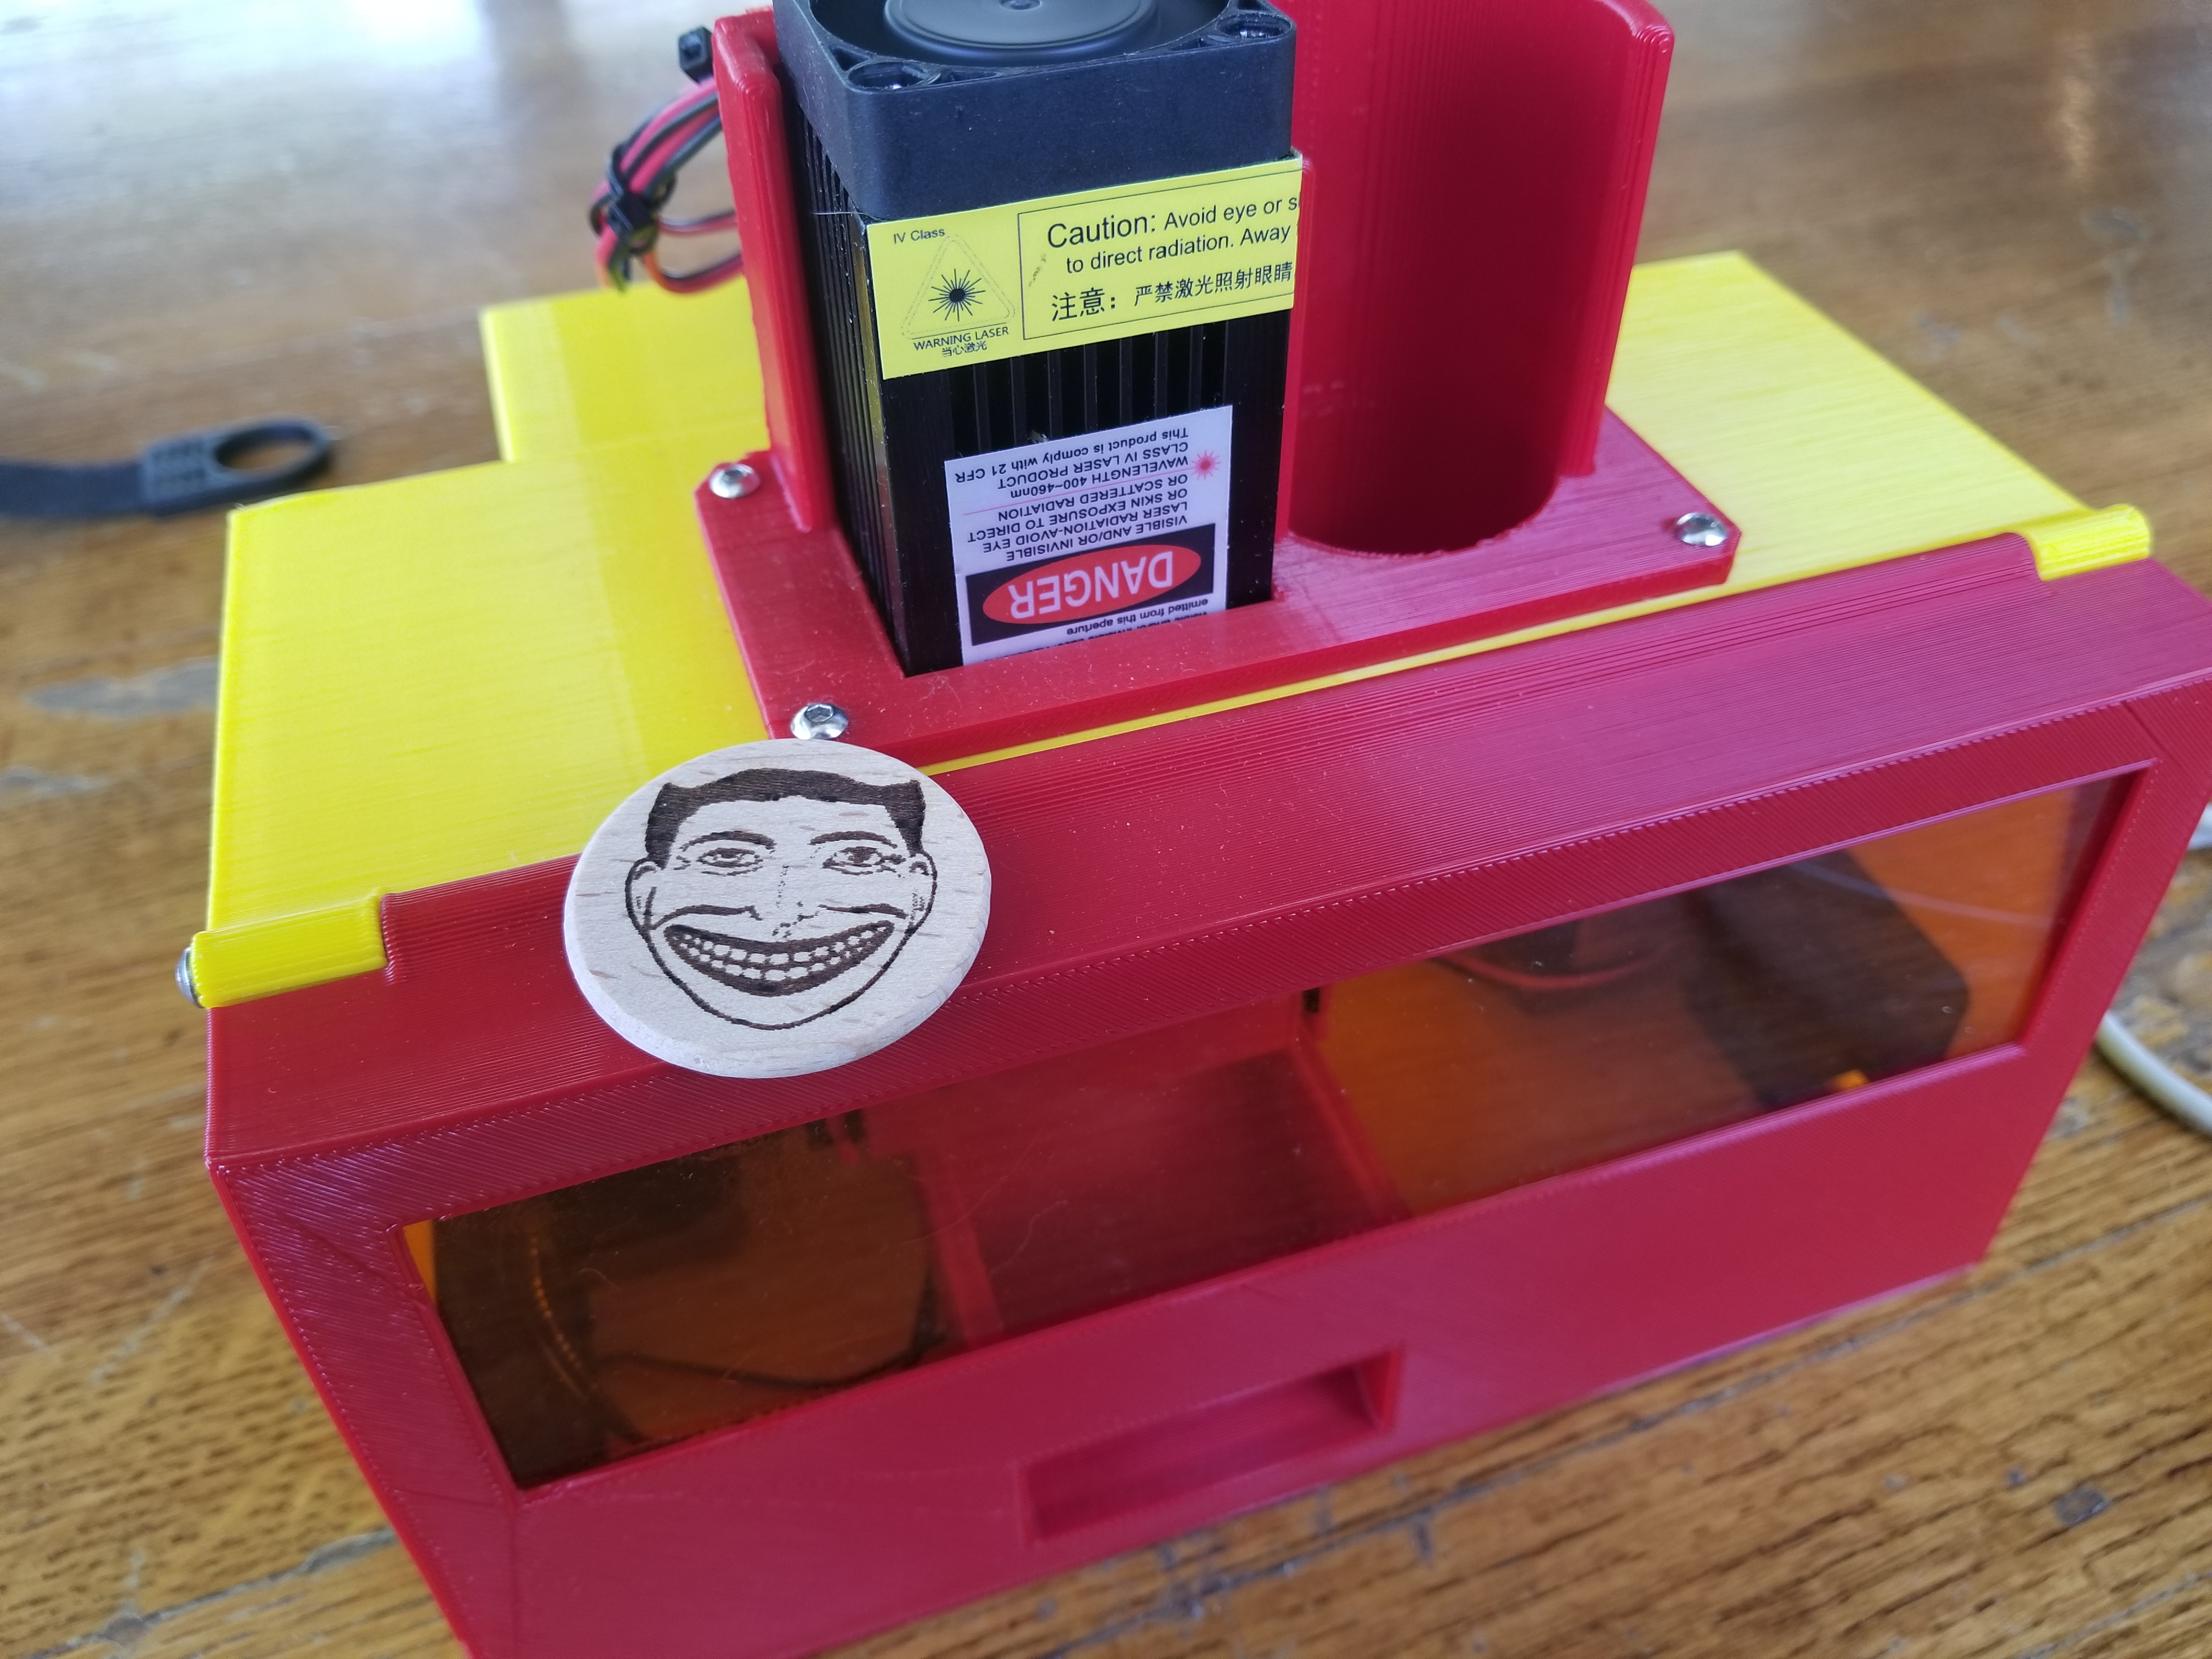
[bdring] just recently completed his absolutely fantastic NickelBot, which is a beautifully made unit that engraves small wooden discs with a laser like some kind of on demand vending machine, and it’s wonderful. NickelBot is small, but a lot is going on inside. For example, there’s a custom-designed combination engraving platform and hopper that takes care of loading a wooden nickel from a stack, holding it firm while it gets engraved by a laser, then ejects it out a slot once it’s done.
NickelBot is portable and can crank out an engraved nickel within a couple of minutes, nicely fulfilling its role of being able to dish out the small items on demand at events while looking great at the same time. NickelBot’s guts are built around a PSoC5 development board, and LaserGRBL is used on the software side to generate G-code for the engraving itself. Watch it work in the video embedded below.
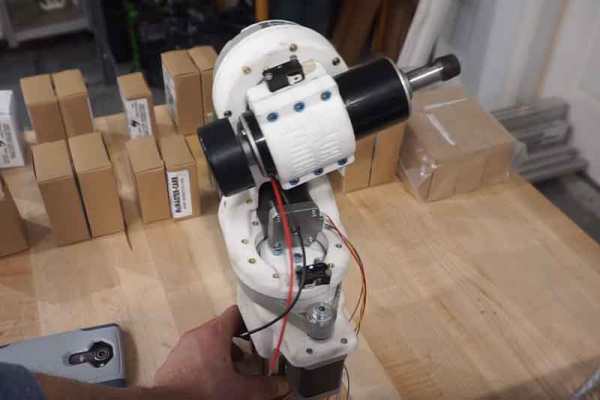
[Reiner Schmidt] was tired of renting an expensive 5-axis CNC head for projects, so he decided to build his own. It’s still a work in progress, but he’s made remarkable progress so far. The project is called Bridge Boy, and it is designed to use a cheap DC rotary mill to cut soft materials like plastic, wood and the like. Most of it is 3D printed, and he has released the Autodesk 360 plans that would allow you to start building your own. His initial version uses an Arduino with stepper drivers, and is designed to fit onto the end of a 60mm arm of a standard 3-axis CNC, so technically it’s a 3+2 axis CNC. With the appropriate software, it should be able to work as a full 5-axis machine, though, and it should be possible to integrate it with a CNC that has a 5-axis driver board without too much effort.
Take apart a few old DVD drives, stitch them together with cable ties, add a pen and paper, and you’ve got a simple CNC plotter. They’re quick and easy projects that are fun, but they do tend to be a little on the “plug and chug” side. But a CNC plotter that uses polar coordinates? That takes a little more effort.
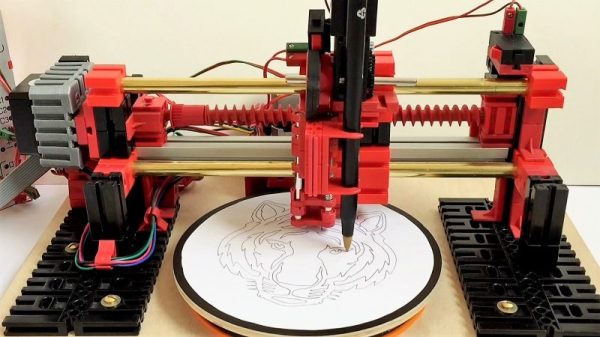
The vast majority of CNC projects, from simple two-axis plotters to big CNC routers, all tend to use Cartesian coordinate systems, where points on a plane are described by their distances from an origin point on two perpendicular axes. Everything is nice and square, measurements are straightforward, and the math is easy. [davidatfsg] decided to level up his CNC plotter a bit by choosing a polar coordinate system, with points described as a vector extending a certain distance from the origin at a specified angle. Most of the plotter is built from FischerTechnik parts, with a single linear axis intersecting the center point of a rotary drawing platform. Standard G-code is translated to polar coordinates by a Java applet before being sent to a custom Arduino controller to execute the moves. Check out the video below; it’s pretty mesmerizing to watch, and we can’t help but wonder how a polar 3D-printer would work out.
Have polar coordinates got you stumped? It can be a bit of an adjustment from Cartesian space for sure. It can be worth it, though, showing up in everything from cable plotters to POV fidget spinners and even to color space models.
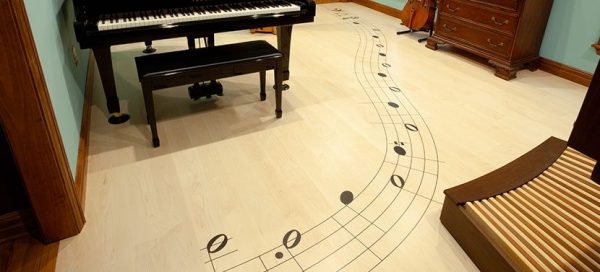
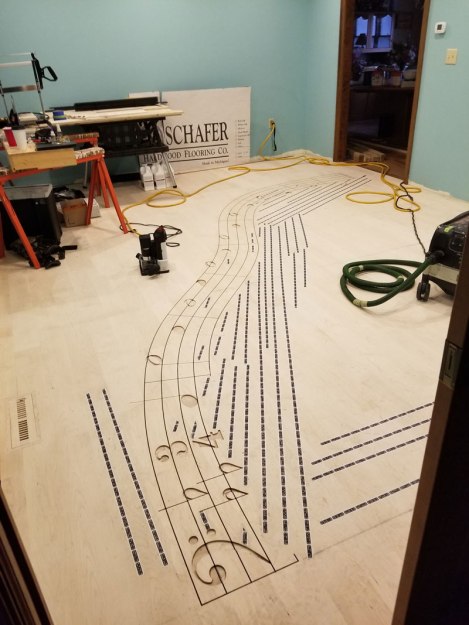
It’s been a few years since we first started hearing about “tools of the future changing the way we work” but this astounding whole-room floor inlay might be the best argument for them yet.
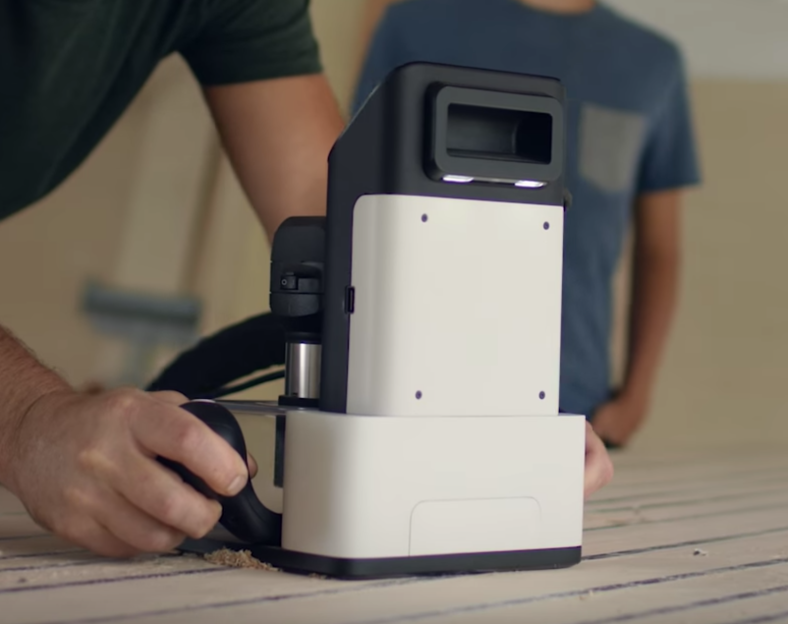
The Shaper Origin
A couple of years ago we wrote a hands-on preview of a unique tool called the Shaper Origin. If a milling machine is classically defined as having a stationary tool head with moving stock, the Origin is the reverse. To use an Origin the user adheres specially marked tape to the stock material, then holds the origin down and moves it much like a hand router.
The Origin has a camera which tracks the fiducial patterns on the tape, allowing it to know its precise position, even across an entire room. The operator sees a picture on the screen of the tool that guides them with superimposed lines, while the tool head makes its own precision adjustments to perfectly cut the design in the X, Y, and Z.
Floor in Progress
But what do you use a tool like this for? Cutting boards, small tables, and toy blocks are fine examples but don’t highlight any unique features of the tool. Many could just as easily be made using a ShopBot, X-Carve, Carvey, or any of their ilk. What you can’t do with any of those tools (or really anything besides manual labor, endless patience, and master skill) is inlay an entire floor in situ.
[Mark Scheller] (eight time winner of Wood Floor of the Year awards) used an Origin to cut a curvaceous 22 foot long rendition of the first 9 bars of Handel’s Passacaglia into the floor of a lucky homeowner’s music room. Without decades of practice, it’s difficult to imagine doing this any way besides with a Shaper Origin. You can’t put an entire room into a CNC router. The individual floorboards could be cut, but that would be tedious and increasingly difficult as the room gets larger. With the Origin it seems almost trivial. Do the design, place the marking tape, and cut. The same model is used to cut the inlays for a perfect fit. This is an incredible example of a unique use for this unusual tool!
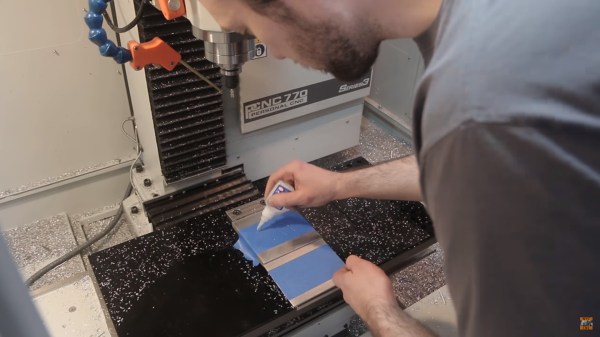
Simple clamps are great if you need to keep the pressure on two parallel surfaces, but if you have an irregular plane, or you need to cut through it, clamps are not the correct tool. The folks at [NYC CNC] feature a video with a clever hack borrowing from other disciplines. Painters tape is applied to the top of a level mounting surface in the machine and then burnished. The same is done to the bottom of the workpiece. Superglue is drizzled between the tape layers and pressed together so now the stock is held firmly below the toolhead.
Some parts are machined in the video, which can be seen below, and the adhesion holds without any trouble. One of the examples they cut would be difficult to hold without damage or stopping the machine. The accepted wisdom is that superglue holds well to a slightly porous surface like tape, but it doesn’t like do as well with smooth surfaces like metal. Removing residue-free tape at the end of a cut is also cleaner and faster than glue any day.
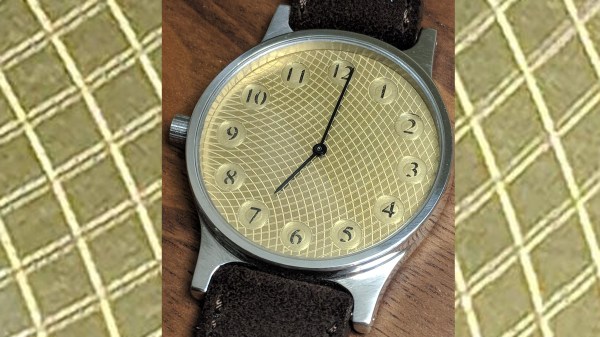
Sometimes silence is the best compliment to a DIY project, and that doesn’t just apply to homemade lockjaw toffee. When a watch is so well-made that it looks like one from a jewelry store, it is easy to keep quiet. [ColinMerkel] took many pictures of his fourth wristwatch attempt but “attempt” is his word because we call this a success. This time around he didn’t forget the crown for adjusting the time so all the pieces were in place.
His second “attempt” at wristwatch making was featured here and it had a classical elegance. Here, the proverbial game has been stepped up. Instead of using stock steel, the body is constructed of 303 stainless steel. The watch dial will definitely draw compliments if its DIY nature is revealed, which is equally mathematical and charming. Pictures of this process were enough to convey the build without words which is always a bonus if you only want a quick look or English isn’t your first choice for language.
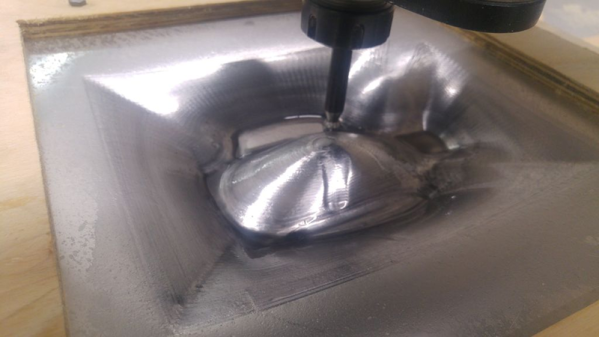
If you want to form a piece of sheet metal into a shape, you’ll probably think about using a die. That’s certainly a great way to do it, but it presupposes you can create or purchase the die, which may be a showstopper for small projects. [Dardy-7] has worked out how to use a lesser-used technique — incremental sheet forming — to get similar results with a CNC machine. The idea is to trace out the form on the sheet metal with a round blunt tool.
He got good results using an inexpensive dapping tool, although he’s seen other use heated titanium ball bearings. In addition, he’s worked out how to adapt existing tool paths, like the ones you might download from the Internet, to use with this technique. You can see a video of the workflow below.
 [bdring] just recently completed his absolutely fantastic NickelBot, which is a beautifully made unit that engraves small wooden discs with a laser like some kind of on demand vending machine, and it’s wonderful. NickelBot is small, but a lot is going on inside. For example, there’s a custom-designed combination engraving platform and hopper that takes care of loading a wooden nickel from a stack, holding it firm while it gets engraved by a laser, then ejects it out a slot once it’s done.