ESP8266 Dev Board Sports Flying Squirrel PCB Art

[Jarrett] has a box of Nokia phone batteries and decided to use them in a project. He designed and built WiFi throwies— these consist of ESP8266 WiFi chips attached to custom PCBs and powered by Nokia phone batteries. The board charges LiPoly/Li-Ion batteries over USB with the help of a MCP73831 charger chip and has USB-serial on-board. It’s much more of a powered ESP8266 dev board than a throwie, but we’ll give [Jarrett] the benefit of the doubt.

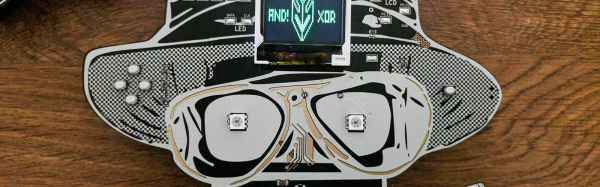
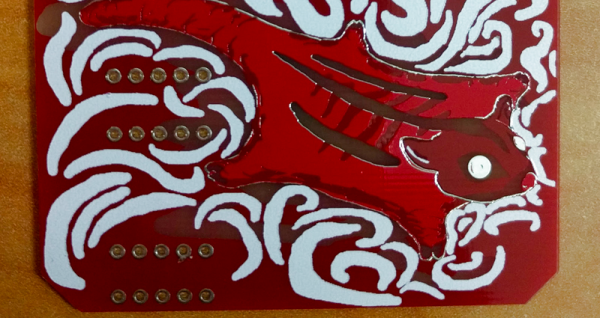
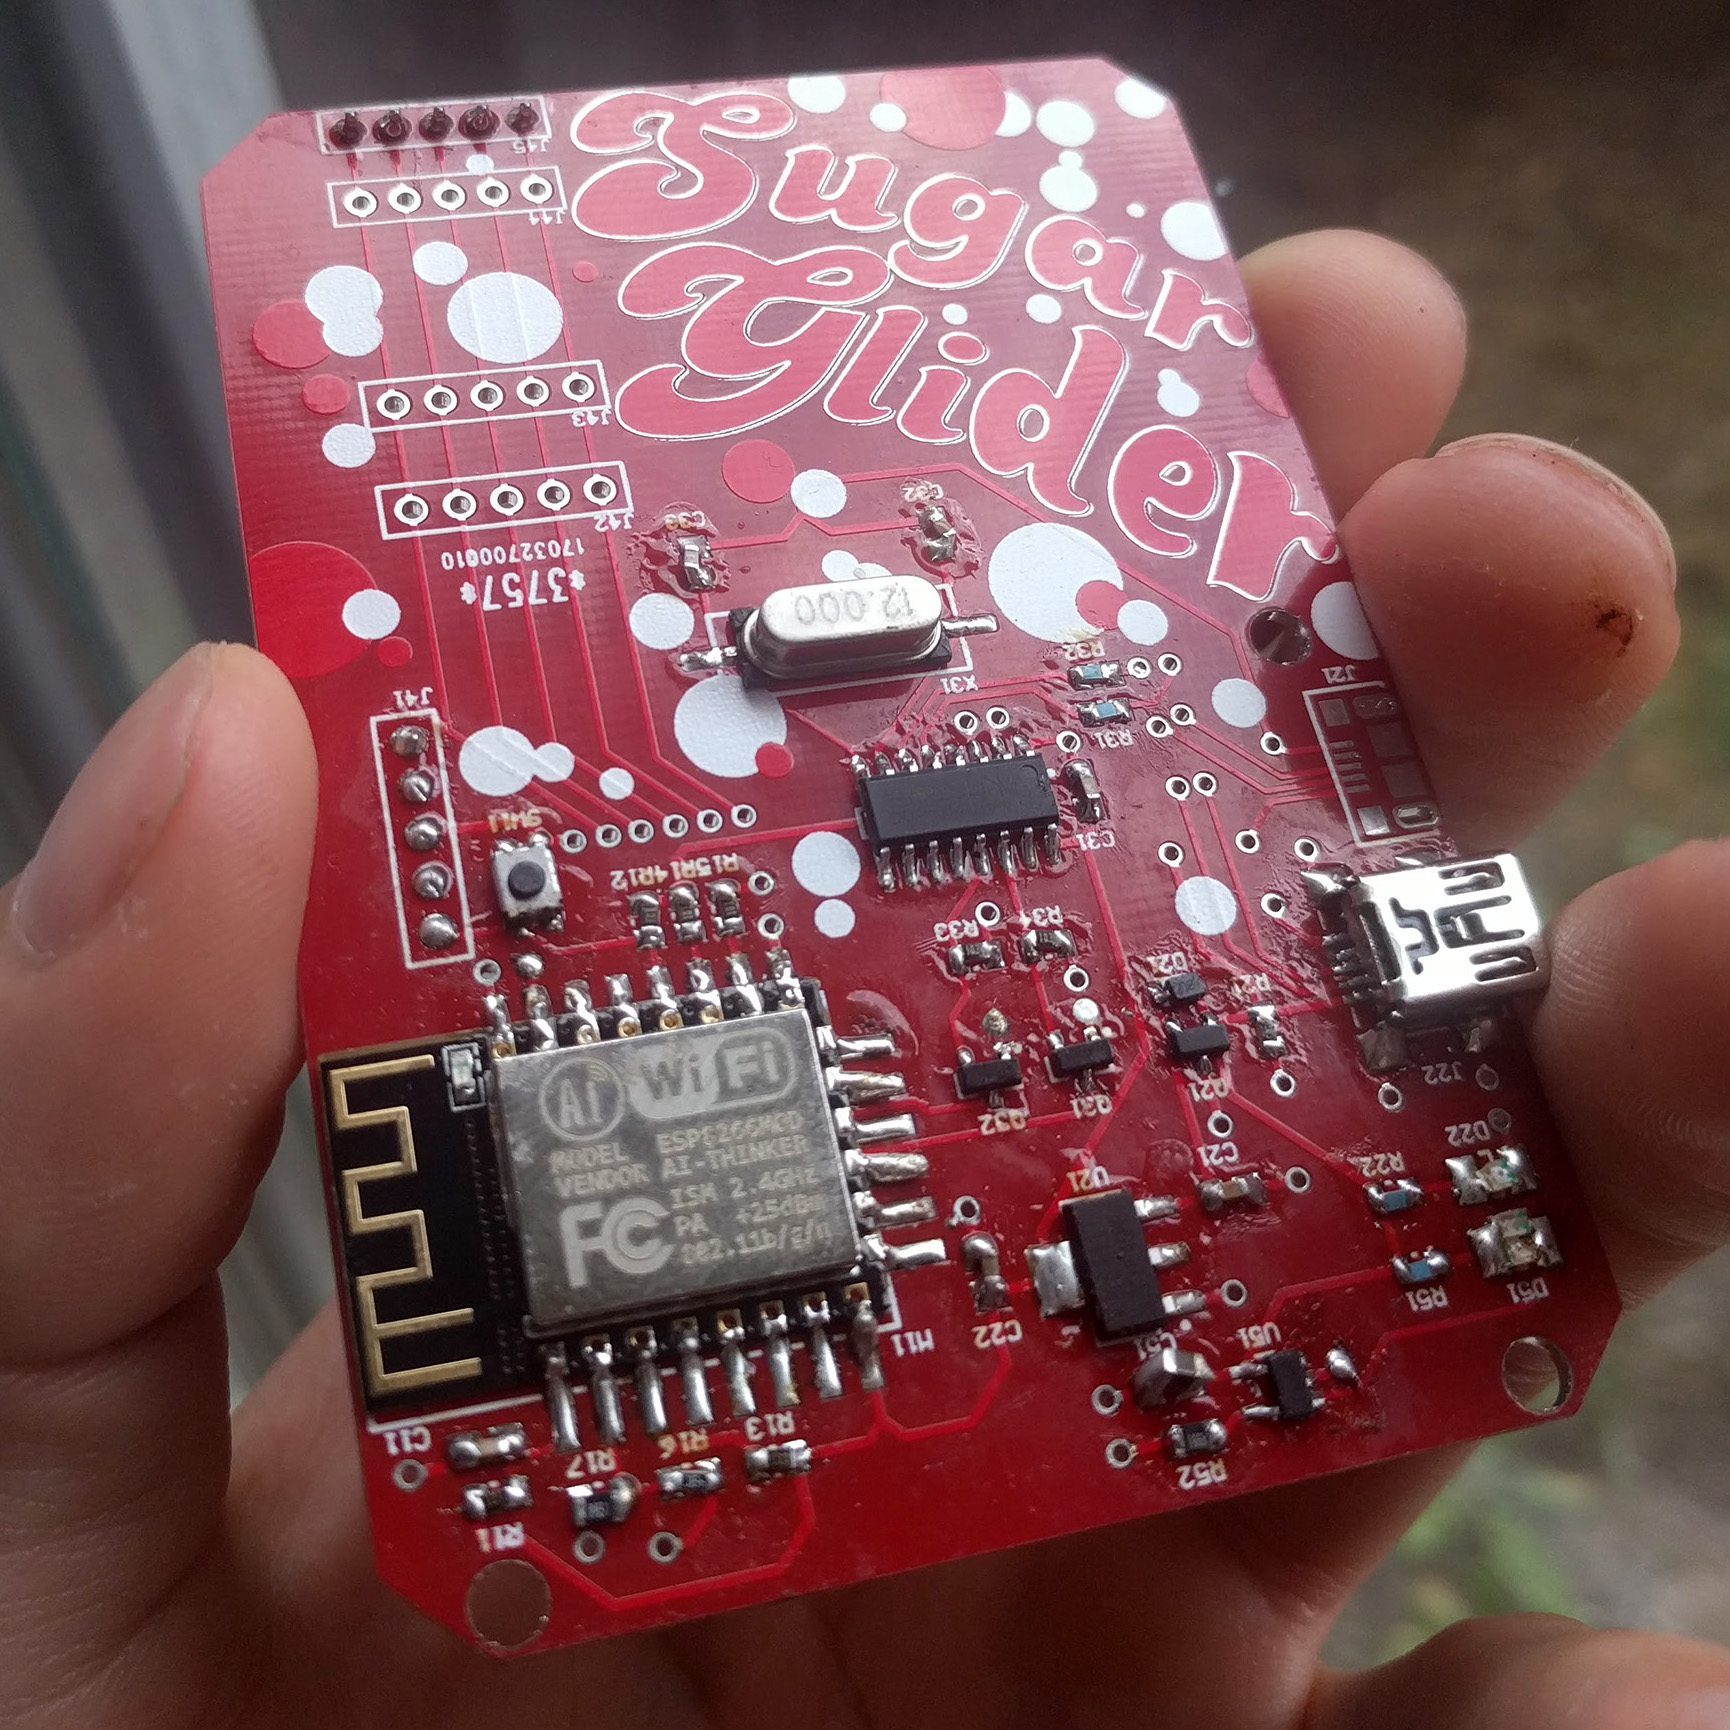
The PCB ended up larger than [Jarrett] would have liked, because of the size requirements of the phone battery connected to it. However, this gave him the canvas to create some fun PCB art. After designing the board he imported the Gerbers into Adobe Photoshop and converted each layer into a monocolor image based on the material of that layer—purple for OSHPark’s stencil mask, beige for DirtyPCB’s FR4, and so on. One challenge [Jarrett] encountered was how to get the art back into Altium Circuit Maker, his layout program of choice. After playing around with different methods for a few days, he wrote a tutorial sharing what he found out.

HaD has covered WiFi throwies before. We also appreciate a beautiful circuit board. Check out our posts on turning PCBs into art and making lapel pins out of circuit board fiberglass.

No-Solder Breadboarding For SMD LEDs

Breadboarding is a great way to get started with electronics, and with the wide availability of those little wire jumpers, it’s never been easier – until you hit roadblocks due to poor connections and parasitic capacitance futzing with your signals. However, in today’s current climate, the latest and greatest modules are too often available only in SMD packages, and while breakout boards can help, it’s probably overcomplicating things a bit when it comes to SMD LEDs. It’s all good, though – [Simon Merrett] has a workaround, as part of his Yapolamp project.

[Simon] first took a flat strip of steel, and placed two neodymium magnets on top. The assembly was then wrapped in electrical tape for insulation, and two contacts were created with copper tape. The LEDs were then placed across the two contacts and wires were attached to join them to the breadboard. The 5630 LEDs [Simon] must contain some sort of ferrous material, because they were attracted to the magnets and sat neatly in place.

It’s a neat hack that would be particularly useful if you needed to quickly swap out LEDs, and saves them from damage by soldering. Meanwhile, check out this SMD LED matrix from 2009. 

Laser Cutting Orreries

An orrery is a clockwork model of the solar system, demonstrating the machinations of the planets traveling around the sun in a sublime pattern of epicycles. A tellurion is a subset of the orrery, showing the rotation of the Earth around the sun, and the orbit of the moon around the Earth. [HuidongT] created his own tellurion out of laser-cut parts and just a few bits of copper tubes and bearings.

This project was originally inspired by the holzmechanik, a tellurion constructed from plywood gears and brass tube. [HuidongT] saw a few shortcomings in this project: the Earth didn’t spin and the moon didn’t orbit with its natural five-degree inclination. [Huidong]’s tellurion would have these features and include an illuminated sun, demonstrate the change of the seasons, and show lunar and solar eclipses.

While there was a bit of math involved in figuring out the gearing, it’s not much: the Earth would go around the sun every 365.25 days, the moon would go around the Earth every 27.32 days, and there is a difference between sidereal and solar time. A quick script made quick work of the math, and anyone can easily find tools to create gears given a diameter and the number of teeth.

The fabrication of this tellurion was made with acrylic on a laser cutter with a handful of 3D printed parts. The electronics are simple enough — just a motor and a few LEDs, and the completed project works well enough. You can check out a video of the tellurium below.

Continue reading “Laser Cutting Orreries”

EMMC To SD Hack Rescues Data From A Waterlogged Phone

How do I get the data off this destroyed phone? It’s a question many of us have had to ponder – either ourselves or for friends or family. The easy answer is either spend a mint for a recovery service or consider it lost forever.  [Trochilidae] didn’t accept either of those options, so he broke out the soldering iron and rescued his own data.

A moment’s inattention with a child near a paddling pool left [Trochilidae’s] coworker’s wife with a waterlogged, dead phone. She immediately took apart the phone and attempted to dry it out, but it was too late. The phone was a goner. It also had four months of photos and other priceless data on it. [Trochilidae] was brought in to try to recover the data.

The phone was dead, but chances are the data stored within it was fine. Most devices built in the last few years use eMMC flash devices as their secondary storage. eMMC stands for Embedded Multimedia Card. What it means is that the device not only holds the flash memory array, it also contains a flash controller which handles wear leveling, flash writing, and host interface. The controller can be configured to respond exactly like a standard SD card.

The hard part is getting a tiny 153 ball BGA package to fit into an SD card slot.  [Trochilidae] accomplished that by cutting open a microSD to SD adapter. He then carefully soldered the balls from the eMMC to the pins of the adapter. Thin gauge wire, a fine tip iron, and a microscope are essentials here. Once the physical connections were made,  [Trochilidae] plugged the card into his Linux machine. The card was recognized, and he managed to pull all the data off with a single dd command.

[Trochilidae] doesn’t say what happened after the data was copied, but we’re guessing he analyzed the dump to determine the filesystem, then mounted it as a drive. The end result was a ton of recovered photos and a very happy coworker.

If you like crazy soldering exploits, check out this PSP reverse engineering hack, where every pin of a BGA was soldered to magnet wire.

Game Like It Is 1983

The first computer I ever physically saw — I think — was an IBM System/3. You might not remember them. They were business computers for businesses that couldn’t justify a big mainframe. They were “midrange.” Nevermind that the thing probably had the memory and processing speed of the CPU inside my mouse. Time progressed and IBM moved on to the System/3x (for example, the System/32). Next up was the AS/400 and finally the IBM i, which is still in production. Here’s a secret, though, most of the code I’ve seen running on an IBM i dates back to at least the System/3 days and maybe even before that.

If you are interested in history, or midrange computers (which are mainframe-like in their operation), you might want to actually play with a real machine. A quick glance at eBay tells me that you might be able to get something workable for about $1000. Maybe. That’s a bit much. What if you could get time on one for free? Turns out, you can.

The Cloud Option

Head over to PUB400.com and register for an account. This won’t be instant — mine took a day or two. The system is for educational purposes, so be nice and don’t use it for commercial purposes. You get 150MB of storage (actually, some of the documentation says 250MB, and I have not tested it). While you are waiting for your account, you’ll need to grab a 5250 terminal emulator and adjust your thinking, unless you are a dyed-in-the-wool IBM guy.

Even though the IBM i looks like an old 1970’s midrange, the hardware is quite modern with a 64-bit CPU (and the architecture can handle 128 bits) and well-known stability. However, the interface is, well, nostalgic.

Ready…

Depending on your host computer, there are several IBM 5250 terminal programs available. They recommend tn5250 or tn5250j which use Java. However, I installed Mochasoft’s emulator into my Chrome browser. It is a 30-day free trial, but I figure in 30 days I’ll be over it, anyway.

Continue reading “Game Like It Is 1983”

Friday Hack Chat: BadgeLife

For the last few years at DEF CON, we’ve seen the emergence of an entire community of badge creators. These aren’t official badges — good news, since the official DEF CON badge will probably be an unpuzzling piece of laser cut acrylic this year. Lucky for us this is the biggest year yet for independent electronic badges. This is BadgeLife, the fine art of designing and building hundreds of badges for eager conference goers.

This Friday, we’ll be hosting a Hack Chat with a few of the folks tapped into BadgeLife. [Whitney Merrill], lawyer, hacker, and overseer of the Crypto & Privacy village will be joining us talking about this year’s badge, the puzzle she designed, and what BadgeLife really means. Also joining us will be [Karl Koscher], research scientist and co-organizer of the Crypto and Privacy village.

Also on deck will be the creators of this year’s Bender Badge. Last year, AND!XOR created one of the most popular electronic conference badges in recent memory. This year, the Bender Badge is getting an upgrade with Blast Processing, a quart of tequila, and two dozen amyls.

We’re proud to note that Hackaday.io has become an unofficial repository for all the best badges from the BadgeLife community. The Hunter S. Rodriguez badge is on there, as is the Ides of DEF CON. As the creator of the most innovative and desirable badge this year, I will also be attending this Hack Chat discussing the trials and tribulations of developing and shipping hardware on a very condensed schedule.

While the focus of this BadgeLife Hack Chat is developing electronic conference badges for DEF CON, it could have easily been called ‘Electronic Design’. There’s a massive amount of work that goes into each of these badges from design to production, and all of it is highly relevant to any hardware developer.

Here’s How To Take Part:

join-hack-chatOur Hack Chats are live community events on the Hackaday.io Hack Chat group messaging. This Hack Chat will take place at noon Pacific time on Friday, July 14th. Confused about where and when ‘noon’ is? Here’s a time and date converter!

Log into Hackaday.io, visit that page, and look for the ‘Join this Project’ Button. Once you’re part of the project, the button will change to ‘Team Messaging’, which takes you directly to the Hack Chat.

You don’t have to wait until Friday; join whenever you want and you can see what the community is talking about.