Making Funhouse Mirror Lenses

[Robb] has had a little experience making lenses from scratch. His first attempt was for a DIY projector, and while the lens was a little blurry, it did work rather well for something carved out of a block of acrylic. Now he’s taking his experiments with lenses even further with DIY optics that turn everything into a funhouse mirror.

There were two techniques tested while making these lenses. The first was the old standby, CNC milling. A piece of acrylic was put in a CNC and carved with a 1/2″ ball mill. The second technique was 3D printing on a very fancy and very expensive Objet Connex 500. Neither of these methods produce a ready to use lens; to get a finished lens out of the machined or printed objects, [Robb] had to wet sand with 240, 320, 400, 600, 1000, 1500, and 2000 grit sandpaper. After a few hours worth of sanding, the parts were polished with a scratch remover.

Making a lens like this isn’t really that novel – it’s basically the same way lenses have been made for 500 years. The real trick here is making funhouse mirror style lenses. These lenses were created by raytracing in Rhino and Neon. It’s tricky; the index of refraction for acrylic is a little lower than glass, and the refraction for 3D photoresin is a bit higher than glass.

With those models in hand, it’s a relatively simple matter of making some very cool and very strange lenses.

Hands-On Othermill Review Grinds Out Sparkling Results

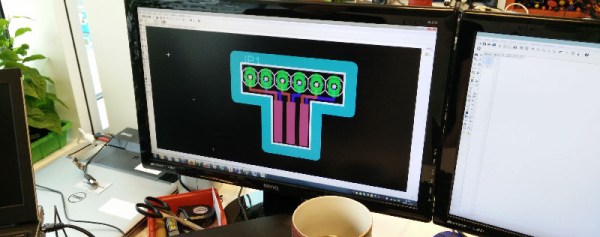
We’ve been on the lookout for alternatives to chemically etching circuit boards for years. The problem has been that we don’t particularly want to devote months of or lives learning how to build precision CNC mills. Off in the distance there may be an answer for that quandary if you don’t mind parting with twenty-two Benjamins. Sure, it’s a heck of a lot more expensive than toner transfer and cupric chloride, but the Othermill can be purchased right now (in your hands a few months later) and after reading this in-depth review we are a bit less hesitant about opening our wallets for it.

othermill-review-thumbIt’s a tome of a review, but that means there’s something for everybody. We especially enjoyed seeing the 10 mil board shown here which took about 1-hour to mill. Considering it has also been through-hole drilled we’d put that on part with the time it takes to etch a board. There are obvious places where the traces are not perfectly smooth (not sure if that’s burring or over-milling) but they are not broken and the board’s ready to be populated.

Alignment is something of an issue, but the Othermill isn’t limited to PCBs so we’d recommend designing and milling your own alignment bracket system as an early project.

Who isn’t envious of custom-builds that can get down to 10-mils, like this beauty from 2013. Our hopes had been sparked when Carbide 3D came onto the scene. We’re still optimistic that they will make a big splash when they start shipping preorders in a few months.

As this review proves, Othermill is already out in the wild with a 6-8 week wait before shipping. We saw it in action milling multiple materials at the Hackaday Omnibus Lauch Party and were duly impressed. Price or waiting-period aside we’re going to hold off until the software options expand beyond Mac-only (UPDATE: Othermill software support for Windows was added in early 2016); either Othermill will add support or someone will come up with a hack to use traditional CNC software. But if you count yourself as a subscriber to the cult of Apple the software, called Otherplan, does get a favorable prognosis along with the hardware.

Already have an Othermill sitting on your bench? Let us know your what you think about it in the comments below.

Bonus content: [Mike Estee], CTO of Othermill just gave a talk last night about how he got into making mills and the challenges of building something with super-high-precision. Sound isn’t good but the talk is solid. Hackaday’s [Joshua Vasquez] also gives a talk on the video about building an SPI core for FPGA. These talks are one of the Hardware Developer’s Didactic Galactic series which you really should check out if you’re ever in the San Francisco area.

Continue reading “Hands-On Othermill Review Grinds Out Sparkling Results”

Laser-Cut Clock Kicks Your CAD Tools To The Curb And Opts For Python

In a world deprived of stock hardware other than #6-32 bolts and sheets and sheets of acrylic, [Lawrence Kesteloot] took it upon himself to design and build a laser-cut pendulum clock. No Pricey CAD programs? No Problem. In a world where many fancy CAD tools can auto-generate gear models, [Lawrence] went back to first principles and wrote scripts to autogenerate the gear profiles. Furthermore, not only can these scripts export SVG files for the entire model for easy laser cutting, they can also render a 3D model within the browser using Javascript.

Given the small selection of materials, the entire project is a labor of love. Even the video (after the break) glosses over the careful selection of bearings, bolt-hole spacing, and time-sensitive gear ratios, each of which may be an easy macro in other CAD programs that [Lawrence], in this case, needed to add himself.

Finally, the entire project is open source and up for download on the Githubs. It’s not every day we can build ourselves a pendulum clock with a simple command-line-incantation to

make cut

Thanks for the tip, [Bartgrantham]!

Continue reading “Laser-Cut Clock Kicks Your CAD Tools To The Curb And Opts For Python”

Microscope Camera For Zeroing CNC Machines

After what we’re sure is several dozen screw-ups or at the very least a lot of wasted hours, [Chris] has gotten around to building a very precise microscope camera mount for zeroing out his CNC machine.

If you need to mill a few bits out of a sheet of metal or plastic, it’s important to know exactly where you’re cutting. A CNC machine can take care of the relative positioning, but if you already have half your holes drilled, you also need absolute positioning. This means placing the work piece exactly where you want to cut, or failing that, zeroing the machine to a predefined point on the piece.

[Chris] is accomplishing this with a pen-shaped USB microscope. With a 3D printed mount and a few magnets, this camera can clip right on to the machine, and with the camera interface in Mach3, it’s pretty easy to zero out the mill to within a thousandth of an inch.

There’s a video demo of the camera in action below, but there’s a lot more CNC mods on [Chris]’ website. There’s custom 3D printed vacuum nozzles, and a lot of work on a small desktop Grizzly mill.

Continue reading “Microscope Camera For Zeroing CNC Machines”

X-Carve, The Logical Upgrade To A Shapeoko

When it comes to small CNC carving machines for hackerspaces and extremely well-equipped garages, the Shapeoko, or something like it, has been the default machine. It’s dead simple – a Dremel attached to linear rails – and is useful for everything from milling PCBs to routing complex woodworking project to plotting designs with a pen. Now, [Bart Dring], the guy behind the Buildlog.net lasers and Inventables have teamed up to create the next generation of carving machines. It’s called the X-Carve, and while it’s fully compatible with the Shapeoko 2, it adds a few improvements that make for a much better machine.

The X-Carve does away with the Dremel-based spindle and replaces it with something that can produce torque. There’s a 24VDC spindle in the stock arrangement that will give you speed control through Gcode. There is, of course, adapters to fit the Dewalt and Bosch routers most commonly used in these types of machines.

As far as the gantry goes, the X and Y axes are makerslide; no change there. The Z axis leadscrew has an optional upgrade to Acme threaded rod, an improvement over the M8 threaded rod found in just about every other DIY machine kit. The entire machine is basically all the upgrades a Shapeoko should have, with stronger corners, NEMA 23 motors, and increased rigidity.

There are a few versions of the X-Carve, ranging from an upgrade kit to the Shapeoko 2 to a fully loaded kit with a square meter of machine space. The big, high-end kit ships for around $1250, but a smaller kit with 500mm rails, NEMA 17s, and threaded rod lead screw is available for around $800.

[Bart] and [Zach], the founder of Inventables sat down and shot a video going over all the features of the X-Carve. You can check that out below.

Continue reading “X-Carve, The Logical Upgrade To A Shapeoko”

Cardboard CNC Machine Boxes Up Both A Tool And A Framework

Want to build up a desktop CNC machine without breaking your pocketbook? [James Coleman], [Nadya Peek], and [Ilan Moyer] of MIT Media Labs have cooked up a modular cardboard CNC that gives you the backbone from which you can design your own machine.

The CNC build comprises of design instructions for a single axis linear stage and single axis rotary stage with several ideas on how to combine multiple of these axes together to construct a particular machine. Whether your milling wood, laser-engraving your desk, or pipetting your bacteria samples, the designs [Dropbox] and physical components can be adopted for your end-application.

Perhaps the most interesting aspect of this project is that, at the high level, it is not just a cnc, but a framework known as Gestalt. This architecture enables users to develop their own machine configuration consisting of multiple software nodes linked together with high-level Python Code. Most of the high level computation is organized by a Python library that calls compiled C-code. This high-level framework processes instructions through the desired machine’s kinematics to output commands to the motor controllers. Finally, the top-level interface does away with the archaic GCode with two alternatives: a Python interface consisting of function calls to procedures and a remote interface to make procedure calls through http requests. While the downside of a motion control language is that commands have no standardization; they are, however, far more human-readable, a benefit that plays into the Gestalt Framework’s aim “to be accessible to individuals for personal use.”

gestaltFramework

In the paper [PDF], [Ilan] expresses the notion of a tool as an impedance-matching device, an instrument that extends the reach of our creativity to bend and morph a broader range of shapes into forms from our imagination. Where our hands fail in their imprecision and weakness, tools bridge this gap. Gestalt and the Cardboard CNC are first steps to creating a framework so that anyone can design and realize their own impedance-matching device, whether they’re weaving steel cables or carving wood.

The folks at MIT Media Labs a familiar heavy-hitters in this field of low-cost machinery, especially the kind that fit in a suitcase. We’re thrilled to see a build that reaches out directly to the community.

via [CreativeApplications.net]

DIY Speaker Build

There is something refreshing about a neat, portable audio hack – especially one than involves making a DIY Speaker Box from scratch. [Dave] had some time to spare and his ShapeOko was lying idle and hankering for some attention. He needed a small speaker that he could place outside when entertaining guests. After some quick homework, he zeroed in on the speakers he would use.

Using some online resources , he did some basic math to figure out the box size and shape, but then eventually threw caution to the wind and went ahead with the design he had in mind. Most speaker box builds use some form of wood or MDF. [Dave] had 9mm thick ABS sheets lying around and decided to use them instead. He used an interesting technique for putting the box together. The front and rear panels had slots milled in to them to follow the shape of the side panels. The two side panels had strategically cut slots half way through the thickness of the ABS to make it easier to heat bend them. He then used a heat gun to bend the side panels to fit them to the slots on the front and back panels. In the end, we’re guessing he used just four pieces of ABS to build a complex shape. Since the HiVi B3N speakers are full range, he also built a 1st order crossover to make sure the highs were diverted to the tweeters. All in all, a neat, clean build.