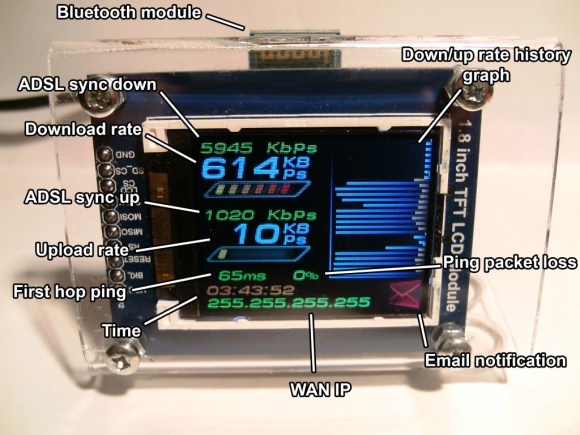
[Zak] wanted to keep tabs on his network connection without needing to log into his router. Since his router was a PC running Debian Linux, he rigged up a Bluetooth Network Monitor to display the information.
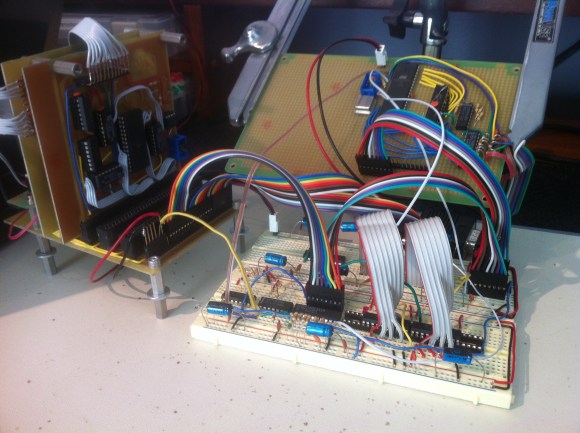
The monitor is based on a ATMega328P that reads data from a Bluetooth serial connection and displays it on the TFT screen. It uses a low cost Bluetooth module to receive data from a router. A shell script fetches the data and formats it into a string that can be sent over the Bluetooth link.
A USB connection with a desktop computer is used to power the device, but [Zak] also added USB support using V-USB. He plans to use it to get data from the desktop. For example, he could display CPU load and temperature data.
Overall, this is a nice project for fetching data wirelessly and displaying it on your desk. [Zak] has provided the code and Eagle files with his write up for anyone interested in building their own.