Developing An Open Source Bike Computer

While bicycles appear to have standardized around a relatively common shape and size, parts for these bikes are another story entirely. It seems as though most reputable bike manufacturers are currently racing against each other to see who can include the most planned obsolescence and force their customers to upgrade even when their old bikes might otherwise be perfectly fine. Luckily, the magic of open source components could solve some of this issue, and this open-source bike computer is something you’ll never have to worry about being forced to upgrade.

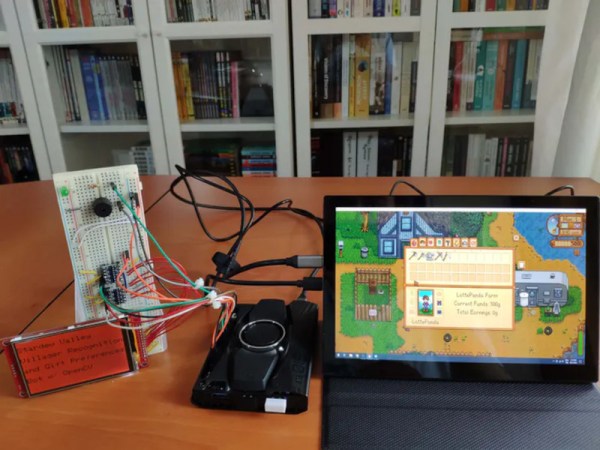
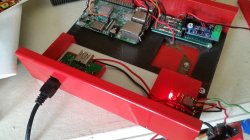
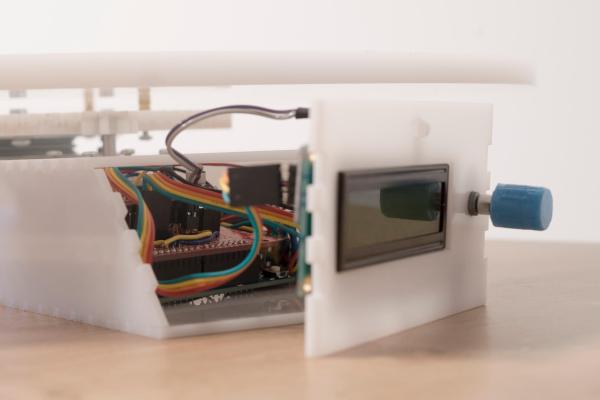
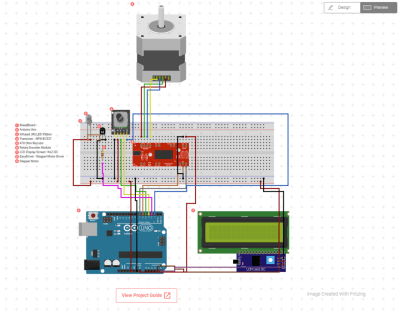
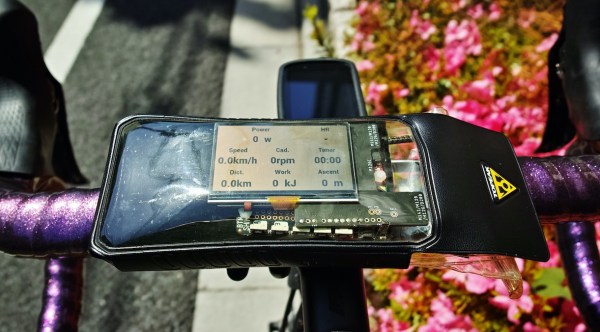
The build is based around a Raspberry Pi Zero in order to keep it compact, and it uses a small 2.7 inch LCD screen to display some common information about the current bike ride, including location, speed, and power input from the pedals. It also includes some I2C sensors including pressure and temperature as well as an accelerometer. The system can also be configured to display a map of the current ride as well thanks to the GPS equipment housed inside. It keeps a log in a .fit file format as well so that all rides can be archived.

When compared against a commercial offering it seems to hold up pretty well, and we especially like that it’s not behind a walled garden like other products which could, at any point, decide to charge for map upgrades (or not offer them at all). It’s a little more work to set up, of course, but worth it in the end. It might also be a good idea to pair it with other open source bicycle components as well.

Thanks to [Richard] for the tip!

A robot that uses CV to detect villagers in Stardew Valley and display their gift preferences on a screen.

Stardew Valley Preferences Bot Is A Gift To The Player

It seems like most narrative games have some kind of drudgery built in. You know, some tedious and repetitious task that you absolutely must do if you want to succeed. In Stardew Valley, that thing is gift giving, which earns you friendship points just like in real life. More important than the giving itself is that each villager has preferences — things they love, like, and hate to receive as gifts. It’s a lot to remember, and most people don’t bother trying and just look it up in the wiki. Well, except for Abigail, who seems to like certain gemstones so much that she must be eating them. She’s hard to forget.

[kutluhan_aktar]’s villager gift preferences bot is a fun and fantastic use of OpenCV. This bot uses a LattePanda Alpha 864s, which is a single-board computer with an Arduino Leonardo built in. It works using template matching, which is basically a game of Where’s Waldo? for computers.

Given a screenshot of each villager in various positions, the LattePanda recognizes them among a given game scene, then does a lookup of their birthday and preferences which the Leonardo prints on a 3.5″ LCD screen. At the same time, it alerts the player with a buzz and big green LED. Be sure to check it out in action after the break.

In Animal Crossing, the drudgery amounts to pressing the A button while catching shooting stars. That’s not a huge problem for a Teensy.

Continue reading Stardew Valley Preferences Bot Is A Gift To The Player”

Escape To An Alternate Reality Anywhere With Port-A-Vid

There was a time when only the most expensive televisions could boast crystal clear pixels on a wall-mountable thin screen. What used to be novelty from “High Definition Flat Screen Televisions are now just “TV” available everywhere. So as a change of pace from our modern pixel perfection, [Emily Velasco] built the Port-A-Vid as a relic from another timeline.

The centerpiece of any aesthetically focused video project is obviously the screen, and a CRT would be the first choice for a retro theme. Unfortunately, small CRTs have recently become scarce, and a real glass picture tube would not fit within the available space anyhow. Instead, we’re actually looking at a modern LCD sitting behind a big lens to give it an old school appearance.

The lens, harvested from a rear-projection TV, was chosen because it was a good size to replace the dial of a vacuum gauge. This project enclosure started life as a Snap-On Tools MT425 but had become just another piece of broken equipment at a salvage yard. The bottom section, formerly a storage bin for hoses and adapters, is now home to the battery and electronics. All original markings on the hinged storage lid were removed and converted to the Port-A-Vid control panel.

A single press of the big green button triggers a video to play, randomly chosen from a collection of content [Emily] curated to fit with the aesthetic. We may get a clip from an old educational film, or something shot with a composite video camera. If any computer graphics pop up, they will be primitive vector graphics. This is not the place to seek ultra high definition content.

As a final nod to common artifacts of electronics history, [Emily] wrote an user’s manual for the Port-A-Vid. Naturally it’s not a downloadable PDF, but a stack of paper stapled together. Each page written in the style of electronics manuals of yore, treated with the rough look of multiple generation photocopy rumpled with use.

If you have to ask “Why?” it is doubtful any explanation would suffice. This is a trait shared with many other eclectic projects from [Emily]. But if you are delighted by fantastical projects hailing from an imaginary past, [Emily] has also built an ASCII art cartridge for old parallel port printers.

Continue reading “Escape To An Alternate Reality Anywhere With Port-A-Vid”

Corn Starch Fixes A Game Boy Screen

Nintendo’s Game Boy was the handheld of the 1990s. Like many of their products, it was famous for its ability to stand up to punishment from angry children and military strikes alike. Its biggest weakness is perhaps its unbacklit LCD screen. Retrogamers and chiptuners alike find themselves modifying and replacing these regularly.

A common problem during these swaps is “Newton rings” – an issue where the polarizer comes into contact with the LCD glass, causing unsightly visual artifacts. Thankfully, there is a simple fix. It’s possible to keep the two separated with the application of microscopic particles, too small to see. [esotericsean] uses cornstarch, while [bogamanz] favors diatomaceous earth. For best results, a makeup brush can be used to apply a fine coating, and compressed air used to clean out the Game Boy and remove any excess.

It’s rare to fix a delicate screen problem with a household staple, but gratifying when it works. The results are hard to see on camera, but many report this fixing the frustrating issue. So, if you’re planning to backlight your Game Boy, keep this in your bag of tricks. It’ll allow you to get the best possible result, and may be useful on other old-school LCDs as well. Video after the break.

Continue reading “Corn Starch Fixes A Game Boy Screen”

This DIY Turntable Just Got Freaky Fresh

Photography turntables are made for both the precise and lazy. Whether you are concerned about the precision of consistent angles during a photo shoot or you simply do not want to stand there rotating a plate after every picture — yes, it does get old — a lazy susan style automatic photography turntable is the ticket. This automatic 360° design made over at circuito.io satisfies both of these needs in an understated package

The parts required to make this DIY weekend project are about as minimal as they get. An Arduino Uno controls it all with a rotary encoder for input and a character LCD to display settings. The turntable moves using a stepper motor and an EasyDriver. It even takes care of controlling the camera using an IR LED.

The biggest obstruction most likely to arise is creating the actual laser cut casing itself. The circuito team avoided this difficulty by using Pololu‘s online custom laser cutting service for the 4 necessary laser cut parts. After all of the components have been brought together, all that is left to do is Avengers assemble. They provide step by step instructions for this process in such a straightforward way that you could probably put this sucker together blindfolded.

We have seen some other inspired photography turntables on Hackaday before. [NotionSunday] created a true turntable hack based off of the eject mechanism of an old DVD-ROM drive. With the whole thing spinning on the head assembly of a VCR, this is the epitome of letting nothing go to waste. We also displayed another very similar Arduino Uno controlled turntable created 2 years ago by [Tiffany Tseng]. There is even a non-electronic version out there of a DIY 360° photography turntable that only uses a lazy susan and tape measure. All of these photography turntable hacks do the job wonderfully, but there was something that we liked about the clean feel of this one. All of the necessary code for this project has been provided over at GitHub. What is your favorite photography turntable?

Coffee Table Puts On A Show Behind Smoked Glass

This coffee table is a real show-piece. It’s got a smoky glass surface that is hiding the LCD screen within. But what fun would it be if it could only play video? The rest of the enclosure houses all the parts necessary to make this living room centerpiece into a computer.

After the break you can see a video showing off each step of the build process. It starts by ridding the screen of its enclosure, and using what’s left to determine the size of the wood frame for the table. With the display firmly in place [Nate] sets to work position, mounting, and developing cooling solutions for the motherboard and the rest of the bits. He does nice work and ends up with a table that we’d be proud to feature in our homes.

Now he’s got a lot of computing power and a huge display, but isn’t something missing? How hard do you think it would be to add touch sensitive input to this? We’re wondering if the overlays used to make those Android touchscreens could be mounted on the underside of the glass?  Continue reading “Coffee Table Puts On A Show Behind Smoked Glass”