A Capable KVM Built With The ESP32

[Evgenij Spitsyn] spotted a KVM build on these very pages some time ago. That inspired their own build, leveraging the versatility of the ESP32-P4 microcontroller.

The concept is straightforward. Named the ESPKVM, the device is designed to hook up to a computer’s HDMI and USB ports. It captures the video output, while presenting itself as a standard keyboard and mouse device. In this way, it allows remote control of the machine over IP. It achieves this feat with the aid of the Toshiba TC358743 HDMI-to-CSI bridge, which is essentially the video capture hardware of the build.

The video output of the machine is streamed in MJPEG or H.264 format. The device is capable of serving up storage from a micro SD card or the onboard flash, as well as handling things like power/reset control and wake-on-LAN. All in all, it’s a very complete package, and full of useful features. Just don’t use it over the public internet yet — [Evgenij] notes it hasn’t been reviewed for potential security holes yet, even though it has some basic authentication features baked in.

If you’ve got an ESP32-P4 ready to go with a TC358743 HDMI bridge, you can actually head over to the ESPKVM website and flash the code right in your browser to get going. Meanwhile, if you found this build interesting, you might like to scope out the one that inspired it. If you’re cooking up similar utility hacks, be sure to notify the Hackaday tipsline.

E-ink Writing Deck Rocks A Typewriter Aesthetic

[Myth Made] has a goal to get into writing. However, she likes to do things the aesthetic way, rather than the easy way. Thus, she has eschewed simple word processing on a conventional computer, instead choosing to build a remarkably attractive writing deck styled after a classic typewriter.

The keycap marking technique is worth watching the video for on its own.

The build began with a mechanical keyboard with a compact layout. The square keycaps were swapped out for custom 3D printed versions that were rounded to suit the desired look. [Myth Made] used a neat technique where the caps were colored in with a paint marker and then ran through a laser engraver to bond the paint to the surface to make all the key markings.

With the input side sorted, the rest of the build could progress. The typewriter shell was printed in multiple parts, and then welded together with acetone. This was then covered with an ABS-acetone solution that helped remove some of the surface artifacts, before priming and paint. As for the electronics side, a Raspberry Pi Zero runs the show, hooked up to a Waveshare e-ink display which can be cranked up and down like a piece of paper coming out of a typewriter. There’s also a lovely 7-segment display which displays the current word count.

It’s a fun build that looks utterly joyous to use. Sometimes leaning into the aesthetic side of a project is what makes it so magical.

Continue reading “E-ink Writing Deck Rocks A Typewriter Aesthetic”

Industrial GPU Adapted For The Desktop

As technologies change and adapt, we’re often left with seemingly useless junk that has nowhere to go. Certainly anyone still sitting on a pile of floppy disks feels this way sometimes, but odds are anyone who owns a mining ASIC or an NFT can attest to that as well. The trillions of dollars flowing into GPU-based data centers will likely become the next victim of this trend, so if you want to capitalize on the losses of some venture capitalist you’ll want to figure out a way to get GPUs meant for a server into your desktop doing useful work.

Of course, calling these devices GPUs is a bit of a stretch compared to the Radeon and GeForce cards many of us are used to using for gaming. These don’t even have a PCIe slot or video output, after all. But, as [] notes, the VRAM and GPU cores are very real and can still do useful work. An adapter board is able to mate a Tesla V100 SXM2 16 GB GPU to a standard PCIe slot, which solves the first problem, but the major downside from there is that the cooling fan for this unit was literally deafeningly loud. At 82 dB it was about as loud as a lawnmower, which is fine in a server rack but not great in a bedroom. [Oscar] found a way to tamp down the fan speed, making it usable in a home.

Without video output, the utility of these cards mainly comes from adding VRAM and compute for tasks that benefit from parallel computing. Using tensor splitting, [Oscar] is running a local LLM with this card alongside his RTX 4080, providing 32 GB of VRAM on his NixOS system. With his benchmarking tests, the LLM sports impressive stats for a self-hosted model, ranking somewhere around Claude Sonnet 4.6. What’s even more impressive is that this is all done for around £200, and with the rate the various LLM companies are ratcheting up pricing could pay itself back very quickly. If trading off performance for cost is acceptable, though, it’s possible to run local models on much less powerful hardware as well.

Counterfeit Retro Mainboards With Fake AGP Slots Are A Thing

Sometimes that retro gaming itch strikes, and you just have to source components for a Pentium 4 build, like [Computer Retro Bus] did recently. Unfortunately, along the way he learned that you can actually get counterfeit mainboards. Case in point the purported ‘Asrock P4i45GV’ that was purchased as the core of this Pentium 4 build, which turned out to have many issues that included a fake AGP slot.

The mainboard was bought off Facebook Marketplace, with the first sign of trouble being spotty GPU support for the AGP slot, and an inability to install a driver for a card that seemed to work. Following this, issues with the installed Soundblaster soundcard popped up, with the use of Windows ME as OS being of course a factor, but even ME is generally not this sketchy.

Warning on fake AGP slot on genuine Asrock mainboard. (Credit: The Retro Web)

At some point he decided to actually dig into this Socket 478 mainboard that he had purchased, only to find out that there was a reason why there were no real markings on it. After an image search it turned out to be a clone of the aforementioned Asrock mainboard, including the original’s ‘feature’ of connecting the ‘AGP’ slot to the PCI bus. This explained why only the AGP GPUs that are compatible with PCI worked with this mainboard, as it’s actually Asrock’s ‘AGI’ slot.

Effectively just a way to scam buyers into believing that they bought a mainboard with an AGP slot when it was just a regular PCI slot cosplaying as an AGP slot. This doesn’t just mean lower speeds and spotty support with AGP cards, but also also potentially dead GPUs, as this mainboard inherited the same 3.3V-only card support.

Unlike PCI slots that are keyed for 3.3/5V voltage support, AGP slots are keyed for either 3.3V or 1.5V, or no key for universal support. These ‘AGI’ slots are sadly keyed for 1.5V AGP cards and thus will expose 1.5V-only AGP cards to potentially fatal voltages.

On the bright side, these are at least genuinely old mainboards, using the same AGP-less Intel chipsets, made back in the day to sell to unsuspecting buyers. Clearly the pain that these fake boards as well as genuine Asrock boards that these ripped off caused back in the day continues in 2026. Caveat Emptor, as they say.

Continue reading “Counterfeit Retro Mainboards With Fake AGP Slots Are A Thing”

Using Your Own RBMK Reactor Control Center At Home

To give people the most intimate RBMK experience, the [Chornobyl Family] has been working tirelessly at not only replicating the original RBMK reactor control room and its SKALA industrial control system’s controls, but also to create a version that you could tinker with at home if you ever fancied getting your own RBMK operator license. This starts with the operator console, with its use demonstrated in a recent video including a range of common commands.

In this video the entering of codes on the console to interact with the system is detailed, including the logic behind it. In the absence of large displays to display many parameters and such, this way the operator could ‘talk’ with the control system, including obtaining current sensors readings and the setting and changing of setpoints. From the same console you can also select and run programs, which is useful for automating tasks, like monitoring coolant flows.

In the second video not only the construction of the control panel is covered, but also a visual representation of the simulated reactor core which is displayed on a connected monitor. Although not a part of the original SKALA system as such, a much larger version existed as a wall-sized physical version inside the control room, so it’s definitely more home-simulator friendly.

We previously covered this SKALA system that controls RBMK reactors, as well as the 1990s modernization of the Chornobyl Nuclear Power Plant.

Continue reading “Using Your Own RBMK Reactor Control Center At Home”

Make A DIY E-ink Faceplate For Valve’s Steam Machine

Valve has always designed hacker-friendly hardware, and in that spirit, [NaKyle Wright] released Inkterface, a design for an E-ink faceplate to fit the recently released Steam Machine. As far as projects go, this one is meticulously documented, so give it a peek.

The system uses a selection of components that include a 5.83″ E-ink panel and driver board, a small lithium-polymer battery, and an ESP32-based controller board.  A cleverly-designed 3D printed frame and bezel hold everything just so, creating a snug assembly with minimal wiring hassles.

A small service can be easily configured to control how the display updates.

The faceplate is wireless and self-contained, attaching with the help of four magnets. On the software side, the host machine communicates over Bluetooth, and a service takes care of pushing updates. An app for configuring and talking to the display will be available on Steam eventually, but in the meantime one can install that part manually.

[NaKyle]’s bill of materials calls for specific components, but the underlying design is very modular. Should one wish to make hardware or component changes, alterations to the 3D printed parts might be needed as well. Fortunately, [NaKyle] includes the .step files alongside the .stl models. We love to see that, because it makes tweaking or customizing so much more accessible. A homebrewed version of this E-ink panel might be just the thing to complement a homebrewed Steam machine.

Be sure to also check out the repository of Steam hardware, which contains drawings and 3D models of the Steam Deck and Steam Controller, useful for designing holders or custom brackets or whatever else one may need.

Yesterday’s Technology, Re-engineered Today

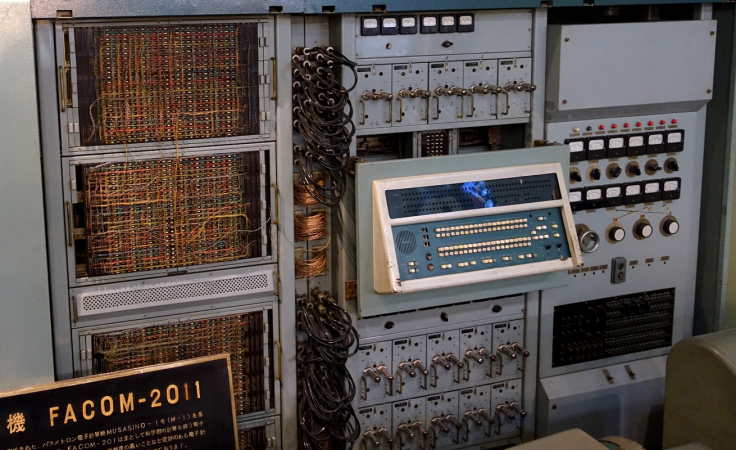
Watching [sprite_tm]’s build of a handheld 486-based gaming computer, we got to thinking about retro computers and the eternal questions of how much of the computer needs to be actually “old” for it it be retro. Where is the soul of a retro computer? The CPU? The old yellowing plastic case? Maybe it depends on what you’re trying to get out of the hobby.

There is of course a spectrum of people playing around with old computers. For some people, let’s call them “vintage computer enthusiasts”, half of the fun is in keeping the actual old hardware running. This group tends to know what teletype lubricant smells like, and how to tell which capacitors need replacing.

For others, “team retro”, the joy is in using the machine itself, whether that be teaching the old dogs new tricks, or simply loading up nostalgic video games. Team retro is more content with emulations or emulations that are wrapped up neatly in hardware workalikes. They know which registers need POKEing, and whether or not Commander Keen is running at the right framerate.

I think [sprite_tm]’s project falls in with yet another camp, the retro-reengineers. Here, the idea is to step through the engineering lessons of the past by re-designing something from a bygone era. So when [sprite_tm] went with a period 486 CPU backed up by a modern FPGA, perhaps ironically borrowing code from the modern MiSTer project, it makes sense for his goals. Retro-reengineers know the bus architecture and the memory timings, and they are reinventing the wheel as a learning experience. Or in the case of [Voja Antonic]’s imaginary four-bit machine, it’s a teaching experience.

How you work often reflects what you’d like to get out of the project, and at Hackaday, of course, we love all of the above! We’ve identified at least three broad schools of fooling around with old computers. Are we missing any?