It seems not a day goes by that we don’t see somebody cramming a Raspberry Pi into some unwilling piece of consumer electronics. But despite being a pretty obvious application for the diminutive ARM board, we don’t often see it installed in an actual computer. Which makes this very clean Raspberry Pi laptop conversion by [Sherbethead2010] all the more interesting.
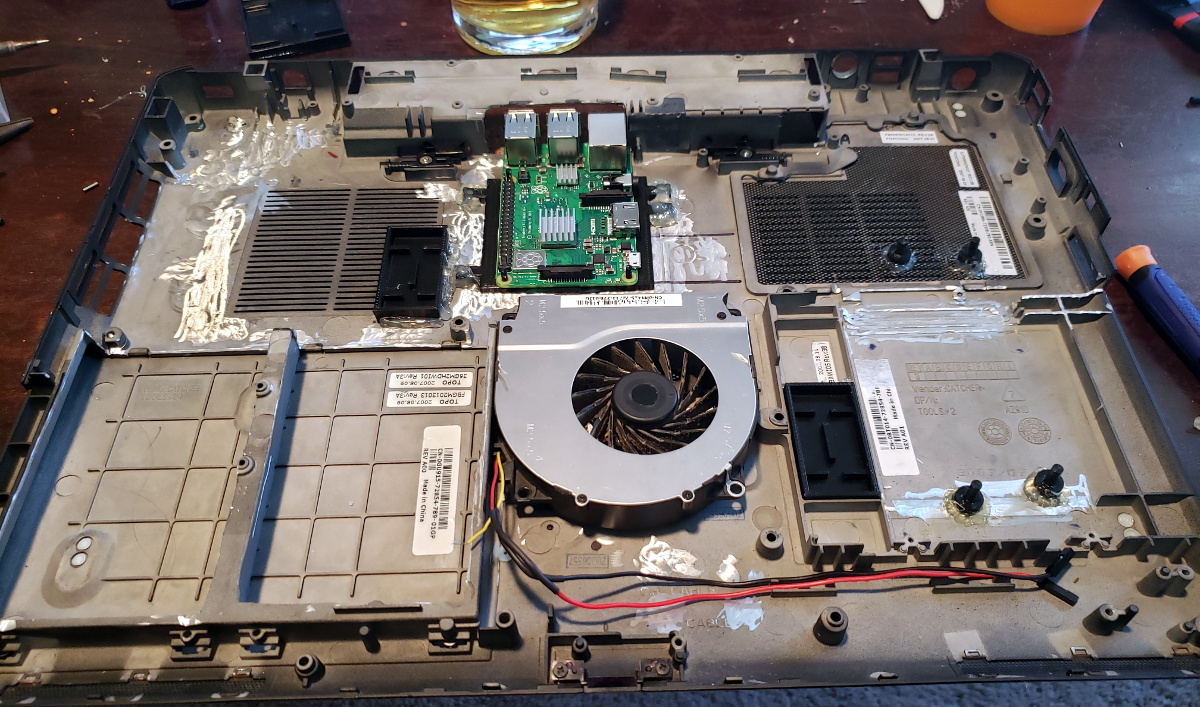 The first step involved taking a Dremel to the Dell’s chassis and essentially leveling out the entire internal volume. The only component that got reused was the fan, and even that appears to be relocated, so all the mounting posts were just standing in the way of progress.
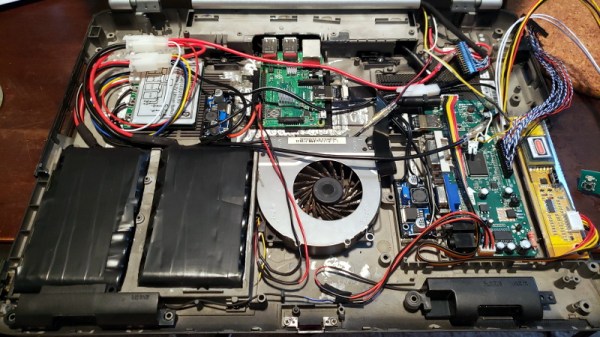
[Sherbethead2010] mounted the Raspberry Pi towards the rear of the case so its USB and Ethernet ports would be available from the outside, and installed a driver board for the original Phillips LP171 LCD panel in the old drive bay. Power is provided by two custom 18650 battery packs connected to dedicated buck converters, along with an onboard charge controller to safely top them off.
Rather than trying to adapt the original input devices, [Sherbethead2010] decided to take the easy route and installed a Rii K22 wireless keyboard with integrated track pad into the top of the laptop. It turned out to be an almost perfect fit, and beyond the keys being slightly off-center, at first glance it looks like it could be stock.
The last time we saw a Raspberry Pi so well integrated into a real laptop, it was to create a functioning version of one of the props from Hackers. While that build was a joy for its own reasons, it’s hard not to be impressed with how unassuming this computer looks after all the work that’s been done to it.