Meetings can actually be useful. It’s hard to believe, but they can actually save time if done right. While most of us are in a perpetual state of torture by Kevin in marketing holding another three-hour meeting during lunch hours, there are a few of us who know their hidden power when put in the right hands.
Working as a contractor, wasted meetings mean wasted billable hours. Even wasted meeting time is covered in the cost of the contract it runs the risk of giving the client the impression that you’re not as productive as originally thought. Organized, productive meetings show that you know what you’re doing and that the cost of your services as a whole is a good value. Yeah, some meetings suck but they are necessary and should be productive.
A meeting needs three things to be worth the time spent on it.
A well prepared for, simple, and clear agenda.
A time limit.
Something needs to be written down at the end of it.
I’ll start with the third item as it shapes the rest. The point of a meeting is to have something to write down at the end of the meeting. Any meeting that ends up in anything requiring fallible human memory was a waste of everyone’s time. This includes, verbal agreements, handshake agreements, ideating (pronounced idioting), brainstorming, think tanking, and the like.
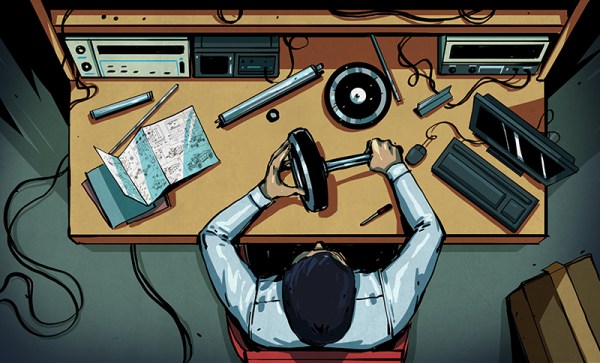
You sit there, irritation bubbling deep within as minute forty-five of the meeting ticks past on the clock in the corner of the office. Fight or flight is in a contest with your attention span as you struggle to keep an interested look on your face while they drone on. Real work could be done in this time. Maybe if you go to the bathroom you could sort of… fast forward the meeting. Panicked thinking continues for a bit until your awareness snaps back to the babble of words in the room.
“How long will it take you to do this?” the manager asks.
“A couple of days maybe?” You reply in turn. The manager nods and you take your escape. Little do you know that you have failed.
The project swerves out of control. Two days on the dot the manager is there expecting results. How? How did this happen again? It felt right! Two days is all you’d need to do such a simple project. It ended up taking a week.
The next meeting you say two weeks just to be sure. Everyone nods gravely, upset that something would take so long, but the work must be done. Two days later you sheepishly wander into the manager’s office with a completed project. He looks pleased but confused. The next meeting, he insists that you can do it in half the time. You and your fragile pride bowl ahead only to deliver late. The mystery!
This was my life until I started bugging the more experienced around me. I learned a lot from them and I ended up distilling it down into a few rules.
There Is No Other Unit Than Hours
Be honest.
Get Granular.
Promise a Range. Give a Deadline.
Why?
Why does someone want a time estimate? What are they going to do with this information? When working on a contract job it often feels like sticking a foot in a trap when a time estimate is given. Are they going to hold me to this? What if it goes wrong? After all, we are not fortune tellers. Unless the manager is extremely bad or you show yourself to be extremely lax in your duties, it is unlikely that a time estimate will be used against you.
However you sell your kits online, you’ll have to find a means of shipping them to the customer. For an online operation this unseen part of the offering is more important than any other when it comes to customer satisfaction, yet so many large players get it so wrong.
This is the final article in a series looking on the process of creating and selling a commercial kit from a personal electronic project (read all the posts in this series). We’ve looked at the market, assembling the kit and its instructions, and how to set up an online sales channel. In this part we’ll look at what happens when you’ve made the sale, how to get it safely to the customer and how to keep the customer happy after the sale by offering support for your products. We’ll also give a nod to marketing your site, ensuring a fresh supply of customers.
One of my favorite types of science fiction character is found in the books of Ben Bova; a business mogul who through brilliance, hard work, and the force of personality drives mankind to a whole new level in areas such as commercializing space, colonizing the stars, battling governments, and thwarting competitors.
It is possible to name a few such characters in real life — influencing the electricity industry was George Westinghouse, automobiles was Henry Ford, and more recently Steve Jobs and Elon Musk. With Elon’s drive we may all finally be driving electric cars within 20 years and spreading out into space with his cheap rockets. Due to the latter he may be the closest yet to one of Bova’s characters.
So what’s it like to work for Elon Musk at Tesla or SpaceX? Most of us have read articles about him, and much that he’s written himself, as well as watched some of his many interviews and talks. But to get some idea of what it’s like to work for him I greatly enjoyed the insight from Ashlee Vance’s biography Elon Musk – Tesla, SpaceX, and the Quest for a Fantastic Future. To write it Vance had many interviews with Musk as well as those who work with him or have in the past. Through this we get a fascinating look at a contemporary mogul of engineering.
This article is the fifth in a series looking at the process of bringing an electronic kit to market from a personal project. We’ve looked at market research, we’ve discussed making a product from your project and writing the best instructions possible before stuffing your first kits ready for sale. In this article we’ll tackle the different means of putting your kits out there for sale.
Given a box of ready-to-sell kits, what next? You have to find some means of selling them, getting them in front of your customer, making the sale, sending them to the purchaser, and safely collecting their money. A few years ago this was an expensive and risky process involving adverts in print magazines and a lot of waiting, but we are fortunate. The Internet has delivered us all the tools we need to market and sell a product like an electronic kit, and in a way that needn’t cost a fortune. We’ll now run through a few of those options for selling your kits, before looking at shipping, marketing, and post-sales support in the final article in the series.
I bet the hand saw really changed some things. One day you’re hacking away at a log with an ax. It’s sweaty, awful work, and the results are never what you’d expect. The next day the clever new apprentice down at the blacksmith’s shop is demoing his beta of his new Saw invention and looking for testers, investors, and a girlfriend. From that day onward the work is never the same again. It’s not an incremental change, it’s a change. Pure and simple.
This is one of those moments. The world of tools is seeing a new change, and I think this is the first of many tools that will change the way we build.
Like most things that are a big change, the components to build them have been around for a while. In fact, most of the time, the actual object in question has existed in some form or another for years. Like a crack in a dam, eventually someone comes up with the variation on the idea that is just right. That actually does what everything else has been promising to do. It’s not new, but it’s the difference between crude and gasoline.
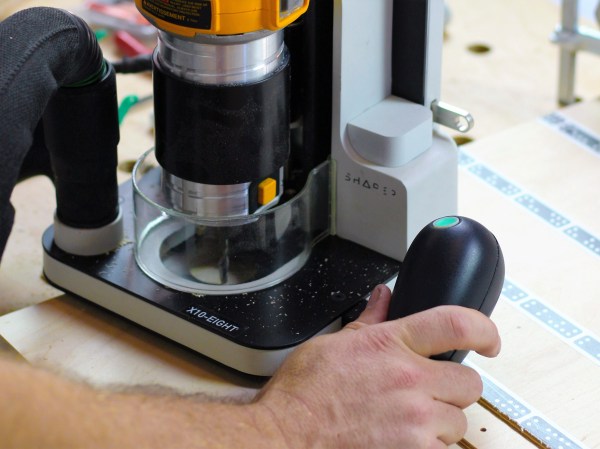
My poetic rasping aside, the Shaper Origin is the future of making things. It’s tempting to boil it down and say that it’s a CNC machine, or a router. It’s just, more than that. It makes us more. Suddenly complex cuts on any flat surface are easy. Really easy. There’s no endless hours with the bandsaw and sander. There’s no need for a 25,000 dollar gantry router to take up half a garage. No need for layout tools. No need to stress about alignment. There’s not even a real need to jump between the tool and a computer. It can be both the design tool and the production tool. It’s like a magic pencil that summons whatever it draws. But even I had to see it to believe it.
If you had made it this far in your journey from project to kit, you would now have a box of electronic components, a pile of printed instructions, and a box of plastic bags, thin card boxes, or whatever other retail packaging you have chosen for your kit. You are ready to start stuffing kits.
It’s All In The Presentation
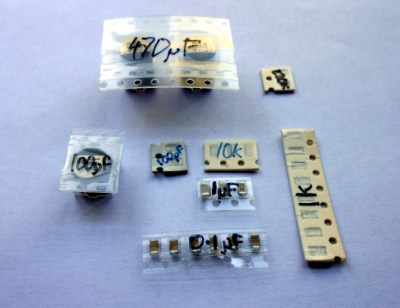
Label all your hard-to-identify components, your customers will appreciate it.
Your priorities when stuffing a kit are to ensure that your customer receives all the components they should, they can easily identify each component, and that the whole kit is attractively presented such that it invites them to buy or build it when they first see it. This starts before you have packed any components, you must carefully prepare each component into units of the required number and label them if they are otherwise not easy to identify. Pre-cut any components supplied on tape, and write the part number or value on the tape if it is not easily readable. You may even have to package up some difficult-to-identify components in individual labeled bags if they can not have their values written on them, though this incurs an extra expense of little bags and stickers. Some manufacturers will insist on using black tape on which an indelible pen doesn’t show up!
Take care cutting tapes of components, it is sometimes easy to damage their pins. Always cut the tape from the bottom rather than the side with the peelable film, and if necessary carefully bend the tape slightly to open up the gap between components for your scissors.
If you start by deciding how many kits you want to stuff in a sitting, list all the kit components and prepare that number of each of them in the way we’ve described. Then take the required number of packages or bags, and work through each component on the list, stuffing all the bags with one component before starting again moving onto the next. In time you will have a pile of stuffed kits ready to receive their instructions and labeling.
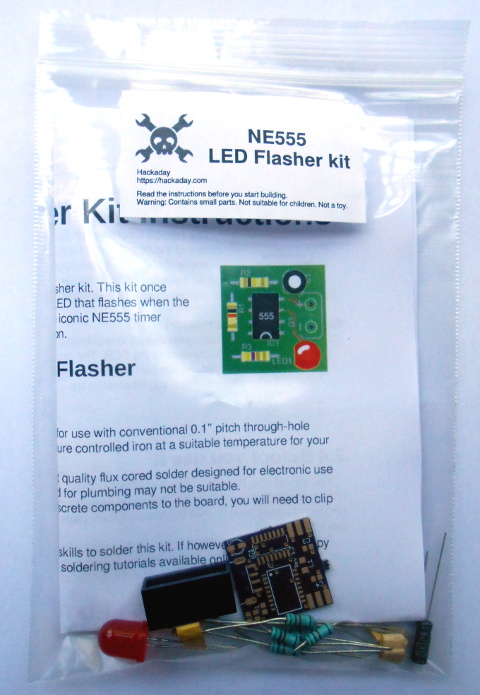
The next step will be to fold your instruction leaflet and pack it in the kit. Take a moment to consider how it can be most attractively presented. For example with a kit packaged in a click-seal plastic bag it makes sense to fold the leaflet such that the colour photo of a completed kit is visible from the front. And when you place it in the bag make sure that the PCB is visible top-outwards in front of it. A customer looking at your kit wants to immediately see what they are likely to create with it.
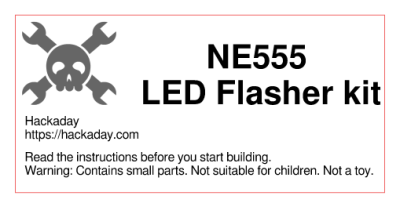
You can now seal the bag or box, the kit is packed. It only remains to give it a label that has all the pertinent information and is attractive to the customer. You will probably want to put your logo or web address on the label as well as any small print required, alongside the most important feature — the kit description. We’ve put a warning about small parts and curious children, you may also want to put any reglatory or compliance information here. For example in Europe you might have a CE mark and a WEEE logo. Once you have your design sorted you can run it up in your favourite label designing software – we used gLabels – and print as many as you like on sheets of sticky labels. We strongly suggest buying good quality branded labels, the extra money is well worth it when you consider that they will have much more reliable glue, and the extra cost per individual kit will be marginal. Pick a label size which fills a decent space and is easy to read on your packaging without being too big, we used 70mm x 37mm laser labels of which 24 can be had on a single sheet.
Your First Finished Product
If Hackaday made electronic kits, they might look a little like this.
It’s an exciting moment when you apply a label to your first fully packed kit and see for the first time what your customers will see: a finished product. You aren’t quite done though, because there is still the small matter of quality control. Take a kit or two from your batch at random, and count all their contents off against your list of what they should contain. This should help you ensure you are packing the kits correctly. Finally, give a completed kit to a friend who has never seen it before, and tell them to build it as a final piece of quality control. They are simulating your customer in every way, if they have no problems then neither should anyone who buys the kit.
Once you’ve built your batch of kits, you will now have the stock you will send out to your customers. Imagine yourself as a customer, if you order a kit you will expect it to arrive in pristine condition. You should therefore now take care of this stock of kits to ensure that it does not come to any harm, its packaging is as crisp and new when you send it out as when you packed it, and it has not attracted any dust while in storage. We would suggest having a separate plastic box for the stock of each kit in your range, and protecting the kits from dust with a lid, or by storing them inside a larger plastic bag.
As we’ve worked through this series of articles, we’ve tried to give you a flavour of the process of bringing an electronic kit from a personal project to the masses. We’ve looked at learning about the market for your kit, we’ve discussed turning a project into a product before writing the best instructions possible and now stuffing your first kits ready for sale. In the next article in the series we’ll talk about how you might sell your products, the different choices open to you for online shops, marketplaces, and crowdfunding.


 You can now seal the bag or box, the kit is packed. It only remains to give it a label that has all the pertinent information and is attractive to the customer. You will probably want to put your logo or web address on the label as well as any small print required, alongside the most important feature — the kit description. We’ve put a warning about small parts and curious children, you may also want to put any reglatory or compliance information here. For example in Europe you might have a CE mark and a WEEE logo. Once you have your design sorted you can run it up in your favourite label designing software – we used