Python Script Sends Each Speaker Its Own Sound File

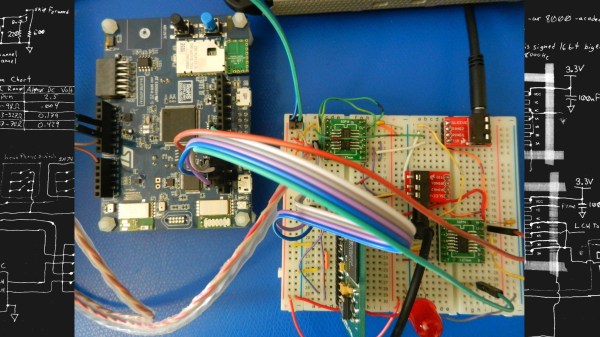
When it comes to audio, the number of speakers you want is usually governed by the number of tracks or channels your signal has. One for mono, two for stereo, four for quadrophonic, five or more for surround sound and so on. But all of those speakers are essentially playing different tracks from a “single” audio signal. What if you wanted a single audio device to play eight different songs simultaneously, with each song being piped to its own speaker? That’s the job [Devon Bray] was tasked with by interdisciplinary artist [Sara Dittrich] for one of her “Giant Talking Ear” installation project. He built a device to play multiple sound files on multiple output devices using off the shelf hardware and software.

But maybe a hack like this could be useful in many applications other than just art installations. It could be used in an Escape room, where you may want the various audio streams to start in synchronicity at the same time, or as part of a DJ console, sending one stream to the speakers and another to the head phones, or a game where you have to run around a room full of speakers in the right sequence and speed to listen to a full sentence for clues.

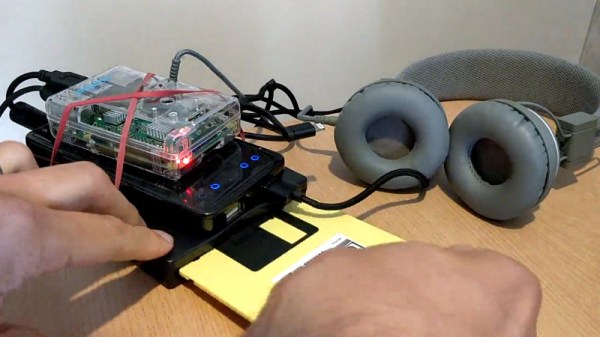
His blog post lists links for the various pieces of hardware required, although all of it is pretty generic, and the github repository hosts the code. At the heart of the project is the Sounddevice library for python. The documentation for the library is sparse, so [Bray]’s instructions are handy. His code lets you “take a directory with .wav files named in numeric order and play them over USB sound devices attached to the host computer over and over forever, looping all files once the longest one finishes”. As a bonus, he shows how to load and play sound files automatically from an attached USB drive. This lets you swap out your playlist on the Raspberry Pi without having a use a keyboard/mouse, SSH or RDP.

Check the video after the break for a quick roundup of the project.

Continue reading “Python Script Sends Each Speaker Its Own Sound File”

Those Voices In Your Head Might Be Lasers

What if I told you that you can get rid of your headphones and still listen to music privately, just by shooting lasers at your ears?

The trick here is something called the photoacoustic effect. When certain materials absorb light — or any electromagnetic radiation — that is either pulsed or modulated in intensity, the material will give off a sound. Sometimes not much of a sound, but a sound. This effect is useful for spectroscopy, biomedical imaging, and the study of photosynthesis. MIT researchers are using this effect to beam sound directly into people’s ears. It could lead to devices that deliver an audio message to specific people with no hardware on the receiving end. But for now, ditching those AirPods for LaserPods remains science fiction.

There are a few mechanisms that explain the photoacoustic effect, but the simple explanation is the energy causes localized heating and cooling, the material microscopically expands and contracts, and that causes pressure changes in the sample and the surrounding air. Saying pressure waves in air is just a fancy way of explaining sound.

Continue reading “Those Voices In Your Head Might Be Lasers”

Raspberry Pi Jukebox Hits All The Right Notes

We (and by extension, you) have seen the Raspberry Pi crammed into nearly every piece of gear imaginable. Putting one inside a game console is so popular it’s bordering on a meme, and putting them into old stereos and other pieces of consumer electronics isn’t far behind. It’s always interesting to see how hackers graft the modern Raspberry Pi into the original hardware, but we’ll admit it can get a bit repetitive. So how about somebody scratch building an enclosure for their jukebox project?

[ComfortablyNumb] took the road less traveled when he created this very nice wooden Raspberry Pi enclosure in the shape of an eighth note. Stained and varnished and with a nice big touch screen in the middle to handle the controls, it’s an attractive and functional piece of home audio gear that we imagine most people would be happy to hang on their wall.

The process starts by printing out the desired shape on a piece of paper to use as guide, and then gluing together strips of wood to create the rough outline. Then the surface was thoroughly sanded to bring all of the strips of wood to the same level, and the final design was cut out. On the back of the note, [ComfortablyNumb] boxed out an area to hold the Waveshare seven-inch touch screen panel and the Raspberry Pi itself.

Having seen so many projects where the Pi is rather unceremoniously shoehorned into another device, it’s refreshing to see the results of a purpose-built enclosure. Since [ComfortablyNumb] was able to build the electronics compartment to his exact dimensions, the final result looks exceptionally clean and professional. Not a drop of hot glue to be seen. It also helps that this build only required the Pi and the display; as the device is meant to be plugged into an existing audio setup, there’s no onboard amplifier. The audiophiles out there might recoil in horror, but adding a dedicated digital to analog converter (DAC) would be easy enough to add if the stock audio on the Pi isn’t good enough for you.

The project is finished off with stain and several coats of varnish to get that deep and rich color. We don’t often find ourselves working with dead trees around these parts, but we’ve got to admit that the final product does look quite handsome. Certainly beats the LEGO cases many of our Pi projects live in.

If you’re looking for more wooden-encased Pi jukeboxes, you might enjoy this somewhat abstract magstripe-based take on the concept. Of course, we’ve also seen our fair share of actual jukeboxes receive a Raspberry infusion over the years.

[via /r/raspberry_pi]

TOTO Forever Widescreen

Somewhere Down In Africa Toto Is Playing On Loop

Amidst the vast expanse of sand dunes in the Namib desert, there now exists a sound installation dedicated to pouring out the 1982 soft rock classic “Africa” by Toto. Six speakers connected to an MP3 player all powered by a few solar powered USB battery packs, and it is literally located somewhere down in Africa (see lyrics). The whole project, known as TOTO FOREVER, was the creation of film director [Max Siedentopf] who himself grew up in Namibia.

“I set up a sound installation which pays tribute to probably the most popular song of the last four decades…and the installation runs on solar batteries to keep Toto going for all eternity.”

Max Siedentopf, Creator of TOTO FOREVER

[Siedentopf] certainly chose a song that resonates with people on a number of levels. Toto’s “Africa” was one of the most streamed songs on YouTube in 2017 with over 369 million plays. The song continues to reach a new generation of fans as it has also been the subject of a number of internet memes. Though those local to the sound installation have had some less than positive things to say. [Siedentopf] told BBC, “Some [Namibians] say it’s probably the worst sound installation ever. I think that’s a great compliment.”

The idea of the installation “lasting for all eternity” will certainly be difficult to achieve since the components most certainly lack any serious IP rating. The audio player itself appears to be a RHDTShop mp3 player that according to its Amazon listing page, has three to four hours of battery life per charge. Considering the size of those solar cells the whole thing will probably be dead in a week or two (it is in a desert after all), but no one can deny the statement TOTO FOREVER makes. Below is some footage of the art piece in action taken by the artist himself.
Continue reading “Somewhere Down In Africa Toto Is Playing On Loop”

Freeforming The Atari Punk Console

This stunning piece of art is [Emily Velasco’s] take on the Atari Punk Console. It’s a freeform circuit that synthesizes sound using 555 timers. The circuit has been around for a long time, but her fabrication is completely new and simply incredible!

This isn’t [Emily’s] first rodeo. She previously built the mini CRT sculpture project seen to the left in the image above. Its centerpiece is a tiny CRT from an old video camera viewfinder, and it is fairly common for the driver circuit to understand composite video. And unlike CRTs, small video cameras with composite video output are easily available today for not much money. Together they bring a piece of 1980s-era video equipment into the modern selfie age. The cubic frame holding everything together is also the ground plane, but its main purpose is to give us an unimpeded view. We can admire the detail on this CRT and its accompanying circuitry representing 1982 state of the art in miniaturized consumer electronics. (And yes, high voltage components are safely insulated. Just don’t poke your finger under anything.)

With the experience gained from building that electrically simple brass frame, [Emily] then stepped up the difficulty for her follow-up project. It started with a sound synthesizer circuit built around a pair of 555 timers, popularized in the 1980s and nicknamed the Atari Punk Console. Since APC is a popular circuit found in several other Hackaday-featured projects, [Emily] decided she needed to add something else to stand out. Thus in addition to building her circuit in three-dimensional brass, two photocells were incorporated to give it rudimentary vision into its environment. Stimulus for this now light-sensitive APC were provided in the form of a RGB LED. One with a self-contained circuit to cycle through various colors and blinking patterns.

These two projects neatly bookend the range of roles brass rods can take in your own creations. From a simple frame that stays out of the way to being the central nervous system. While our Circuit Sculpture Contest judges may put emphasis the latter, both are equally valid ways to present something that is aesthetic in addition to being functional. Brass, copper, and wood are a refreshing change of pace from our standard materials of 3D-printed plastic and FR4 PCB. Go forth and explore what you can do!

Continue reading “Freeforming The Atari Punk Console”

High-End Headphones Get Flexible Boom Upgrade

It seems a reasonable assumption that anyone who’d be willing to spend a few hundred dollars on a pair of headphones is probably the type of person who has a passion for high quality audio. That, or they work for the government. We’re fairly sure [Daniel Harari] falls into that former category though, given how much thought he gave to adding a decent microphone to his Sennheiser HD650 headphones.

Not happy with the results he got from microphones clipped to his shirt or mounted on a stand, [Daniel] realized what he really wanted was a sensitive boom microphone. This would be close enough to his mouth that it wouldn’t pick up stray noises, but at the same time not obstruct his field of view or otherwise get in the way.

He found a few options on the market which would allow him to mount a boom microphone to his HD650’s, but he didn’t want to stick anything to them and risk scratching the finish so those weren’t really an option. [Daniel] decided to go the DIY route, and eventually settled on a microphone that would mount to the headphone’s existing connector which plugs in at the bottom of the cup.

To make his mount, he 3D printed a two piece clamp that could be screwed together and securely attach to the connector without making any permanent changes. Once he had that base component printed, he salvaged the flexible metallic neck from a cheap USB light and used that to hold the female 3.5mm connector. Into that he’s plugged in a small commercially available microphone that is usually used on voice recorders, which [Daniel] said sounds much better than even the larger mics he had tested.

Finally, he used Sugru to encapsulate the wires and create a flexible strain relief. The whole assembly is very light, easily movable, and perhaps most importantly, didn’t require any modifications or damage to a pair of headphones which have a retail price that could double as a car payment.

It’s been a few years since we’ve seen anyone brave enough to hack their pricey Sennheiser headphones. But in the past we covered a modification which gave them an infusion of Bluetooth and even one that reversed a sneaky manufacturer hardware limitation.

Battery Swap Keeps Sansa Clip+ Chugging

You’d be forgiven for not realizing there’s still a diehard group of people out there carrying around dedicated MP3 players. While they were all the rage a decade or so back, most consumers have since moved over to using their handy dandy pocket supercomputer for playing their music. Plus controlling every other aspect of their personal life and finances, of course. Though that’s another story entirely.

But as [Conno Brooks] explained to us, there’s a sizable group of open source fanatics who prefer to store their jams on devices running the Rockbox firmware. Only problem is, some of the desirable Rockbox-compatible players are from the Golden Age of dedicated players, and aren’t getting any younger. In a recent blog post, he briefly goes over his ultimately successful attempt to put a new-made battery into his Sansa Clip+, a particularly desirable player that was released in 2009.

There are a few problems with the procedure that has kept it from being very widespread, according to [Conno]. For one, the Sansa Clip+ is tiny and not easily disassembled without destroying it. Worse, the diminutive 30mm x 36mm x 3mm OEM battery is effectively unobtainium. But ironically he was able to find an even smaller battery which seemed like it should work, assuming he could get it wired up.

The OEM battery on the Clip+ uses three wires, which [Conno] presumed was part of some thermal protection system. He first tried to take the circuit board off the original dead battery and graft it onto the modern cell, but something must have tripped because the resulting Franken-pack didn’t output any voltage. On his second attempt he simply ignored the third wire, and luckily the Clip+ didn’t seem to complain and started up as expected.

[Conno] says there’s some careful flexing required to get the new pack installed and the Clip+ closed properly, and the device’s runtime is somewhat diminished by the new battery’s lower capacity. But if it means another few years of keeping Big Brother out of your digital media habits, he figures it’s a worthy trade.

We’ve actually seen a few hacks now for the Sansa Clip line of players at this point, thanks to its second lease on life as an open source darling; from a slightly less stock-looking battery replacement, to adding a line-in option. When you get sick of listening to Hanson’s discography, you can even boot up what is perhaps the world’s worst port of DOOM.