ESP8266 Based Internet Radio Receiver Is Packed With Features

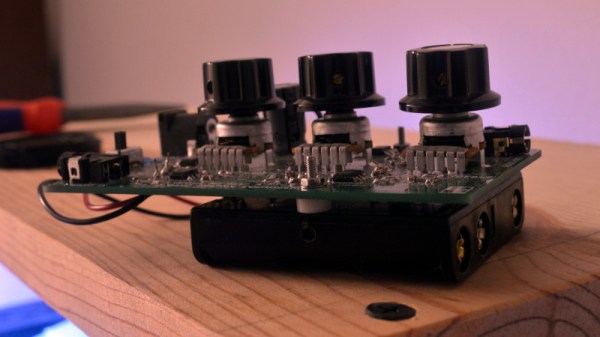
Have a beautiful antique radio that’s beyond repair? This ESP8266 based Internet radio by [Edzelf] would be an excellent starting point to get it running again, as an alternative to a Raspberry-Pi based design. The basic premise is straightforward: an ESP8266 handles the connection to an Internet radio station of your choice, and a VS1053 codec module decodes the stream to produce an audio signal (which will require some form of amplification afterwards).

Besides the excellent documentation (PDF warning), where this firmware really shines is the sheer number of features that have been added. It includes a web interface that allows you to select an arbitrary station as well as cycle through presets, adjust volume, bass, and treble.


If you prefer physical controls, it supports buttons and dials. If you’re in the mood for something more Internet of Things, it can be controlled by the MQTT protocol as well. It even supports a color TFT screen by default, although this reduces the number of pins that can be used for button input.

The firmware also supports playing arbitrary .mp3 files hosted on a server. Given the low parts count and the wealth of options for controlling the device, we could see this device making its way into doorbells, practical jokes, and small museum exhibits.

To see it in action, check out the video below:

[Thanks JeeCee]

Continue reading “ESP8266 Based Internet Radio Receiver Is Packed With Features”

The Best Stereo Valve Amp In The World

There are few greater follies in the world of electronics than that of an electronic engineering student who has just discovered the world of hi-fi audio. I was once that electronic engineering student and here follows a tale of one of my follies. One that incidentally taught me a lot about my craft, and I am thankful to say at least did not cost me much money.

Construction more suited to 1962 than 1992.

It must have been some time in the winter of 1991/92, and being immersed in student radio and sound-and-light I was party to an intense hi-fi arms race among the similarly afflicted. Some of my friends had rich parents or jobs on the side and could thus afford shiny amplifiers and the like, but I had neither of those and an elderly Mini to support. My only option therefore was to get creative and build my own. And since the ultimate object of audio desire a quarter century ago was a valve (tube) amp, that was what I decided to tackle.

Nowadays, building a valve amp is a surprisingly straightforward process, as there are many online suppliers who will sell you a kit of parts from the other side of the world. Transformer manufacturers produce readily available products for your HT supply and your audio output matching, so to a certain extent your choice of amp is simply a case of picking your preferred circuit and assembling it. Back then however the world of electronics had extricated itself from the world of valves a couple of decades earlier, so getting your hands on the components was something of a challenge. I cut out the power supply by using a scrap Dymar Electronics instrument enclosure which had built-in HT and heater rails ready to go, but the choice of transformers and high-voltage capacitors was something of a challenge.

Pulling the amplifier out of storage in 2017, I’m going in blind. I remember roughly what I did, but the details have been obscured by decades of other concerns. So in an odd meeting with my barely-adult self, it’s time to take a look at what I made. Where did I get it right, and just how badly did I get it wrong?

Continue reading “The Best Stereo Valve Amp In The World”

We Should Stop Here, It’s Bat Country!

[Roland Meertens] has a bat detector, or rather, he has a device that can record ultrasound – the type of sound that bats use to echolocate. What he wants is a bat detector. When he discovered bats living behind his house, he set to work creating a program that would use his recorder to detect when bats were around.

[Roland]’s workflow consists of breaking up a recording from his backyard into one second clips, loading them in to a Python program and running some machine learning code to determine whether the clip is a recording of a bat or not and using this to determine the number of bats flying around. He uses several Python libraries to do this including Tensorflow and LibROSA.

The Python code breaks each one second clip into twenty-two parts. For each part, he determines the max, min, mean, standard deviation, and max-min of the sample – if multiple parts of the signal have certain features (such as a high standard deviation), then the software has detected a bat call. Armed with this, [Roland] turned his head to the machine learning so that he could offload the work of detecting the bats. Again, he turned to Python and the Keras library.

With a 95% success rate, [Roland] now has a bat detector! One that works pretty well, too. For more on detecting bats and machine learning, check out the bat detector in this list of ultrasonic projects and check out this IDE for working with Tensorflow and machine learning.

Bessel Filter Design

Once you fall deep enough into the rabbit hole of any project, specific information starts getting harder and harder to find. At some point, trusting experts becomes necessary, even if that information is hard to find, obtuse, or incomplete. [turingbirds] was having this problem with Bessel filters, namely that all of the information about them was scattered around the web and in textbooks. For anyone else who is having trouble with these particular filters, or simply wants to learn more about them, [turingbirds] has put together a guide with all of the information he has about them.

For those who don’t design audio circuits full-time, a Bessel filter is a linear, passive bandpass filter that preserves waveshapes of signals that are within the range of the filter’s pass bands, rather than distorting them in some way. [turingbirds]’s guide goes into the foundations of where the filter coefficients come from, instead of blindly using lookup tables like he had been doing.

For anyone else who uses these filters often, this design guide looks to be a helpful tool. Of course, if you’re new to the world of electronic filters there’s no reason to be afraid of them. You can even get started with everyone’s favorite: an Arduino.

Designing The Atom Smasher Guitar Pedal

[Alex Lynham] has been creating digital guitar pedals for a while and after releasing the Atom Smasher, a glitchy lo-fi digital delay pedal, he had people start asking him how he designed digital effects pedals rather than analog effects. In fact, he had enough interest, that he wrote an article on it.

The article starts with some background on [Alex], the pedals he’s built and why he chose not to work on pedals full-time. Eventually, the article gets to the how [Alex] designed the Atom Smasher. He starts by describing the chip he used, the same one that many hobbyists, as well as commercial builders, use for delay based effects – the SpinSemi FV-1.

The FV-1 is a SMD chip used for digital delays and other effects that require a delay line – reverbs, choruses, flangers, etc. It’s programmed with an assembly-style language called SpinASM. [Alex] goes over some of the tools and references he used when designing for the pedal. He also has a list of tips for would-be effect pedal designers which work whether you’re designing digital or analogue effects.

[Alex] ends his article saying that, in the future, he might make the schematic and code available, but for the moment he’s not. The FV-1 is an interesting chip, and [Alex]’s article gives a nice high-level look at its features and how to develop for it. For some interesting guitar pedal related articles, check out this one using effects pedals to get better audio in your car, and here’s one about playing with DSP and designing a pedal with it.

Continue reading “Designing The Atom Smasher Guitar Pedal”

Robotic Glockenspiel And Hacked HDD’s Make Music

[bd594] likes to make strange objects. This time it’s a robotic glockenspiel and hacked HDD‘s. [bd594] is no stranger to Hackaday either, as we have featured many of his past projects before including the useless candle or recreating the song Funky town from Old Junk.

His latest project is quite exciting. He has incorporated his robotic glockenspiel with a hacked hard drive rhythm section to play audio controlled via a PIC 16F84A microcontroller. The song choice is Axel-F. If you had a cell phone around the early 2000’s you were almost guaranteed to have used this song as a ringtone at some point or another. This is where music is headed these days anyway; the sooner we can replace the likes of Justin Bieber with a robot the better. Or maybe we already have?

Continue reading “Robotic Glockenspiel And Hacked HDD’s Make Music”

Custom Media Center Maintains Look Of 70s Audio Components

Slotting a modern media center into an old stereo usually means adding Bluetooth and a Raspberry Pi to an amp or receiver, and maybe adding a few discrete connectors on the back panel. But this media center for a late-70s Braun hi-fi (translated) goes many steps beyond that — it fabricates a component that never existed.

The article is in German, and the Google translation is a little spotty, but it’s pretty clear what [Sebastian Schwarzmeier] is going for here. The Braun Studio Line of audio components was pretty sleek, and to avoid disturbing the lines of his stack, he decided to create a completely new component and dub it the “M301.”

The gutted chassis of an existing but defunct A301 amplifier became the new home for a Mac Mini, Blu-Ray drive, and external hard drive. An HDMI port added to the back panel blends in with the original connectors seamlessly. But the breathtaking bit is a custom replacement hood that looks like what the Braun designers would have come up with if “media center” had been a term in the 70s.

From the brushed aluminum finish, to the controls, to the logo and lettering, everything about the component that never was shows an attention to detail that really impresses. But if you prefer racks of servers to racks of audio gear, this media center built into a server chassis is sure to please too.

Thanks to [Sascho] and [NoApple4Me] for the nearly simultaneous tips on this one.