Once you fall deep enough into the rabbit hole of any project, specific information starts getting harder and harder to find. At some point, trusting experts becomes necessary, even if that information is hard to find, obtuse, or incomplete. [turingbirds] was having this problem with Bessel filters, namely that all of the information about them was scattered around the web and in textbooks. For anyone else who is having trouble with these particular filters, or simply wants to learn more about them, [turingbirds] has put together a guide with all of the information he has about them.
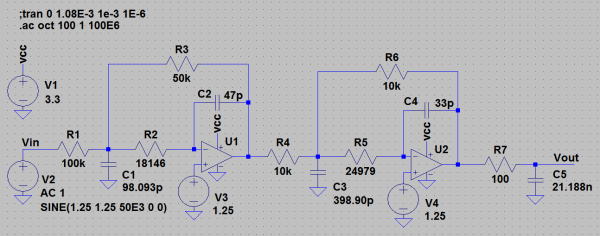
For those who don’t design audio circuits full-time, a Bessel filter is a linear, passive bandpass filter that preserves waveshapes of signals that are within the range of the filter’s pass bands, rather than distorting them in some way. [turingbirds]’s guide goes into the foundations of where the filter coefficients come from, instead of blindly using lookup tables like he had been doing.
For anyone else who uses these filters often, this design guide looks to be a helpful tool. Of course, if you’re new to the world of electronic filters there’s no reason to be afraid of them. You can even get started with everyone’s favorite: an Arduino.