An Epic Story Of 1980s FPV Flight

A staple of today’s remote-controlled flight is the so-called FPV transmitter, allowing the pilot of a multirotor or other craft to see the world from onboard, as a pilot might do. It’s accessible enough that it can be found on toy multirotors starting at not much more than pocket money prices, and reliable enough that in its better incarnations it can send back high definition video at surprisingly long range.

In case you think of FPV flight as a recent innovation, the video below the break from [Larry Mitschke] should come as a revelation. In 1986 he was a bona-fide rockstar playing in a band, whose radio-controlled flight hobby led him into creating an FPV system for his planes and soaring above the Texas countryside at significant distance from his base while flying it watching a CRT screen.

The video is quite long but extremely watchable, all period footage with his narration here in 2020. We see his earliest experiments with a monochrome security camera and a video sender, and a whole host of upgrades until finally he can fly three miles from base with good quality video. 70 cm amateur TV makes an appearance with a steerable tracking antenna, he even makes a talking compass for when he loses himself. It’s an epic tale of hacking with what seems rudimentary equipment by our standards but was in fact the cutting edge of available video technology at a time when the state of the video art was moving rather fast. This is the work that laid the path for today’s $30 FPV toys, and for flying FPV from space.

Continue reading “An Epic Story Of 1980s FPV Flight”

Cheap Strain Relief By Casting Hot Glue In A 3D Print

[Daniel Roibert] found a way to add cheap strain relief to JST-XH connectors, better known to hobby aircraft folks as the charging and balance connectors on lithium-polymer battery packs. His solution is to cast them in hot glue, with the help of 3D printed molds. His project provides molds fitted for connectors with anywhere from two to eight conductors, so just pick the appropriate one and get printing. [Daniel] says to print the mold pieces in PETG, so that they can hold up to the temperature of melted glue.

The 3D models aren’t particularly intuitive to look at, but an instructional video makes everything clear. First coat the inside surfaces of the mold with a release agent (something like silicone oil should do the trick) and then a small amount of hot glue goes in the bottom. Next the connector is laid down on top of the glue, more glue is applied, and the top of the mold is pressed in. The small hole in the top isn’t for filling with glue, it’s to let excess escape as the mold is closed. After things cool completely, just pop apart the mold (little cutouts for a screwdriver tip make this easy) and trim any excess. That’s all there is to it.

One last thing: among the downloads you may notice one additional model. That one is provided in split parts, so that one can make a mold of an arbitrary width just by stretching the middle parts as needed, then merging them together. After all, sometimes the STL file is just not quite right and if sharing CAD files is not an option for whatever reason, providing STLs that can be more easily tweaked is a welcome courtesy. You can watch a short video showing how the whole thing works, below.

Continue reading “Cheap Strain Relief By Casting Hot Glue In A 3D Print”

The Options For Low Cost ROV Tethers

Wireless connections are cool and all, but sometimes you just need a bit of copper. This interesting article on SV Seeker discusses the various ways of making a tether for a remotely operated vehicle (ROV). They experimented with a number of different cables, including gel-filled Cat 5 designed for burial and wrapping the cable in polypropylene rope to keep it protected and buoyant. They also looked at using a single core solid coax cable with an Ethernet to coax converter on either end wrapped in stretch webbing. The upside of using coax would be the length: it can handle over a mile of cable, which should be more than enough for this project. The downside is that they found that the coax stretches under strain, messing with the signal.

Continue reading “The Options For Low Cost ROV Tethers”

Lego Drone Finally Takes Off

We were concerned when we saw [Brick Experiment Channel] test a drone propulsion pod made with Lego. After all, the thrust generated was less than the weight of the assembly. But a few tweaks got enough lift to overcome the assembly weight, as you can see in the video below.

The next step was to build three more pods and add some lightweight avionics and a battery. The first flight was a little dicey because the sensor orientation was off. Then there was some more software tuning before things really got airborne.

Continue reading “Lego Drone Finally Takes Off”

3D Pens Can Make Ugly Drone Parts That Almost Work

Small hobby aircraft and light plastic parts go hand in hand, and a 3D printing pen makes lightweight plastic things without the overhead of CAD work and running a 3D printer. So could a 3D pen create useful plastic bits for small quadcopters? [Michael Niggel] decided to find out by building his drone parts with a 3D pen loaded with ABS plastic. He mostly discovered that the created objects could politely be said to look like they were sketched by a toddler, but that’s not all he learned.

He found that in general creating an object was harder than the marketing materials implied. As soon as the filament exits the pen’s nozzle, the thin little molten line of plastic cools rapidly and does two things: it has a tendency to curl, and loses its desire to stick to things. [Michael] found the whole affair worked much less like ‘drawing in thin air’ and rather more like piping frosting, or caulking.

An almost functional micro quad frame. The arms aren’t rigid enough to hold the motors vertical when under power.

Nevertheless, [Michael] sought to discover whether a 3D pen could be used to make quick and dirty parts of any use. He created two antenna brackets and one micro quad frame. All three are chaotic messes, but one antenna bracket was perfectly serviceable. The 3D pen was indeed able to create a strangely-shaped part that would have been a nightmare to CAD up. The other antenna part worked, but didn’t do anything a zip tie wouldn’t have done better. The rapid cooling of the plastic from the 3D pen has an advantage: extrusions don’t “droop” like a glob of hot glue does before it hardens.

By now, [Michael] agreed that the best way to create a plastic part of any complexity whatsoever seemed to be to draw sections flat, build them up in layers, then use the pen to weld the pieces together and add bulk. The micro quad frame he made in this way doesn’t look any nicer than the other attempts, but it did hold the parts correctly. Sadly, it would not fly. Once the motors powered up, the arms would twist and the flight controller was unable to compensate for motors that wouldn’t stay straight. This could probably be overcome, but while the end result was dirty it certainly wasn’t quick. The 3D pen’s niche seems restricted to simple, unstressed parts that aren’t permitted to gaze up themselves in a mirror.

If you have a 3D pen, we’d like to remind you of this mini spool design whose parts are welded together with the pen itself. For bigger jobs, a high-temperature hot glue gun can be used to dispense PLA instead.

Ask Hackaday: Drone Swarms Replace Fireworks; Where Are The Hackers?

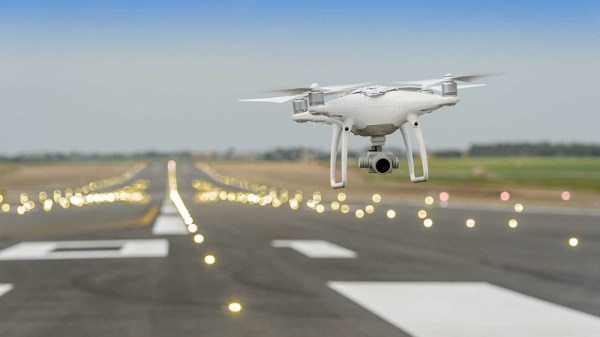
Your mom always warned you that those fireworks could put an eye out. However, the hottest new thing in fireworks displays is not pyrotechnic at all. Instead, a swarm of coordinated drones take to the sky with different lighting effects. This makes some pretty amazing shows possible, granting full control of direction, color, and luminosity of each light source in a mid-air display. It also has the side benefit of being safer — could this be the beginning of the end for fireworks accident videos blazing their way across social media platforms?

For an idea of what’s possible with drone swarm displays, check out the amazing pictures found on this site (machine translation) that show off the 3D effects quite well. Note that although it appears the camera is moving during many of these, the swam itself could be rotated relative to a stationary viewer for a similar effect.

What I couldn’t find was much going on here in the hobby space. Granted, in the United States, restrictive drone laws might hamper your ability to do things like this. But it seems that in a purely technical terms this wouldn’t be super hard to do — at least for simple designs. Besides, there must be some way to do this in US airspace since drone performances have been at the Super Bowl, Los Angeles, New York, Miami, and Folsom, CA.

So if the regulations were sorted, what would it take to build a swarm of your own performing drones?

Continue reading “Ask Hackaday: Drone Swarms Replace Fireworks; Where Are The Hackers?”

Autonomous Boat For Awesome Video Hyperlapses

With the ever-increasing capabilities of smart phones, action cameras, and hand-held gimbals, the battle for the best shots is intensifying daily on platforms like YouTube and Instagram. Hyperlapse sequences are one of the popular weapons in the armoury, and [Daniel Riley] aka [rctestflight] realised that his autonomous boat could be an awesome hyperlapse platform.

This is the third version of his autonomous boat, with version 1 suffering from seaweed assaults and version 2 almost sleeping with the fishes. The new version is a flat bottomed craft was built almost completely from pink insulation foam, making it stable and unsinkable. It uses the same electronics and air boat propulsion as version 2, with addition of a GoPro mounted in smart phone gimbal to film the hyper lapses. It has a tendency to push the bow into the water at full throttle, due to the high mounted motors, but was corrected by adding a foam bulge beneath the bow, at the cost of some efficiency.

Getting the gimbal settings tuned to create hyperlapses without panning jumps turned out to be the most difficult part. On calm water the boat is stable enough to fool the IMU into believing that it’s is not turning, so the gimbal controller uses the motor encoders to keep position, which don’t allow it to absorb all the small heading corrections the boat is constantly making. Things improved after turning off the encoder integration, but it would still occasionally bump against the edges of the dead band inside which the gimbal does not turn with the boat. In the end [Daniel] settled for slowly panning the gimbal to the left, while plotting a path with carefully calculated left turns to keep the boat itself out of the shot. While not perfect, the sequences still beautifully captured the night time scenery of Lake Union, Seattle. Getting it to this level cost many hours of midnight testing, since [Daniel] was doing his best to avoid other boat traffic, and we believe it paid off.

We look forward to his next videos, including an update on his solar plane. Continue reading “Autonomous Boat For Awesome Video Hyperlapses”