The phrase “They don’t make them like they used to” is perhaps best exemplified by two types of products: cars and consumer electronics. Sure, the vehicles and gadgets we have now are so advanced that they may as well be classified as science-fiction when compared to their predecessors, but what about that style. Our modern hardware can rarely hold a candle to the kind of gear you used to be able to buy out of the “Sears, Roebuck and Company” catalog.
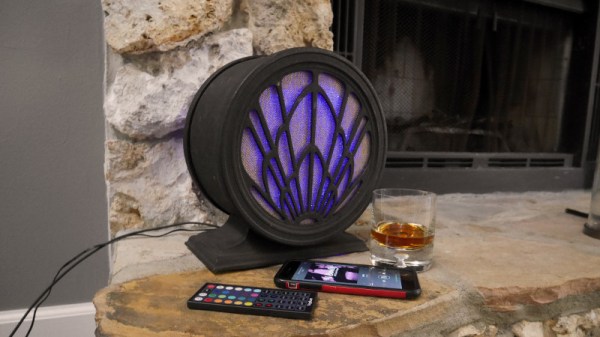
So when [Democracity] came into possession of a wickedly retro art deco speaker, it’s no surprise he saw it as a perfect opportunity to bring some of that old school style into the 21st century by rebuilding it with an Amazon Echo Dot at its core. The fact that the original device was a speaker and not a full radio made the conversion much easier, and will have everyone trolling yard sales for months trying to find a donor speaker to build their own.

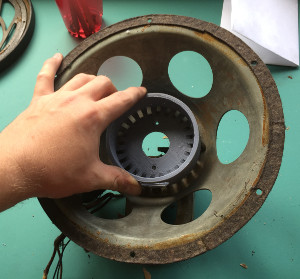
To start the process, [Democracity] popped the panels off and ripped out what was left of the speaker’s paper cone and coil. In a stroke of luck, the opening where the driver used to go was nearly the perfect size to nestle in the Echo Dot. With a 3D printed cradle he found on Thingiverse and a liberal application of epoxy, the Dot could get snapped into the speaker like it was always meant to be there.
[Democracity] then picked up some absolutely gorgeous speaker cloth on eBay and hot glued it to the inside of the panels. What was presumably the volume knob was pulled out of the bottom and turned out to be a perfect place to run the Dot’s USB cable out of.
A lesser man would have called this project completed, but [Democracity] knows that no hack is truly complete without the addition of multicolored blinking LEDs. With the RGB LED strips installed inside, the light is diffused through the cloth panels and creates a pleasing subtle effect. You can almost imagine a couple of vacuum tubes glowing away inside there. Judging by the final product, it’s no surprise [Democracity] has a fair bit of experience dragging audio equipment kicking and screaming into the modern era.
This isn’t the first time we’ve seen an old piece of audio equipment get a high-tech transfusion, and isn’t even the first time we’ve seen the Dot used to do it. But it’s certainly the one we’d most like to see sitting on our shelf.