ESP8266 Keeps Tabs On Wood Stove Temperature

Wood heat offers unique advantages compared to more modern heating systems, especially in remote areas. But it also comes with its own challenges, namely, keeping the fire going at the optimum temperature. If it’s too cold you risk buildup in the chimney, but if you’ve got it stoked up more than necessary, you’ll end up burning through your wood faster.

To keep the fire in that sweet spot, [Jay] decided to put an ESP8266 and a thermocouple to work. Now, this might seem like an easy enough job at first, but things are complicated by the fact that the flue temperature above the stove lags considerably behind the temperature inside the stove. There’s also the fact that the top of the chimney will end up being much colder than the bottom.

Mounting the thermocouple in the flue pipe.

In an effort to get a more complete view of what’s happening, [Jay] plans on putting at least two thermocouples in the chimney. But as getting on the roof in December isn’t his idea of fun, for now, he’s starting with the lower one that’s mounted right above the stove. He popped a hole in the pipe to screw in a standard K-type probe, and tapped it a few times with the welder to make sure it wasn’t going anywhere.

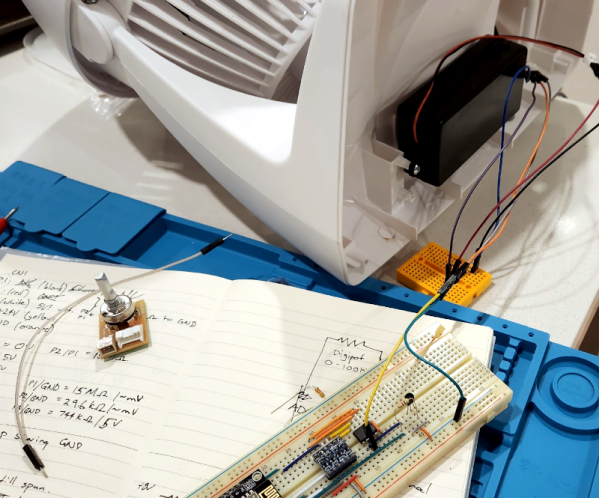
From there, the thermocople connects to a MAX6675 amplifier, and then to the WeMos D1 Mini development board that’s been flashed with ESPHome. [Jay] provides the configuration file that will get the flue temperature into Home Assistant, as well as set up notifications for various temperature events. The whole thing goes into a 3D printed box, and gets mounted behind the stove.

This project is a great example on how you can get some real-world data into Home Assistant quickly and easily. In the future, [Jay] not only wants to add that second thermocouple, but also look into manipulating the stove’s air controls with a linear actuator. Here’s hoping we get an update as his woodstove learns some new tricks.

A Look Inside IKEA’s Vallhorn Motion Sensor Teardown

A good source of hackable home automation parts has come for a while in the form of inexpensive modules offered by large retailers such as Lidl, or IKEA. They’re readily available and easy to play with, they work with open source hubs, so what’s not to like! As an example, [Circuit Valley] has an IKEA Vallhorn motion sensor for a teardown, it’s as you might expect, a passive infrared sensor (PIR) sensor coupled with a Zigbee interface.

Inside the ultrasonic welded case is a small PCB and a Fresnel lens on the inside of the top cover, and a small PCB for the electronics. We applaud the use of a Swiss Army knife can opener as a spudger. The interesting part comes in identifying the individual components: the Silicon Labs EFR32MG21 SoC is easy enough, but another mystery 8-pin chip is more elusive. The part number suggests an Analog Devices op-amp for signal conditioning the PIR output, but the pinout seems not to support it and from here we think it’s too expensive a part for a budget item like this.

There’s a handy header for talking to the SoC, which we’d love to report is open and ready to be hacked, but we’re not getting too optimistic. Even if not hackable though, we’re guessing many of you find uses for these things. Continue reading “A Look Inside IKEA’s Vallhorn Motion Sensor Teardown”

Exercise Wheel Tracker Confirms Suspicions About Cats

What do cats get up to in the 30 minutes or so a day that they’re awake? Being jerks, at least in our experience. But like many hackers, [Brent] wanted to quantify the activity of his cat, and this instrumented cat exercise wheel was the result.

To pull this off, [Brent] used what he had on hand, which was an M5Stack ESP32 module, a magnetic reed switch, and of course, the cat exercise wheel [Luna] seemed to be in the habit of using at about 4:00 AM daily. The wheel was adorned with a couple of neodymium magnets to trip the reed switch twice per revolution, with the pulse stream measured on one of the GPIOs. The code does a little debouncing of the switch and calculates the cat’s time and distance stats, uploading the data to OpenSearch for analysis and visualization. [Brent] kindly includes the code and the OpenSearch setup in case you want to duplicate this project.

As for results, they’re pretty consistent with what we’ve seen with similar cat-tracking efforts. A histogram of [Luna]’s activity shows that she does indeed hop on the wheel at oh-dark-thirty every day, no doubt in an effort to assassinate [Brent] via sleep deprivation. There’s also another burst of “zoomies” around 6:00 PM. But the rest of the day? Pretty much sleeping.

ESP32 Powers DIY Smart Energy Meter

Energy is expensive these days. There’s no getting around it. If, like [Giovanni], you want to keep better track of your usage, you might find value in his DIY energy meter build.

[Giovanni] built his energy meter to monitor energy usage in his whole home. An ESP32 serves as the heart of this build. It’s hooked up with a JSY-MK-194G energy metering module, which uses a current clamp and transformer in order to accurately monitor the amount of energy passing through the mains connection to his home. With this setup, it’s possible to track voltage, current, frequency, and power factor, so you can really nerd out over the electrical specifics of what’s going on. Results are then shared with Home Assistant via the ESPHome plugin and the ESP32’s WiFi connection. This allows [Giovanni] to see plots of live and historical data from the power meter via his smartphone.

A project like this one is a great way to explore saving energy, particularly if you live somewhere without a smart meter or any other sort of accessible usage tracking. We’ve featured some of [Giovanni]’s neat projects before, too.
Continue reading “ESP32 Powers DIY Smart Energy Meter”

A brown sphere with a flat top, a nose and circular eyes sits on the ground surrounded by low vegetation. A wooden fence is behind it.

Making A Stool From Clay

We’ve seen furniture made out of all sorts of interesting materials here, but clay certainly isn’t the first one that comes to mind. [Mia Mueller] is expanding our horizons with this clay stool she made for her garden.

Starting with an out-of-budget inspiration piece, [Mueller] put her own spin on a ceramic stool that looks like a whimsical human head. An experienced potter, she shows us several neat techniques for working with larger pieces throughout the video. Her clay extruder certainly beats making coils by hand like we did in art class growing up! Leaving the coils wrapped in a tarp allows her to batch the process coils and leave them for several days without worrying about them drying out.

Dealing with the space constraints of her small kiln, her design is a departure from the small scale prototype, but seeing how she works through the problems is what really draws us to projects like this in the first place. If it was easy, it wouldn’t be making, would it? The final result is a beautiful addition to her garden and should last a long time since it won’t rot or rust.

If you’re thinking of clay as a medium, we have some other projects you might enjoy like this computer mouse, 3D printing with clay, or a clay battery.

Continue reading “Making A Stool From Clay”

Receipt paper mural from above eye level

Massive Mural From Thermal Receipt Paper

Turning trash into art is something we undoubtedly all admire. [Davis DeWitt] did just that with a massive mural made entirely from discarded receipt paper. [Davis] got lucky while doing some light dumpster diving, where he stumbled upon the box of thermal paper rolls. He saw the potential them and, armed with engineering skills and a rental-friendly approach, set out to create something original.

The journey began with a simple test: how long can a receipt be printed, continuously? With a maximum length of 10.5 feet per print, [Davis] designed an image for the mural using vector files to maintain a high resolution. The scale of the project was a challenge in itself, taking over 13 hours to render a single image at the necessary resolution for a mural of this size. The final piece is 30 foot (9.144 meters) wide and 11 foot (3.3528 meters) tall – a pretty conversational piece in anyone’s room – or shop, in [Davis]’ case.

Once the design was ready, the image was sliced into strips that matched the width of the receipt paper. Printing over 1,000 feet of paper wasn’t without its issues, so [Davis] designed a custom spool system to undo the curling of the receipts. Hanging the mural involved 3D-printed brackets and binder clips, allowing the strips to hang freely with a kinetic effect.

Though the thermal paper will fade over time, the beauty of this project lies in its adaptability—just reprint any faded strips. Want to see how it all came together? Watch the full process here.

Continue reading “Massive Mural From Thermal Receipt Paper”

Recreating Unobtainium Weather Station Sensors

Imagine you own a weather station. Then imagine that after some years have passed, you’ve had to replace one of the sensors multiple times. Your new problem is that the sensor is no longer available. What does a hacker like [Luca] do? Build a custom solution, of course!

[Luca]’s work concerns the La Crosse WS-9257F-IT weather station, and the repeat failures of the TX44DTH-IT external sensor. Thankfully, [Luca] found that the weather station’s communication protocol had been thoroughly reverse-engineered by [Fred], among others. He then set about creating a bridge to take humidity and temperature data from Zigbee sensors hooked up to his Home Assistant hub, and send it to the La Crosse weather station. This was achieved with the aid of a SX1276 LoRa module on a TTGO LoRa board. Details are on GitHub for the curious.

Luca didn’t just work on the Home Assistant integration, though. A standalone sensor was also developed, based on the Xiao SAMD21 microcontroller board and a BME280 temperature, pressure, and humidity sensor. It too can integrate with the Lacrosse weather station, and proved useful for one of [Luca’s] friends who was in the same boat.

Ultimately, it sucks when a manufacturer no longer supports hardware that you love and use every day. However, the hacking community has a way of working around such trifling limitations. It’s something to be proud of—as the corporate world leaves hardware behind, the hackers pick up the slack!