Bridging Older Tasmota Hardware Into Apple Home

The Tasmota firmware is a popular choice for flashing to a range of Espressif microcontrollers to turn them into smart home devices. If you have such devices in your house, you might wish they were easier to integrate with the Apple Home platform. As it turns out, though, there’s a convenient app for that.

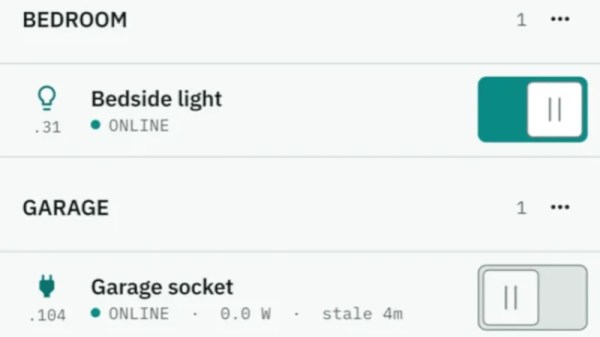
[Christof Müller] built an app called Tasmoshelf for just this purpose. Its primary claim to fame is that it can easily help port a Tasmota-based setup into the Apple Home universe. It can achieve this without requiring a Home Assistant server or MQTT broker or any other workarounds. This is thanks to the fact that Apple Home is compatible with Matter technology, as are ESP32 devices running Tasmota 13 firmware or newer. They can natively jump on an Apple Home setup, and even act as a bridge for older ESP8266 devices that can’t speak Matter themselves. The device is able to run network scans to automatically discover devices and advise whether they can hook up directly to Apple Home, or whether a bridge is needed.

If you’re running Tasmota devices and want to easily integrate them, you might find Tasmoshelf a useful addition to your smart home setup. Just note that it does require a one-off purchase if you intend to use it beyond three devices, a limit which some might find somewhat restrictive.

We’ve looked at Tasmota in detail before; it’s a great way to whip up a smart home to suit your own desires. Meanwhile, if you’re whipping up your own nifty integrations, don’t hesitate to let us know on the tipsline.

Titanic-esqe Telegraph Keeps Relationship Afloat

When people say the key to a happy, long-lasting marriage is communication, they generally mean the verbal kind: talking things out with your spouse, sharing your feelings, and all that lot. [Rich] AKA [Thumblegudget] took it another way, and built a engine-room telegraph for intramarital communication.

Now, this is less crazy than it sounds. Like the ship’s telegraph, which matched the position of an indicator on the bridge and in the engine room, [Rich]’ telegraph pairs an indicator in his office with one in the living areas of the house. He sets himself to “busy” and the arrow on the matching unit in the basement moves to that position. This naturally goes both ways, which allows his wife to point the needle to remind [Rich] that it may be time for hugs, dinner, or — most essentially for a brit — tea.

In operation each unit has a gimbal motor paired to a rotation sensor and an ESP32-S3 driving it. Thanks to that rotation sensor, the gimbal motor is programmed to lock itself into the positions on the wheel when you poke it, and the ESP32 wirelessly synchronizes the two units. A moving arrow might not be enough to get [Rich] to come down to dinner, so just like the ship’s telegraph you may remember from Titanic, [Rich]’s comes equipped with a bell to draw attention to itself.

Given [Rich]’s wife participated in the video and isn’t filing for divorce, it seems he may be onto something. Perhaps good communication doesn’t need to involve cumbersome human speech at all; maybe all a marriage needs is a telegraph like this and some paddles to send more complicated messages via Morse code.

Continue reading “Titanic-esqe Telegraph Keeps Relationship Afloat” →

The countertop in its natrual habitat: a van.

Cotton-Fiberglass Composite Makes Lightweight RV Countertops

You’ve seen fiber-reinforced-plastic before, no doubt, but perhaps never quite like in this video by [Whitburn Studio]: it’s still got the usual resin, but instead of glass or carbon fibers, he’s using printed Japanese cotton to create strong, lightweight and good looking parts for the interior of his RV– specifically the countertops.

The technique is very similar to the sort of moldless composite work Burt Rutan pioneered in aircraft use. The fiber-reinforced plastic is formed around a positive ‘buck’ that remains inside the final part, adding stiffness and some backing. Unlike Rutan’s designs, which used pure Styrofoam inside, [Whitburn] is using a sandwhich of two layers of thin ply (3.6 mm) with XPS foam in between. Adding plywood means you don’t need many layers of fiber– again, that’s a decorative cotton, here– to get a surface that won’t dent into the styrofoam when you drop a coffee cup on it.

Indeed, with the plywood providing much of the strength, he’s only using a single layer of cotton and a second of fiberglass– though the glass fibers are really there to protect the pretty print from oopsies while sanding, rather than for their mechanical properties, by the sounds of it. Everything is held together with clear epoxy resin, which also fills the weave of the fabrics. Multiple coats of that are required to get the smooth, shiny surface he shows off at the end, but all that sanding and buffing really pays off. That’s also where you have to be really careful to avoid oopsies– go through the cotton and you have to start over.

Aside from the aesthetics, since this is going in a vehicle the weight is an important consideration– the bigger of the two counters he makes, pictured here, weighs in at only 2.4 kg or 5.2 lb including the cutout covering the sink. That’s pretty good all things considered– a lot lighter than a cement countertop, or even one made of DIY resin tiles.

Continue reading “Cotton-Fiberglass Composite Makes Lightweight RV Countertops” →

An Automated Water Tank Controller

[Jumpor] lives in a part of India where the water infrastructure is a little frustrating to use. Water gets delivered to underground tanks outside of homes, and must then be regularly pumped into rooftop tanks prior to use inside the building. Typically, this pumping is handled manually—by switching on a pump and running it until water comes out of an overflow pipe to indicate the rooftop tank is full. [Jumpor] decided to improve this wasteful and time consuming process with a little automation project.

The build is based around an ESP32 microcontroller. It’s hooked up to an ultrasonic sensor which can measure the water level inside the rooftop water tank. When the sensor detects the level descending below a set point, the microcontroller fires a relay to trigger the lift pump to fill up the tank. Once the sensor detects the tank is full, the pump is shut off, saving liters of water compared to waiting for water to pour out of the overflow as an indicator of the same.

It’s a simple enough project, but [Jumpor] was sure to include the important practical considerations. Since the rig was being installed in a rental, it was desirable to not make any permanent modifications to the water system. Thus, a fresh cap for the water tank was modified to host the electronics and level sensor, such that the original could be replaced at a later date. Due consideration was also paid to things like avoiding crossing the minimum detection threshold of the sensor, which could lead to accidental overflows if not managed correctly.

The aim of this project was to ease the day to day burden of maintaining a basic utility. That’s the sort of project we love to see around these parts.

Continue reading “An Automated Water Tank Controller” →

A Complex Way To Push A Button

We’ve likely all looked at a simple problem in our lives and thought that it would be an easy fix, only to realize that the project is enormously more complicated than we first realized. Whether that’s starting a home improvement project, doing a quick repair to a bicycle or car, or trying to install an obscure piece of software on a Linux machine, the amount of time we budget for these tasks often ends up woefully underestimated. []’s night light needs to have its brightness set every night, and it seems easy enough to get a microcontroller to automate that, right?

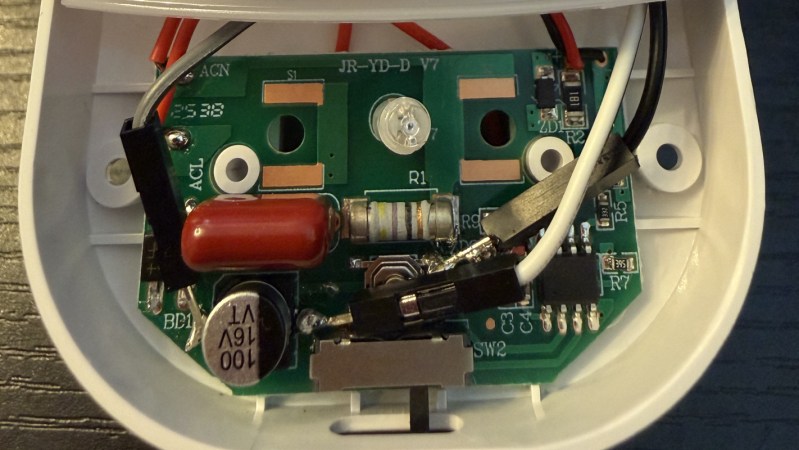
Well, upon opening the small device, the first issue is that there is no labeling on any of the parts, so simply adding a jumper on to existing microcontroller pins without damaging anything wouldn’t easily be possible. Adding a secondary microcontroller is the next logical step, but the power supply in the night light is extremely underpowered so using even the smallest Raspberry Pi or off-the-shelf Arduino was out of the question too. [Oscar] instead chose an ATtiny85, which solves the power requirement issue, but these are a bit more of a challenge to program without a USB device. From there, it needs a transistor wired in to the circuit to actually push the button for him, plus a few support resistors, so [Oscar] actually had a PCB custom-built to hold all of these components.

Even after all of that, the space within the night light enclosure made installing the PCB a challenge, but in the end he has a device which, when his home automation system powers on the plug for the nightlight, automatically boots up and pushes the switch the required number of times and then puts itself to sleep. We’d call that a success even after the colossal effort getting this inexpensive, small light working the way he wanted. There are some other low-powered solutions for problems like these too, as long as being battery-powered isn’t a dealbreaker.

Samsung’s SmartThings API Terminates Free Access

If there’s one constant in the world of commercial home automation solutions, it is that of decreasing availability and higher costs as time goes on. So too with Samsung’s SmartThings, the API of which will cease free access in October of 2026.

While this does not affect people who use the SmartThings app, any system that relies on access to this API will soon face a $4.99 per month fee for non-commercial users, with various commercial tiers also in the pipeline. While the rest of the blog post has all the elegance of the output of a ‘please generate a list of plausible excuses’ query to ChatGPT, the most likely reason is that offering free services after the sale of an Internet of Things device will never be profitable.

SmartThings was originally a 2012 Kickstarter campaign that ended up becoming successful enough that the company was bought by Samsung in 2014. Its current offerings are very much like other Smart Home products, with recently added support for Matter and interoperability with third-party devices.

If you have SmartThings integrated with your Home Assistant installation, you are also likely affected by this change if at any point you use the API. Of course, this isn’t the first time that SmartThings customers had to scramble to fix broken infrastructure, such as when in 2021 the original hubs got discontinued.

A vaguely perforated metal cylinder sits on a wooden box with a grey cylinder and LCD display atop it. There are holes in the top of the grey cylinder for air to flow through.

A Smarter DIY Air Filter

As predominantly indoor creatures, it’s important to maintain a healthy habitat for the hacker. [Kishan Pratap Singh] designed a clever solution in AirSense, an ESP32-powered air filter.

If you’re thinking of cleaning the air in your environment, you might also want to know some properties about the air coming out of the filter. AirSense measures PM2.5 dust concentration, Air Quality Index (AQI), temperature, humidity, and atmospheric pressure. The various sensors are mounted along the exhaust path of the filter, which lets your know what kind of air it’s pumping out.

The system drives a 150 mm exhaust fan mounted in a 3D printed cap that pulls air through a cylindrical Xiaomi HEPA filter inside a perforated metal trash can enclosure. The ESP32 and an LCD readout of the environmental data also live in the cap, giving the device a sleek look. While [Singh] chose to run the filter continuously, we wonder if it might be interesting to set it up to only filter the air if air quality drops below a certain level to conserve power, especially if you’re on a time-of-use power plan. That would require redesigning the sensor assembly (or running the unit in reverse), so maybe it’s over-complicating things?

We’ve seen the Xiaomi Air purifier filter mentioned before, but under the auspices of hacking it’s filter DRM, an open source air filter designed by [Naomi Wu], and even an ESP32 pressed into service to plug an air purifier into Home Assistant.