In today’s “predictable things that happened before and definitely will happen again”, Insteon, a smart home company boasting the Insteon ecosystem of devices built around their proprietary communication standards, has shut down their servers without a warning. For almost two decades, Insteon used to offer products like smart light switches, dimmers, relays, various sensors, thermostats – the usual home automation offerings, all linked into a cozy system. Looking through the Insteon subreddit’s history, there were signs of the company’s decline for good half a year now, but things were mostly stable – until about a week ago, when users woke up and noticed that parts of their smart home network stopped working, the mobile app would no longer respond, and the company’s resources and infrastructure went down. What’s more – the C-rank management has scrubbed their LinkedIn profiles from mentioning Insteon and SmartLabs (Insteon’s parent company).
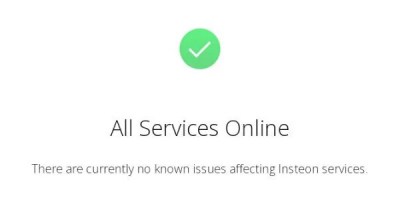 Instantly, the Insteon subreddit has livened up. People, rightfully angry about being literally left in the dark, were looking for answers – as if mocking them, Insteon’s homepage claimed that all services were operational. Others, having expected the shutdown to eventually happen, started collecting and rehosting rapidly disappearing documentation, helping each other keep their tech up in the meantime, and looking into alternative platforms. It turned out to be imperative that users don’t factory reset their Insteon hubs, since those have to communicate with the currently Inste-Gone servers as part of initial configuration, diligently verifying the SSL certificates. Sadly, quite a few users, unaware and going through the usual solutions to make their network function again, are now left with hubs that are essentially bricked, save for a few lucky ones.
Continue reading “Insteon Abruptly Shuts Down, Users Left Smart-Home-Less”