Recently I was given a somewhat crusty looking ThinkPad T400 that seemed like it would make a good knock around machine to have on the bench, if it wasn’t for the fact the person who gave it to me had forgotten (or perhaps never knew) the BIOS password. Cleaning the machine up, putting more RAM in it, and swapping the wheezing hard drive for an SSD would be a relatively cheap way to wring a few more years of life from the machine, but not if I couldn’t change the boot order in BIOS.
Alright, that’s not entirely true. I could have installed an OS on the SSD from my desktop and then put it into the T400, but there was something else at play. The locked BIOS gave me the perfect excuse to install LibreBoot on it, which is one of those projects I’ve had in the back of my mind for years now. Replacing the BIOS with something entirely different would solve the password issue, but there was only one problem: the instructions for flashing LibreBoot onto the T400 are intimidating to say the least.
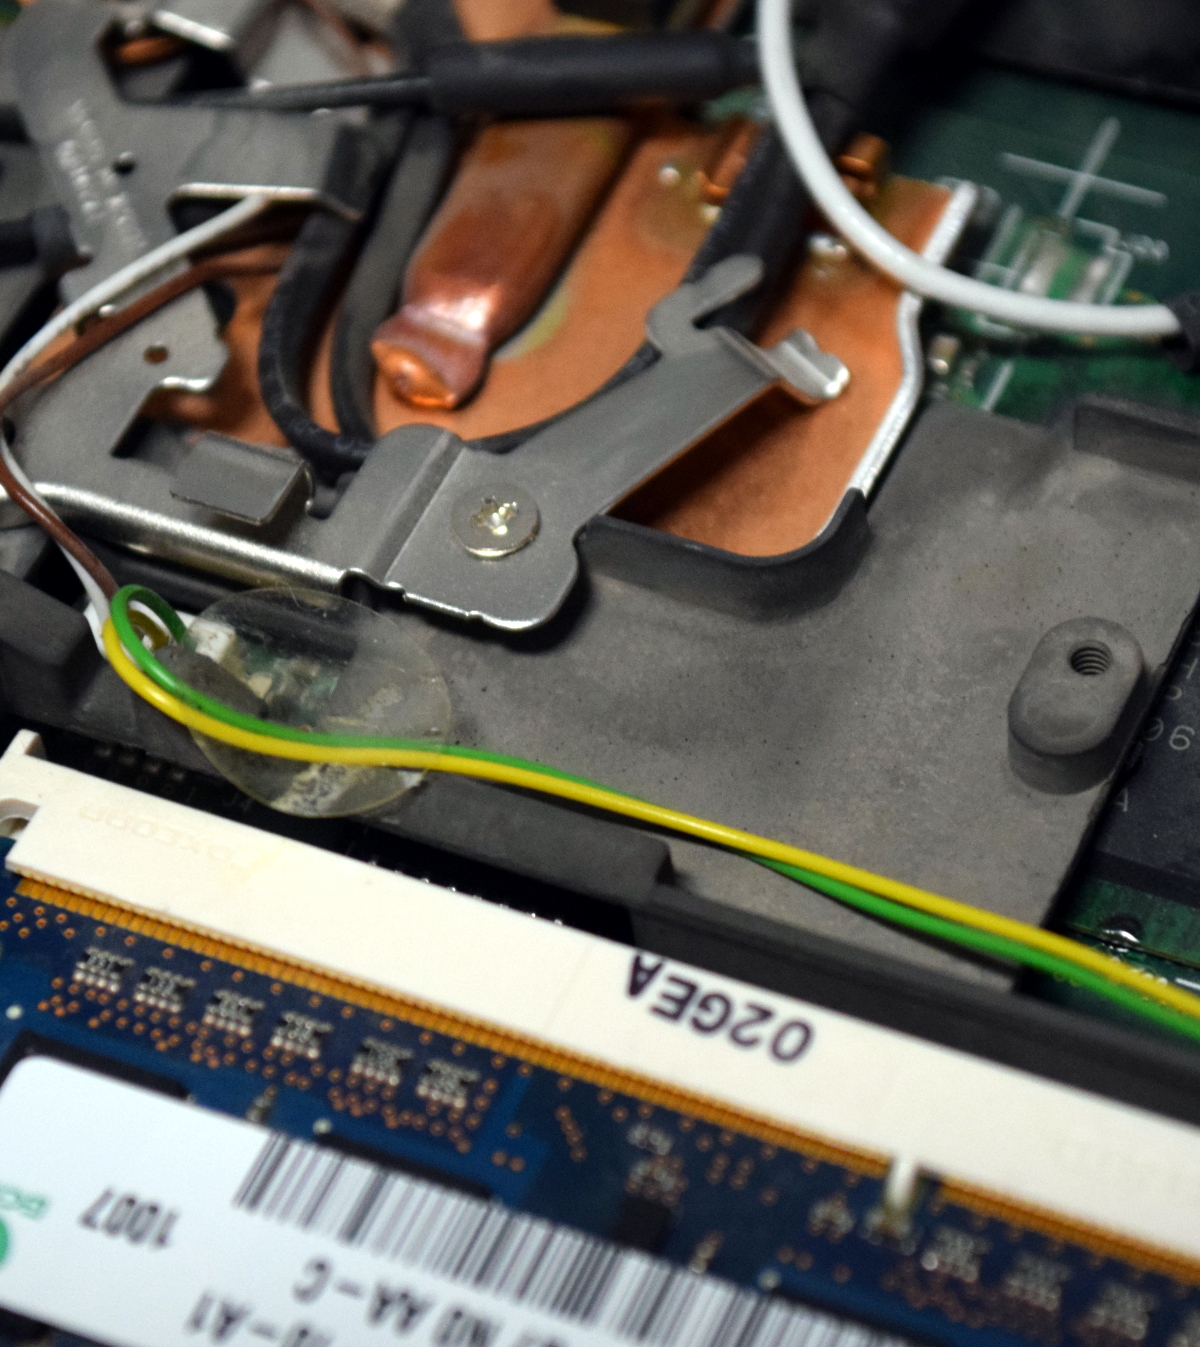
You’re supposed to take the entire machine apart, down to pulling the CPU cooler off and removing the display. All so you can flip the motherboard over to access a flash chip between the CPU and RAM that’s normally covered by a piece of the laptop’s frame. Oh how I hated that diabolical chunk of magnesium which kept me from my silicon quarry. Flashing the chip would take a few minutes, but YouTube videos and first hand accounts from forums told me it could take hours to disassemble the computer and then put it back together after the fact.
Deep into that darkness I peered, long I stood there, wondering, fearing, doubting. Then a thought came to me: maybe I could just cut the thing. If it was a success, it would save me hours of work. If it failed, well, at least the computer didn’t cost me anything. Time to roll the dice.
There are a number of companies now providing turn-key computers that meet the Free Software Foundation’s criteria for their “Respects Your Freedom” certification. This means, in a general sense, that the computer is guaranteed not to spy on you or otherwise do anything else you didn’t explicitly ask it to. Unfortunately these machines often have a hefty premium tacked on, making it an unpleasant decision between privacy and performance.
Freedom-loving hacker [SolidHal] writes in to tell us about his quest to create a FSF-compliant laptop without breaking the bank. Based on a cheap Asus C201 Chromebook, his custom machine checks off all the appropriate boxes. The operating system was easy enough with an install of Debian, and the bootloader was rid of any Intel Management Engine shenanigans with a healthy dose of Libreboot. But there was one problem: the permanently installed WiFi hardware that required proprietary firmware. To remedy the issue, he decided to install an internal USB Wi-Fi adapter that has the FSF seal of approval.
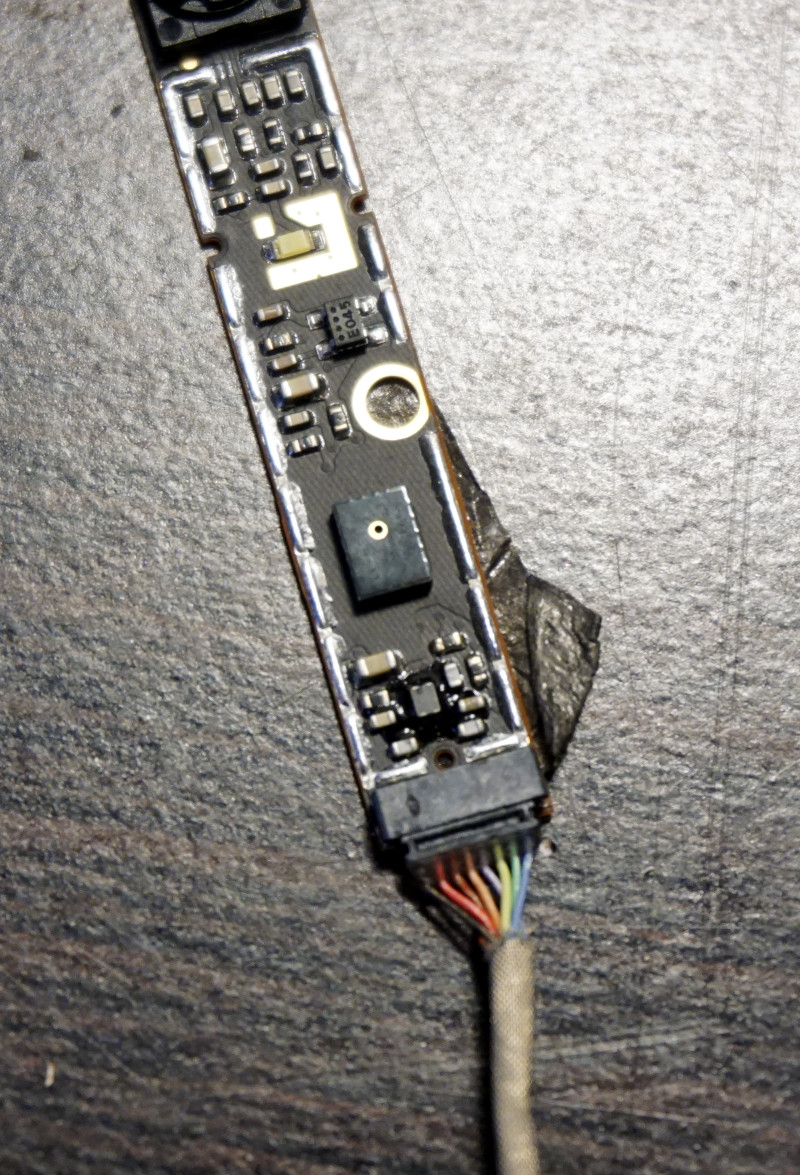
As the Chromebook obviously doesn’t have an internal USB port, this was easier said than done. But as [SolidHal] is not the kind of guy who would want his laptop taking pictures of him in the first place, he had the idea to take the internal USB connection used by the integrated webcam and use that. He pulled the webcam out, studied the wiring, and determined which wires corresponded to the normal USB pinout.
The FSF approved ThinkPenguin Wi-Fi adapter he chose is exceptionally small, so it was easy enough to tuck it inside some empty space inside of the Chromebook. [SolidHal] just needed to solder it to the old webcam connection, and wrap it up in Kapton tape to prevent any possible shorts. The signal probably isn’t great considering the antenna is stuck inside the machine with all the noisy components, but it’s a trade-off for having a fully free and open source driver. But as already established, sometimes these are the kind of tough choices you have to make when walking in the righteous footsteps of Saint Ignucius.
Internal laptop modifications like this one remind us of the Ye Olden Days of Hackaday, when Eee PC modifications were all the rage and we still ran black and white pictures “taped” to the screen. Ah, the memories.
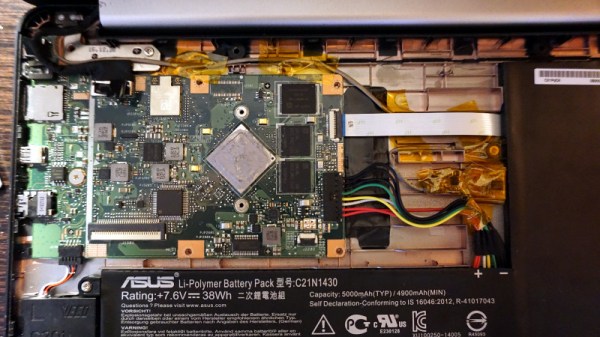
It’s not something you often give a lot of thought to, but the modern consumer laptop battery is a pretty advanced piece of technology. Not only does it pack several dozen watt-hours of energy into a relatively small and lightweight package, but it features integrated diagnostic capability to make sure all those temperamental lithium cells are kept in check. Widely available and extremely cheap thanks to the economies of scale (unless you try to get them from the OEM, anyway), they’re a very compelling option for powering your projects.
Of course, it also helps if, like [teliot] you have a bunch of the things lying around. For reasons we won’t get into, he’s got a whole mess of Acer AL12x32 battery packs which he wanted to use for something other than collecting dust. He had the idea of hooking one up to a solar panel and using it as a power supply for some ESP8266 projects but wanted to be able to talk to the battery for status and diagnostic information. After studying the Smart Battery System (SBS) protocol the batteries use, he was able to come up with some code that lets him pull 37 separate fields of information from the pack’s onboard electronics using his ESP8266.
Battery consumption over time
It took some fiddling with a multimeter to figure out which pin did what on the eight pin interface of the battery. Two of the pins need to be shorted to enable the dual 12 VDC pins to kick in. Technically that’s all you really need to do if you want to utilize the battery in a low-tech sort of way. But to actually get some information from the battery, [teliot] had to identify the two pins which are for the System Management Bus (SMBus) interface where the SBS data lives.
Once he knew which pins to talk to the battery on, the rest was fairly easy. SBS is well documented, and the SMBus interface is very similar to I2C. Like all the cool kids are doing these days, his code publishes the battery info to MQTT where he can plot it and get finely grained info on the performance of his solar power system.
This isn’t the first time we’ve seen a hacker wrangle laptop batteries through SMBus, but it’s always nice to get multiple perspectives on a topic. If you plan on making this kind of thing part of your standard bag of tricks, you might even want to take the time to build a dedicated SMBus scanner.
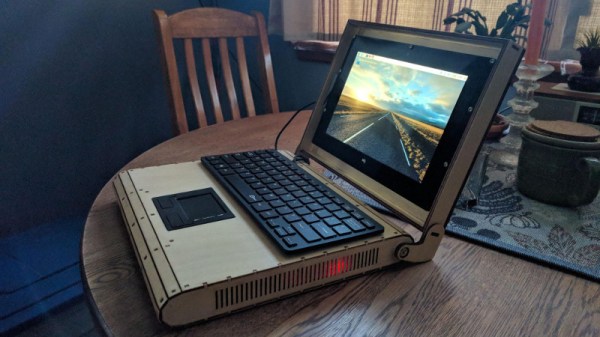
[Rory Johnson] writes in to tell us about PlyTop Shell, a Creative Commons licensed design for a laser cut wooden laptop that he’s been working on since 2016. It’s designed to accommodate the Raspberry Pi (or other similarly sized SBCs), and aims to provide the builder with a completely customizable mobile computer. He’s got a limited run of the PlyTop up for sale currently, but if you’ve got the necessary equipment, you can start building yours while you wait for that new Pi 3B+ to arrive.
Originally [Rory] was working on a 3D printed design, but quickly ran into problems. The vast majority of 3D printers don’t have nearly the build volume to print out a laptop case in one shot, so the design needed to be broken up into multiple smaller pieces and then grafted together into the final case. Not only did this take a long time and a lot of material, but the final result had the rather unfortunate appearance of a plastic quilt.
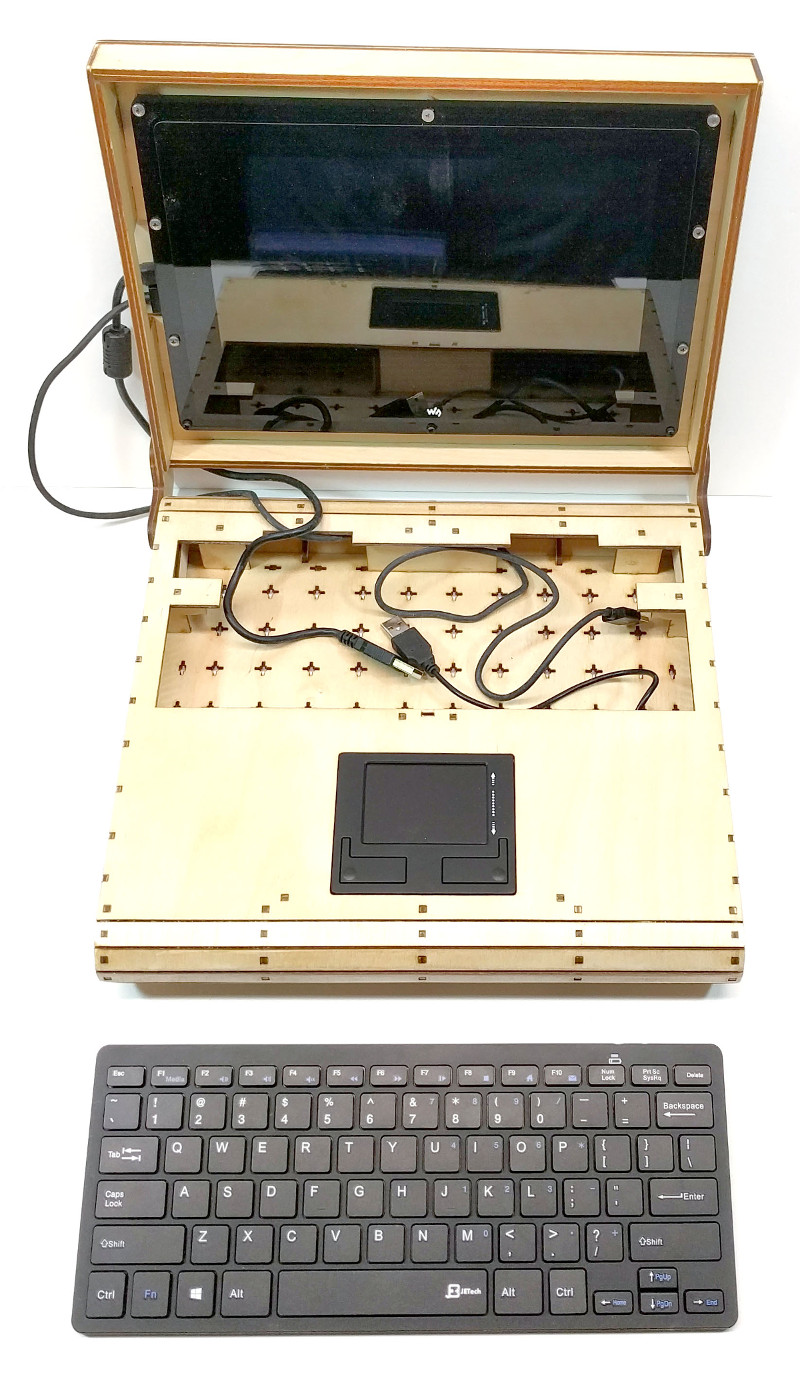
Eventually he got hooked up with a maker collective in Minneapolis that had a laser cutter, and the PlyTop was born. There’s still a 3D printed component in the design that goes in the screen hinge, but the rest of the PlyTop is cut out of a three 2′ x 4′ sheets of 1/8″ Baltic birch plywood. As you might expect, plenty of fasteners are required, but [Rory] has a complete Bill of Materials (complete with purchase links) for everything you’ll need to turn the cut pieces into a fully fledged laptop. He’s considering selling kits in the future, but is still working on the logistics.
In keeping with the idea of complete flexibility, there’s no defined layout for the internals of the PlyTop. Rather, there’s an array of star-shaped openings on the bottom plate that allow the builder to connect hardware components up in whatever way works for them. [Rory] actually suggests just holding everything down with zip ties to allow for ease of tinkering.
He’s also come up with a list of suggested hardware for the keyboard, touchpad, and display; but those are really just suggestions. The design is open enough that it shouldn’t take much work to adapt to whatever gear you’ve got laying around.
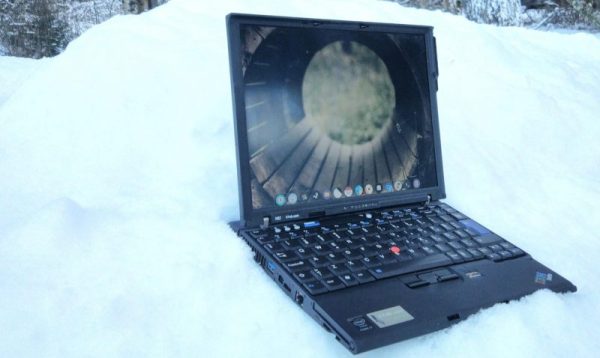
We often see people funneling their passion into keeping beloved devices in operation long past their manufacturer’s intent. These replacement Thinkpad motherboards (translated) bring old (yet beloved) Thinkpads a much desired processor upgrade. This is the work of the user [HOPE] on the enthusiast forum 51nb. The hack exemplifies what happens when that passion for legendary gear hits deep electrical expertise and available manufacturing. This isn’t your regular laptop refurbishment, [HOPE] is building something new.
ThinkPads are known for their zealous following (as our own [Brian Benchoff] underscored last year). Lenovo has steered the venerable brand into the future while the laptop market has drifted deeper and deeper into the wilds of tight integration at the expense of user modification. Along the way 4:3 screens were traded for media-friendly 16:9, TrackPoints were traded for trackpads, and the classic ThinkLight gave way to real keyboard backlights. These progressions left a shrinking but vocal group of old school Thinkpad enthusiasts — the cult of Thinkpad — clinging to beloved devices like 2007’s X61 and T60 ignored by a changing market.
In an astounding turn of ingenuity [HOPE] has revitalized these classic ThinkPads by entirely replacing their motherboards. And not just for one particular model, there are options available for at least 3 families of computers. The new devices are referred to by model numbers never used by IBM or Lenovo; the X60/61 motherboard makes an X62, the X200/201 motherboard makes an X210, and the T60 motherboard makes a T70. Depending on the customer’s preference either a bare motherboard or a fully assembled unit is available.
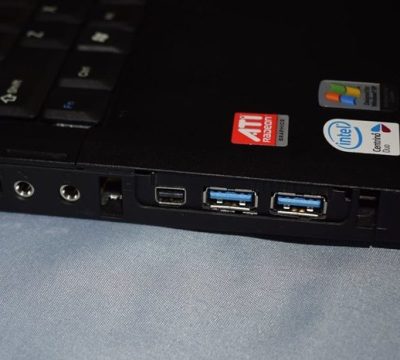
Classic stickers with non-classic ports
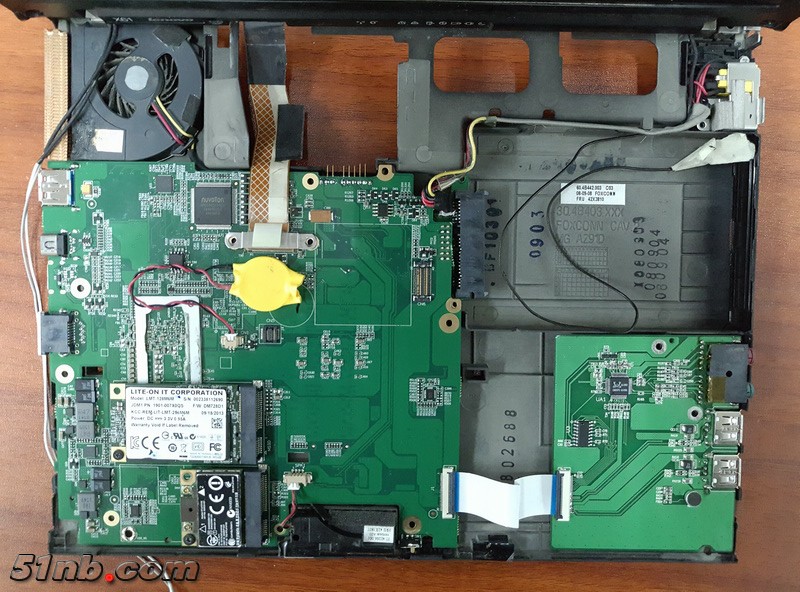
Depending on the exact model in question these motherboards slot directly into the original chassis but add recent generation Intel Core I processors, DDR4, USB 3.0/3.1, Thunderbolt 3 and more. Often they reuse the original heat sinks and fans, and expose these ports through the same chassis apertures the original motherboards used. Considering these machines are a decade older than the hardware being crammed inside them the level of integration is truly impressive. The end result looks like it could have come out of a Lenovo factory just before Spring Festival. If you look closely at the image at the top of this article, you might notice they even included an improved “Intel Inside” sticker on the palm rest and a model number label at the lower left of the display!
There is an implicit economic statement here that’s worth calling out. A motherboard for anything more significant than a basic microcontroller is an incredibly complicated piece of technology. When the bar is moved from “small ARM processor” up to “modern x86 system” this counts extra. Not only are they complex electrically but the fabrication processes required to physically create them are at the edge of what you’d find at your favorite cheap PCB fab house. We’re talking CPUs studded with about 1100 pins, DDR4 and PCI-E with extremely tight electrical timing requirements driving elaborate board layouts, and a plethora of off-board peripheral parts. On top of those constraints the board itself must be small enough to fit inside, not a purpose-built enclosure, but an existing laptop body with whatever combination of mounting brackets and connector placements Lenovo decided on. That a hobbyist (we assume) can make their own devices in this range to sell for $500-$700 is nothing short of astounding.
Fresh replacements being installed
This shouldn’t be possible. More accurately, it’s likely possible because there are other drivers which make the cost of PCB fabrication and assembly lower and more accessible than ever. The general march of technology certainly, but perhaps the presence of mobile devices and a desire to repair and improve them. After all and if the rumors are to be believed, anyone who can find the right Huaqiangbei stall can get the NAND replaced in their iPhone, a once complex process made simple.
It’s difficult to track the progression of each model as they are primarily covered on the 51nb forums (a Facebook page called [Lcdfans] makes some of the information available in English). However it’s possible to find hands-on information like [koobear]’s review on Reddit.
[AkBKukU] writes in to tell us of his experiments with the rather vile-sounding “ChugPlug”, an odd portable AC power bank designed for the express purpose of powering MacBook chargers. It would seem more efficient to simply build a DC power bank with a MagSafe connector to cut out the charger all together, but presumably there is some market for this particular niche device. Especially at the $15 they are currently selling for on Amazon.
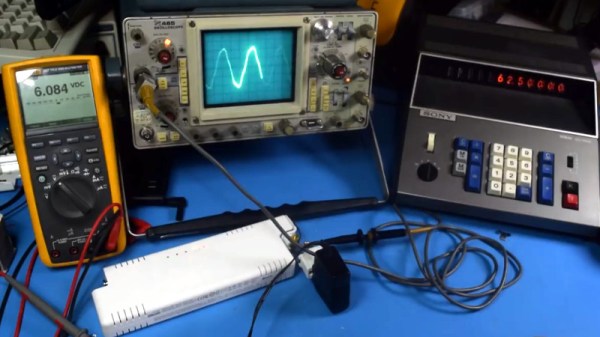
Unfortunately, the ChugPlug that [AkBKukU] bought doesn’t seem to work. After some experimenting he found that it appears to only be outputting 80 VAC, obviously too low for many devices to function. But he reasoned that some things, like switch mode power supplies or restive loads, might still work. He just needed to come up with a way to plug them into the ChugPlug.
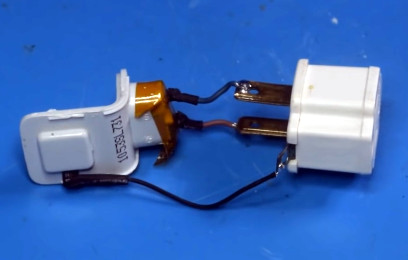
If his testing setup gives you a case of sweaty palms, you aren’t alone. He breaks open a dead MacBook charger to recover the female AC connector, and then solders that directly to an AC grounding adapter. The resulting pigtail lets [AkBKukU] plug in various AC loads while allowing him to probe the wires with his multimeter and oscilloscope.
Once he’s satisfied his hack works conceptually, that is, he’s able to plug arbitrary AC loads into this purpose-built battery pack, he follows up with a less dangerous looking adapter. Making use of the shell of the dead MacBook charger and what some might describe as a salacious amount of hot glue, he produces a compact and relatively safe looking device that will let him use his handicapped ChugPlug as a general purpose source of AC power.
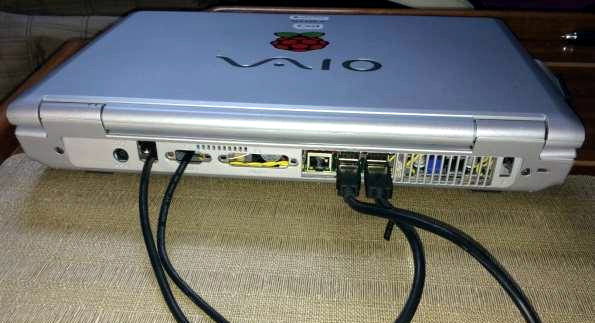
Early in November we took a look at a one of the best Raspberry Pi laptops we had ever seen, using the shell of a Sony VAIO. Laptops used to be hulking beasts, and that played into [Frank Adams’] hands as he got rid of the motherboard and had enough space to replace it with a Raspberry Pi and a few other support boards. This took advantage of the laptop’s screen, keyboard, LEDs, etc. But what’s a laptop without battery power? [Frank] hadn’t cracked that nut until now.
VAIO battery and charging PCB seen to lower left
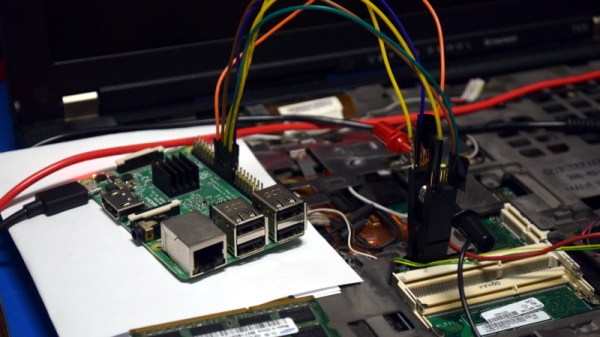
Adding battery power is trickier that it sounds, but [Frank] managed to get the Raspberry Pi to talk to the original Sony VAIO internal battery. His work on the project is shared, but this part of the story is best found starting on page 29 of his PDF project details.
Using the original battery is a good move since it’s designed to fit and has a charger ready to interface with the port on the laptop case. But these batteries have logic inside them, and there’s the rub. Communications use the 2-wire System Management Bus (SMBus) which is well documented. But the when trying to use the Pi’s I2C [Frank] couldn’t figure out to send a repeated start command.
He ended up writing his own C program that bit-bangs the communications he needed and now has the Pi speaking to the battery and listening to what it hears coming back. Reading through his description of this is fun since he includes his observations from a logic analyzer captures. He suspects an occasional bad read is due to Linux interrupting code execution. He watches for and catches these bad reads in software and can now reliably read all the battery vitals.
The hack leaves him with a system that functions in much the same way the original computer did: plug it in and it charges. He did add some hardware that lets him take a voltage reading from the battery using an ADC on the Teensy that was already present to control the keyboard and case LEDs. This adds a small constant draw on the battery, but for now he doesn’t leave the battery connected when the laptop is not in use.
If you’d like to read our original coverage of this laptop, here it is.
 Alright, that’s not entirely true. I could have installed an OS on the SSD from my desktop and then put it into the T400, but there was something else at play. The locked BIOS gave me the perfect excuse to install LibreBoot on it, which is one of those projects I’ve had in the back of my mind for years now. Replacing the BIOS with something entirely different would solve the password issue, but there was only one problem: the instructions for flashing LibreBoot onto the T400 are intimidating to say the least.