There was a time when we thought a 50 MHz 486 was something to get excited about. In comparison, the computer this post was written on clocks in at about 3.8 GHz, which these days, isn’t an especially fast machine. But researchers at the University of Rochester and the Friedrich-Alexander-Universität Erlangen-Nürnberg want to blow the doors off even the fastest modern CPUs. By using precise lasers and graphene, they are developing logic that can operate at nearly 1 petahertz (that’s 1,000,000 GHz).
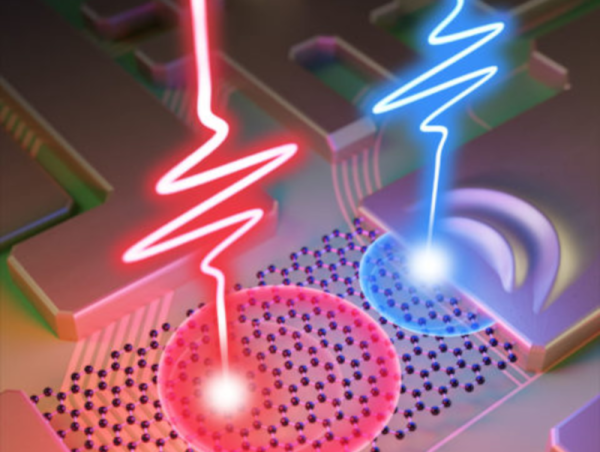
These logic gates use a pair of very short-burst lasers to excite electrical current in graphene and gold junctions. Illuminating the junctions very briefly creates charge carriers formed by electrons excited by the laser. These carriers continue to move after the laser pulse is gone. However, there are also virtual charge carriers that appear during the pulse and then disappear after. Together, these carriers induce a current in the graphene. More importantly, altering the laser allows you to control the direction and relative composition of the carriers. That is, they can create a current of one type or the other or a combination of both.
This is the key to creating logic gates. By controlling the real and virtual currents they can be made to add together or cancel each other out. You can imagine that two inputs that cancel each other out would be a sort of NAND gate. Signals that add could be an OR or AND gate depending on the output threshold.
[Ignacio Franco], the lead researcher, started working on this problem in 2007 when he started thinking about generating electrical currents with lasers. It would be 2013 before experiments bore out his plan and now it appears that the technique can be used to make super fast logic gates.
We often pretend our logic circuits don’t have any propagation delays even though they do. If you could measure it in femtoseconds, maybe that’s finally practical. Then again, sometimes delays are useful. You have to wonder how much the scope will cost that can work on this stuff.