ESP8266 Adds Slick Touchscreen Controls To A Stretch Limo

The popularity of the ESP8266 WiFi module has a lot to do with its ability to inexpensively connect to the Internet. However, [hwhardsoft]’s stretch limousine environmental control system explores another use for these modules: a simple way to tie together disparate systems with a common user interface.

On a basic level, the problem is one we’ve all faced: multiple devices with multiple control interfaces create an awkward user experience. Have you ever worked in an office with 6 brands of air conditioner requiring 6 different remotes? Because of its low-cost, support for Wi-Fi, serial, and GPIO, ESP8266 boards are a reasonable candidate to create a unified control system for multiple devices. This is even more true for the ESP32, as it adds Bluetooth support.

[hwhardsoft]’s use case is fairly straightforward. The limousine (a Lincoln stretch) has multiple LED lighting controllers, climate control, and a laser projector. This was not exactly a smooth user experience, so [hwhardsoft] tied all the controls to two slick touchscreen interfaces (presumably one for the driver and one for the passengers).

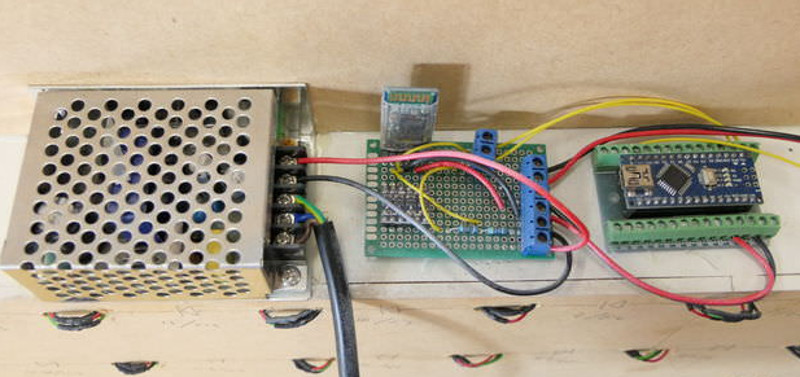
Each touchscreen sends commands over Wi-Fi using UDP to a control board that switches relays to control the different devices, as we’ve seen previously.

While relays are arguably not the ideal solution here, these control boards already existed and were functional, so it would have been wasteful to throw them out. An easy improvement suitable for future projects would be to use NPN transistors to simulate button presses on the remote controls. This works quite well and lowers cost, power, and parts count, while being faster, more reliable, and quiet.

If you wanted to build something similar in your home or office, but want to use an Android smartphone instead of a touchscreen, the Kivy Python module allows you to do just that. It’s quite easy to set up a simple interface with buttons, dropdown lists, and text inputs that send data to an ESP8266 over UDP.

Color Sensor From An RGB LED And A Photocell

When you need to quantify the color of an object, you’ve got quite a few options. You can throw a Raspberry Pi camera and OpenCV at the problem and approach it through software, or you can buy an off-the-shelf RGB sensor and wire it up to an Arduino. Or you can go back to basics and build this reflective RGB sensor from an LED and a photocell.

The principle behind [TechMartian]’s approach is simplicity itself: shine different colored lights on an object and measure how much light it reflects. If you know the red, green, and blue components of the light that correspond to maximum reflectance, then you know the color of the object. Their sensor uses a four-lead RGB LED, but we suppose a Neopixel could be used as well. The photosensor is a simple cadmium sulfide cell, which measures the intensity of light bouncing back from an object as an Arduino drives the LED through all possible colors with PWM signals. The sensor needs to be white balanced before use but seems to give sensible results in the video below. One imagines that a microcontroller-free design would be possible too, with 555s sweeping the PWN signals and op-amps taking care of detection.

And what’s the natural endpoint for a good RGB sensor? A candy sorter, or course, of which we have many examples, from the sleek and polished to the slightly more hackish.

Continue reading “Color Sensor From An RGB LED And A Photocell”

How To Eclipse When All You Have Is A Welding Helmet

What do you do if you don’t trust cheap eclipse-watching glasses from the internet? What about if everyone’s sold out? Well, if you want to watch the eclipse and you have an auto-darkening welding helmet, you can do what [daniel_reetz] did and hack something together with a remote and your welding helmet to let you see the eclipse without blinding yourself.

Essentially, the hack tricks the helmet’s sensors into thinking it’s very bright. [Daniel_reetz] accomplishes this by gluing a remote with an infrared LED to the side of the helmet and covering it with a 50mm plastic lid. There are two sensors on [daniel_reetz]’s helmet, so he covers the other one with aluminum tape. What this means is that when he presses a button on the remote, the lid-covered sensor thinks it’s very bright out and since the other sensor is covered, it darkens the lens of the mask.

I’m sure some of our readers could come up with a more sophisticated method that would allow you to do something other with your hand than press the remote buttons, but this is a quick and easy hack that’ll get you able to take a quick look at the eclipse – assuming you have a welding mask capable of shading to level 13 or 14. If you are hoping to catch a glimpse of the eclipse, check out the safety guide from NASA just to make sure your eyes are safe. For another method of viewing the eclipse, check out this wearable pinhole camera. For another welding mask hack, check out this augmented reality mask.

Continue reading “How To Eclipse When All You Have Is A Welding Helmet”

Clever Battery Holder Hack Makes Brilliant Earrings

A ‘googly eye’ with hole for LED leads on one side, slot for coin cell on the other. Black disk for pupil removed.

We love seeing a thing get used effectively for other than its intended purpose, and this DIY LED Earrings project is a great example. [IdunnGoddess] liked the idea of making light-up LED earrings powered by a small coin cell, but an enclosure and power connection for the battery were sticking points. The solution? A googly eye after a few minor modifications turned out to be perfect.

A googly eye resembles a thin, flat, hollow plastic bulb. Choose one that’s just a bit bigger than the coin cell, and cut a slot in one end and a small hole in the other. The LED leads go into the hole, and the coin cell slides into the slot. The result? A lightweight battery holder for an attached LED, and as a bonus the hacked googly eye is a clean and super smooth surface that can easily be painted or decorated to make it part of the design. The video embedded below demonstrates the process and showcases a few sample designs.

Continue reading “Clever Battery Holder Hack Makes Brilliant Earrings”

Rushing The Design And Construction Of LED Centerpieces

‘Dragon Flame’ RGB LED table centerpieces, by [Alex Lao]
Sometimes the most important thing is getting something done.

[Alex Lao] was recently in such a situation. His sister was getting married and he designed, built, and delivered twenty RGB LED table centerpieces in a rush. There were no prototypes made, and when the parts arrived all twenty were built all at once over a single weekend. These table centerpieces are illuminated by RGB LEDs and battery-powered, but have an option to be powered by a wall adapter.

[Alex] helpfully shared some tips on reducing the production risks and helping ensure results in such a limited time frame. His advice boils down to this: reduce the unknowns. For Alex this meant re-using code and components from a previous project — even if they were not optimal — so that known-good schematic and footprint libraries could be used for the design.

From one perspective, the PIC32 microcontroller inside each lamp is overkill for an LED centerpiece. From another perspective, it was in fact the perfect part to use because it was the fastest way for [Alex] to get the devices working with no surprises.

For an added perspective on needing to get production right the first time on a much larger scale, be sure to check out getting an installation made up of 25,000 PCBs right the first time.

Dead Bug Soldered LED Ring Of Awesome

Sometimes the simplest things in life are the most beautiful. [The Tweaker] has soldered an LED circle on the top of an ATmega328P chip, and it looks great.

Using nothing more than some solder, wire, 20 x Pico 0402 (1mm x 0.5mm) blue LEDs and an ATmega328P (7mm x 7mm), [The Tweaker] managed to cram 20 LEDs into a circle on the top of the chip soldered in dead bug style. The chip is running some Arduino code and is operating on the 8 MHz internal crystal oscillator, so that manages to keep the part count low. The soldering is done in a spiral so the LED terminals are hooked up to the right pins, but it seems to add to the aesthetics of the project and looks like it would take a really steady hand. Once you connect a power source it displays chasing lights as well as other light patterns.

There may not be much to this project but it does look great.

Continue reading “Dead Bug Soldered LED Ring Of Awesome”

Edge-lit Pendants Show Two Layers Are Better Than One

Engraved acrylic lights up nicely with LED lighting. Simply engrave clear acrylic with a laser engraver, then edge-light the acrylic and watch the engraving light up. This badge made by [Solarbotics] shows how they used this principle when creating some pendants for an event that performed particularly well in the dark.

The pendants they created have two engraved acrylic panels each, and that’s about it. Two LEDs and a CR2032 battery nestle into pre-cut holes, and the engraved sides are placed face-to-face, so the outer surfaces of the pendant are smooth. By using some color-cycling RGB LEDs on one panel and blue LEDs on the other panel, the effect is that of an edge-lit outer design with a central element that slowly changes color separately from the rest of the pendant.

The design stacks the LED leads and coin cells in such a way that a simple wrap of tape not only secures things physically, but also takes care of making a good electrical connection. No soldering or connectors of any kind required. [Solarbotics] found that CR2032 cells would last anywhere between a couple of days to a week, depending on the supplier.

This design is great for using a minimum of materials, but if that’s not a priority it’s possible to go much further with the concept. Multiple layers of edge-lit acrylic were used to make numeric 0-9 display modules as well as a full-color image.