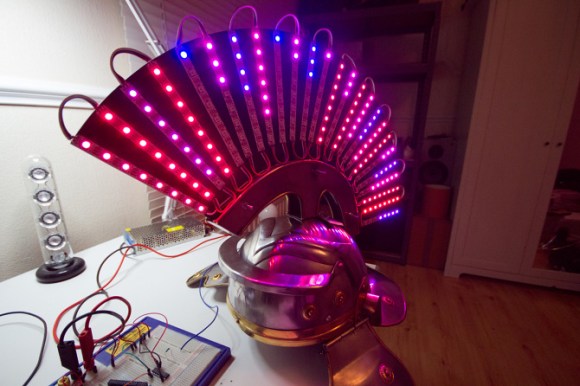
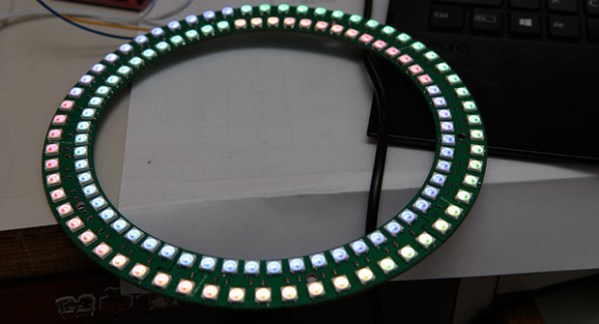
Breadboardable WS2812 LEDs

LED

Hackaday sees a ton of projects featuring the WS2812 series of digitally controllable RGB LEDs, in the form of bare chips, RGB LED strips, or some form of Adafruit’s NeoPixels. All these WS2812 LED products have one thing in common – they’re chip LEDs, making some projects difficult to realize. Now there’s a new member of the WS2812 family – a through-hole LED version – that should be available through the usual sources sometime later this year.

The key difference between these and the usual WS2812 LEDs is the packaging; these are 8mm LEDs with pins for power, ground, data in, and data out. With the preexisting libraries, this 8mm LED should work just the same as any other WS2812 LED.

Aside from a through-hole package, these new LEDs are very diffuse and aren’t as blinding as the normal chip LEDs. If you want to pick up a few of these LEDs, they’re available here, 13 LEDs for $15. There’s a lot of potential here for RGB LED cubes, something we hope to see sooner rather than later.

Companion Cube Christmas Lights Improved With Neopixels

cubes

[Crenn] obtained a string of official companion cube lights from Valve, but being in Australia couldn’t put them to their non-judgemental glory without the use of a step down transformer. They sat on the workbench for a few months until an idea was hatched: replace the bulbs with an Adafruit Neopixel strip, making these wonderful inanimate friends a string of individually addressable RGB LEDs.

The process of converting these cubes required stuffing a very small 9.4mm PCB inside. This PCB was designed in KiCAD thanks to a few classes at the Melbourne hackerspace. The board files were sent off, PCBs received, soldered up, and stuffed into the cubes.

Control is via a Duemilanove with a single IO pin using the Neopixel library. All the code, board files, and schematics are available on the gits. Future improvements might include a 3D printed cable relief and a way to securely mount the PCBs to the inside of the cubes.

Video available below.

Continue reading “Companion Cube Christmas Lights Improved With Neopixels”

Ridiculously Over-Powered Quadrotor Spotlight Kills Battery, Blinds People

Flying quadrotors at night is awesome — but being in the dark tends to be a problem for not crashing them… Tired of not being able to get successful GoPro videos, [Diode] decided to strap a light to his quadrotor. A 3000+ lumen, 50W LED to be precise.

He found the 50W LED for $20 online with the driver! The only problem was it gets super hot. He salvaged a heat sink from an Xbox 360 which helps to keep the temperature at bay… but also increases the weight of the quad by a bit too much. Luckily his quadrotor is pretty powerful — but with the added weight, and 50W power drain, his flight time went from 15 minutes… to about 3 minutes.

Three of the most awesome minutes ever! Just watch the following video — the night-time possibilities are endless!

Continue reading “Ridiculously Over-Powered Quadrotor Spotlight Kills Battery, Blinds People”

Hack All The Things In The Time You Save With This LED Pomodoro Timer

Do you want to use your time more productively but are tomato-averse? [Robin]’s LED Pomodoro timer could be the perfect hack for you.

The Pomodoro Technique is a time management solution developed in the late 1980s. The basic idea is to spend a very focused 25 minutes performing some activity such as working or studying and then take a 5-minute break. Many of its proponents use a tomato-shaped kitchen timer to alert them to switch between the two states, but [Robin] wanted to make his own and learn along the way.

First, he wanted to use an ATtiny85 and learn about its features. Specifically, he used its timers, PWM, and low-power sleep mode. [Robin] used Charlieplexing to drive a total of six LEDs. When the timer starts, five yellow LEDs are driven high to indicate each 5-minute slice of work time. A red LED is lit during the 5-minute break.

[Robin] also explored compact PCB design and fabrication. All components are SMD and his board is 4cm square. [Robin] is using this SMD buzzer for discrete feedback. He included a footprint for a six-pin ISP header and programmed it with pogo pins. The timer is completely interrupt-driven: one click of the tactile button starts the work counter, and the buzzer sounds when time is up. A second click starts the break counter.

[Robin] has made everything available in his GitHub repo and encourages you to use it. Time’s a-wastin’!

Driving RGB Pixel LEDs With CAT5 Cable

cable-test

[Teknynja] was working on a project where he needed to drive a few strips of Adafruit Neopixels – WS2812 LED strips – that were located several feet apart. These LED strips draw a lot of current, and are very timing sensitive; anything more than a few feet of wire between the microcontroller and the LED strip will probably result in missed data, voltage drops, dimming LEDs, and possibly a non-functional strip.

The solution, as in all matters concerning long distance transmission of data, was CAT5 cable. [Teknynja] used RS-422 drivers and receivers to pull this task off, with 75174 line drivers receiving signals from a Teensy 3.0, and 75176 bus transceivers reading everything at the other end of a 20 foot cable.

For the power drop issue, [Teknynja] is feeding 12V into a few of the wire pairs in the cable and using a cheap  LM2596 buck converter to step everything down to 5V at the strip.

With a fairly simple circuit, [Teknynja] was able to drive a few strips of WS2812 LEDs through 20-foot lengths of CAT5 cable with ease; it worked just the same as if the pixels were connected directly to the Teensy on a workbench.

WS2811 SPI Driver Using One Transistor And Passives

ws2811-spi-driver

We love the WS28xx projects because even if we never plan to use them, the signal timing is like the most addictive puzzle game ever. For instance, check out this WS2811A driver which uses hardware SPI to generate the signals.

The WS28xx offerings place a microcontroller inside an RGB LED, allowing them to be individually addressed in very long chains or large matrices (still a chain but different layout). But the timing scheme used to address them doesn’t play well with traditionally available microcontroller peripherals. [Brett] had been intrigued by some of the attempts to bend hardware SPI to the will of the WS2811 — notably [Cunning_Fellow’s] work featured in this post. He took it a great step forward by simplifying the driver to just one transistor, three resistors, and a capacitor.

Click through the link above for his step-by-step description of how the circuit works (it’s not worth re-explaining here as he does a very concise job himself). The oscilloscope above shows the SPI signal on top and the resulting timing signal below. You will notice the edges aren’t very clean, which requires the first pixel to be very close to the driver or risk further degradation. But, since the WS28xx drivers feature a repeater which cleans up signals like this, it’s smooth sailing after the first pixel.


IKEA LED Table Mod Doesn’t LACK Awesome

Some people look at IKEA LACK tables as cheap furniture. Our readers look at them as a blank canvas. [Klaas] has turned a LACK Side table into an interactive LED table featuring 144 RGB LEDs. After attending a class on WS2801 pixel strings at his student IEEE chapter, [Klaas] was inspired to design something of his own. He settled on an IKEA LACK table and started sketching. He didn’t actually have a table on hand, so he had to deduce the size from the website images and dimensions. He calculated a usable size of around 45cm, which was pretty close to the mark. After running a few tests, [Klaas] determined that a 12×12 grid of squares 35mm on a side would provide that enough resolution to play simple games. The 35mm x 35mm grid would also be small enough for the LEDS to illuminate. He used a laser cutter to cut the an interlocking grid from 3mm MDF. A base plate with 144 12mm LED holes was also cut out, and the entire assembly was glued together.

For illumination, [Klaas] settled on WS2812B LEDs, as they were cheaper than their WS2801 couterparts. The WS2812B’s also snapped easily into his 12mm holes. At this point [Klaas] actually purchased his IKEA table and proceeded to cut a huge hole in it. The grid glued right in, and some aluminum L-profile cleaned up the top edge. Driving all those LEDs would need a bit of processing power, [Klaas] chose a Teensy 3, and the well-known OctoWS2811 library. He also added a USB host shield, which allowed him to use an Xbox 360 USB game pad as his controller. For software, he created a simple Tetris clone, and ported snake from the Arduino game shield. A menu and some scrolling text ties everything together. The only thing left to add is a glass top. [Klaas] hasn’t settled on clear or diffuse glass yet. We a suggest clear to avoid hiding any details of this great build.

Continue reading “IKEA LED Table Mod Doesn’t LACK Awesome”