The MMORPG RuneScape holds a special place in the hearts of those who played it in the early 2000s. Sure it might seem exceptionally quaint by modern standards, but at the time it was groundbreaking stuff. Plus you could play it for free, which certainly helped get people onboard. While there’s a more modern build available, many who played the game from the early days prefer to stick with what they know, and continue to run a version of the game that has now become known as Old School RuneScape.
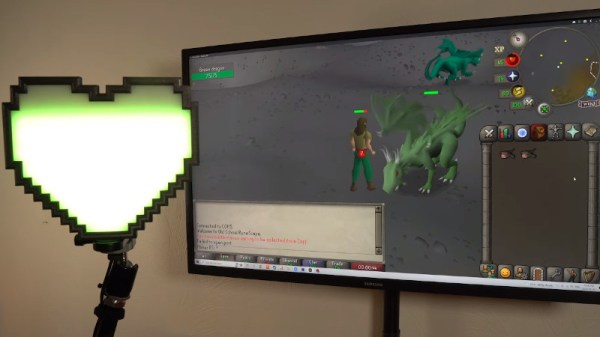
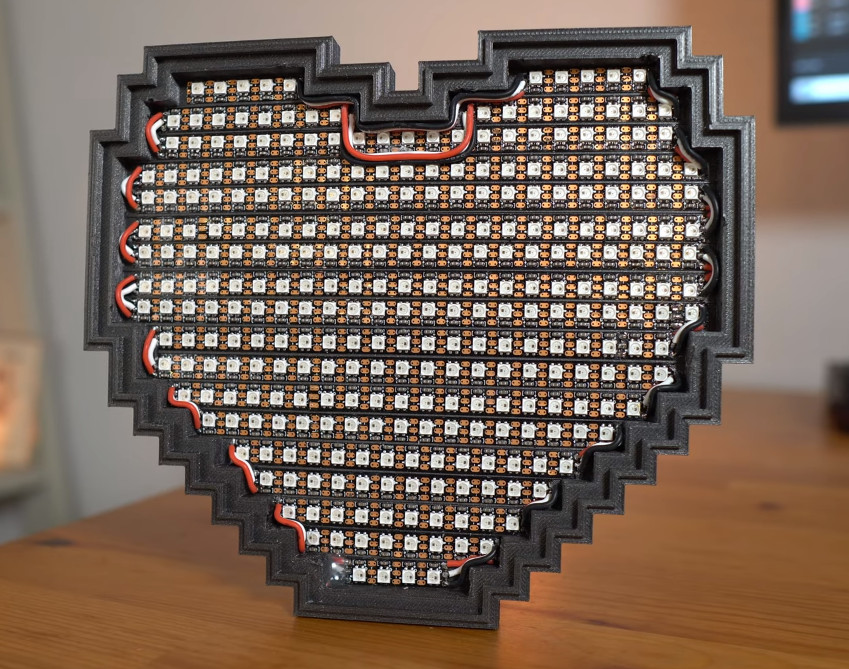
[Austin Blake] is one of those early adopters, and the work he put into this LED health indicator should tell you all you need to know about how dedicated he is to the classic game. The 3D printed heart holds an incredible 312 NeoPixel LEDs, which are controlled by a 5 volt compatible Arduino Nano Every located on the back side. Both the color and “fill level” of the heart will change in real-time to correspond to the health of the player character.
 Building the light itself was pretty straightforward, but getting the health value from the game was another story. As [Austin] explains in the video, his first attempt involved using Python and some image recognition routines to literally read the indicator off of the screen. The idea worked, and is frankly a fascinating hack worth keeping in mind on its own, but unfortunately it was too slow to provide the real-time feedback he was looking for.
Eventually he turned his attention to RuneLite, which is an open source client for Old School RuneScape. Thanks to its open source nature he could have hacked a routine to read the current health value and send it off to the Arduino, but thanks to a mature plug-in system, he didn’t have to.
The game’s API let him create a simple and reliable way of getting the data out of the game, similar to what we see in the flight simulator community for driving physical gauges and displays. RuneLite features a repository of community-developed plugins, and [Austin] says that he’d be happy to submit his for inclusion if others are interested in building similar indicators — a perfect match for this motion-sensing RuneScape axe.
Continue reading “LED Heart Keeps Tabs On Your RuneScape Character”